Sony RDR-VX525 Operating Instructions - Page 66
Copying a scene Copy, Select Copy, and press ENTER.
 |
UPC - 027242716056
View all Sony RDR-VX525 manuals
Add to My Manuals
Save this manual to your list of manuals |
Page 66 highlights
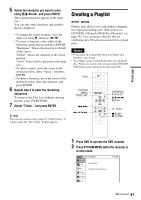
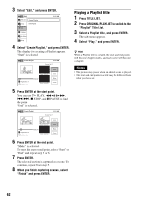
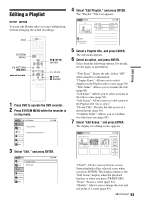
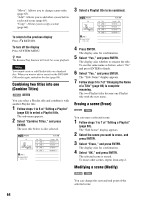
3 Select "Add," and press ENTER. "Start" is selected. Add 10:10 AM Scene No.01 Start 00:00:00 00:00:07 T Playlist No. 01 May/02/2007 03:25 PM End 00:00:00 Start End Add Cancel 4 Press ENTER at the start point. You can use H PLAY, , ./>, x STOP, and X PAUSE to find the point. "End" is selected. Add 10:10 AM Scene No.01 Start 00:00:10 00:00:10 T Playlist No. 01 May/02/2007 03:25 PM End 00:00:00 Start End Add Cancel 5 Press ENTER at the end point. "Add" is selected. To reset the start or end point, select "Start" or "End" and repeat step 4 or 5. 6 Press ENTER. The display returns to the "Edit Scene" display. The selected section is added before the scene selected in step 2. To add other scenes, repeat from step 2. Copying a scene (Copy) -RWVR -RVR You can copy and add a selected scene. 1 Follow steps 1 to 7 of "Editing a Playlist" (page 63). The "Edit Scene" display appears. 2 Select the scene you want to copy, and press ENTER. 3 Select "Copy," and press ENTER. Edit Scene 10:10 AM Scene No.02 / 03 01 00:00:34 02 00:00:10 03 Playlist No.01 Check Erase 00:04:20 Modify Move Add Copy 4 Select a location to copy to using
-
 1
1 -
2
-
3
-
4
-
5
-
6
-
7
-
8
-
9
-
10
-
11
-
12
-
13
-
14
-
15
-
16
-
17
-
18
-
19
-
20
-
21
-
22
-
23
-
24
-
25
-
26
-
27
-
28
-
29
-
30
-
31
-
32
-
33
-
34
-
35
-
36
-
37
-
38
-
39
-
40
-
41
-
42
-
43
-
44
-
45
-
46
-
47
-
48
-
49
-
50
-
51
-
52
-
53
-
54
-
55
-
56
-
57
-
58
-
59
-
60
-
 61
61 -
 62
62 -
 63
63 -
 64
64 -
 65
65 -
 66
66 -
 67
67 -
 68
68 -
 69
69 -
 70
70 -
 71
71 -
72
-
73
-
74
-
75
-
76
-
77
-
78
-
79
-
80
-
81
-
82
-
83
-
84
-
85
-
86
-
87
-
88
-
89
-
90
-
91
-
92
-
93
-
94
-
95
-
96
-
97
-
98
-
99
-
100
-
101
-
102
-
103
-
104
-
105
-
106
-
107
-
108
-
109
-
110
-
111
-
112
-
113
-
114
-
115
-
116
-
117
-
118
-
119
-
120
-
121
-
122
-
123
-
124
-
125
-
126
-
127
-
128
-
129
-
130
-
131
-
132
-
133
-
134
-
135
-
136
-
137
-
138
-
139
-
140
-
141
-
142
-
143
-
144
-
145
-
146
-
147
-
148
-
149
-
150
-
151
-
152
-
153
-
154
-
155
-
156
-
157
-
158
-
159
-
160
 |
 |
