Yamaha CL3 Cl Editor Owner's Manual - Page 24
DCA window, DCA fader, DCA number, DCA group name, Level Meter
 |
View all Yamaha CL3 manuals
Add to My Manuals
Save this manual to your list of manuals |
Page 24 highlights
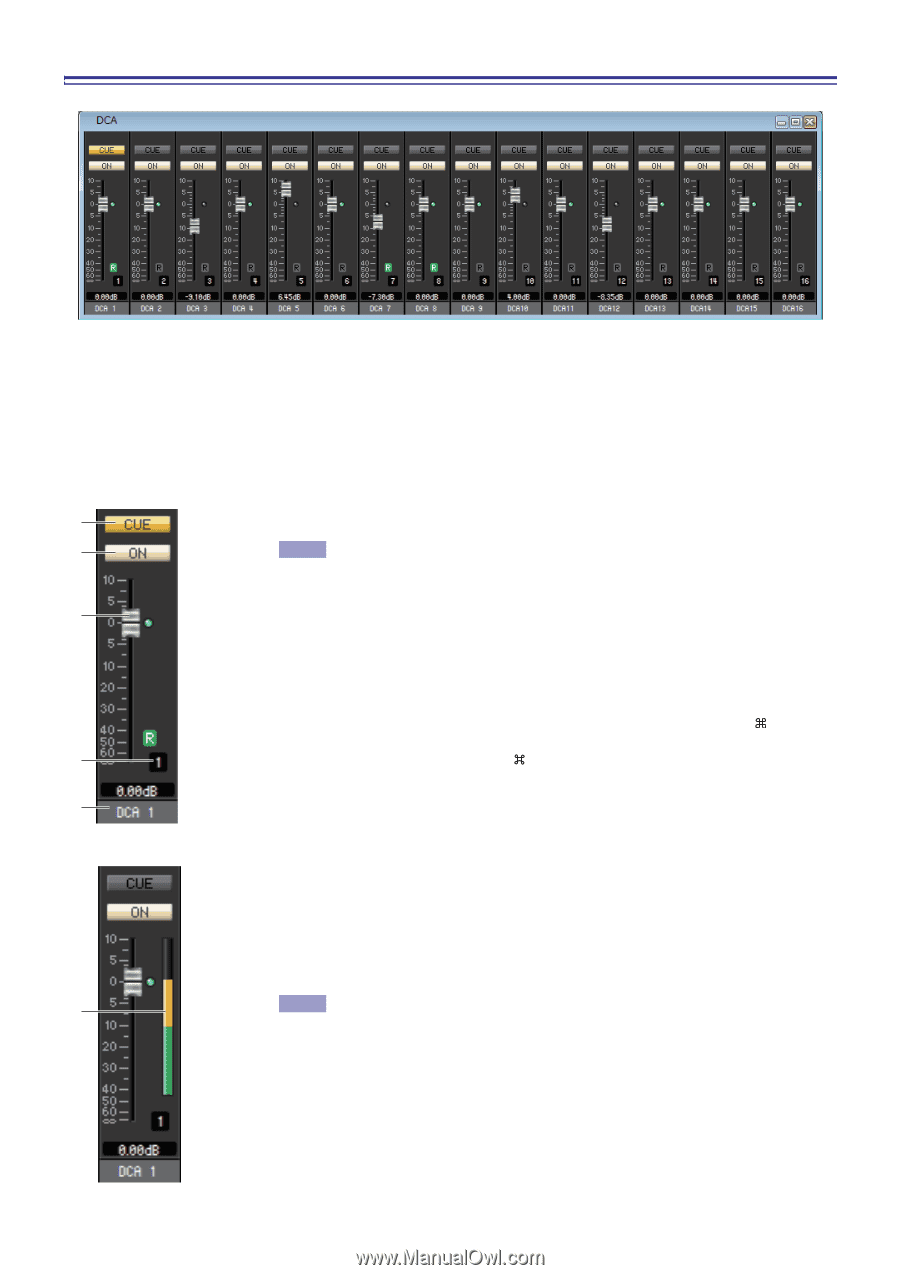
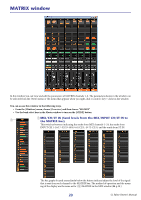
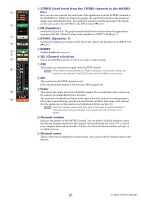
DCA window In this window you can view and edit the parameters of DCA (Digital-Controlled Amplifier) groups 1-16. You can access this window in the following ways. • From the [Windows] menu, choose [Overview] and then choose "DCA" • Use the bank select keys in the Master window to turn on the [DCA] button 1 CUE 1 This button cue-monitors all channels that are assigned to the DCA group. 2 NOTE If the Channel Select/Sends On Fader checkbox in the System Setup dia- log box is not checked, the [CUE] button will be hidden in the screen. 2 ON 3 If you turn this button off, no signal will be output from the channels assigned to the DCA group. If you turn this button on, that status will be cancelled. 3 DCA fader This fader adjusts the level of the DCA group. The current fader value is shown in the numeric box immediately below the fader. You can set this to the minimum value (-∞ dB) by holding down the (< >) key of your computer keyboard and clicking the fader knob, or set it to the nominal value 4 (0.00 dB) by holding down the (< >) key and key and clicking the fader knob. If the fader is at nominal level, the green indicator at the right of the fader will light. 5 If a DCA group is set to Recall Safe, the R character at the lower right of the fader is dis- played in green. 4 DCA number This is the number of the DCA group. 5 DCA group name This is a text box that displays the DCA group name. You can also edit the DCA group name in this text box. 6 Level Meter This level meter indicates the post-meter of DCA. 6 NOTE Click the level meter area to switch between the recall-safe indicator and the level meter. 24 CL Editor Owner's Manual
-
 1
1 -
2
-
3
-
4
-
5
-
6
-
7
-
8
-
9
-
10
-
11
-
12
-
13
-
14
-
15
-
16
-
17
-
18
-
 19
19 -
 20
20 -
 21
21 -
 22
22 -
 23
23 -
 24
24 -
 25
25 -
 26
26 -
 27
27 -
 28
28 -
 29
29 -
30
-
31
-
32
-
33
-
34
-
35
-
36
-
37
-
38
-
39
-
40
-
41
-
42
-
43
-
44
-
45
-
46
-
47
-
48
-
49
-
50
-
51
-
52
-
53
-
54
-
55
-
56
-
57
-
58
-
59
-
60
-
61
-
62
-
63
-
64
-
65
-
66
-
67
-
68
-
69
-
70
-
71
-
72
-
73
-
74
-
75
-
76
-
77
-
78
-
79
-
80
-
81
-
82
-
83
-
84
-
85
-
86
-
87
-
88
-
89
 |
 |