Yamaha CLP-535 Owner's Manual - Page 119
Raising the unit to the standing, position., Connect the power cord., Set the adjuster.
 |
View all Yamaha CLP-535 manuals
Add to My Manuals
Save this manual to your list of manuals |
Page 119 highlights
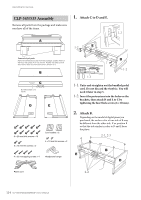
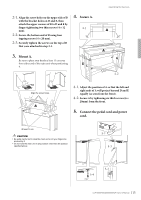
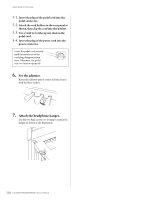
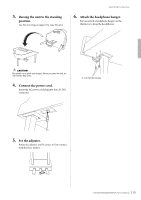
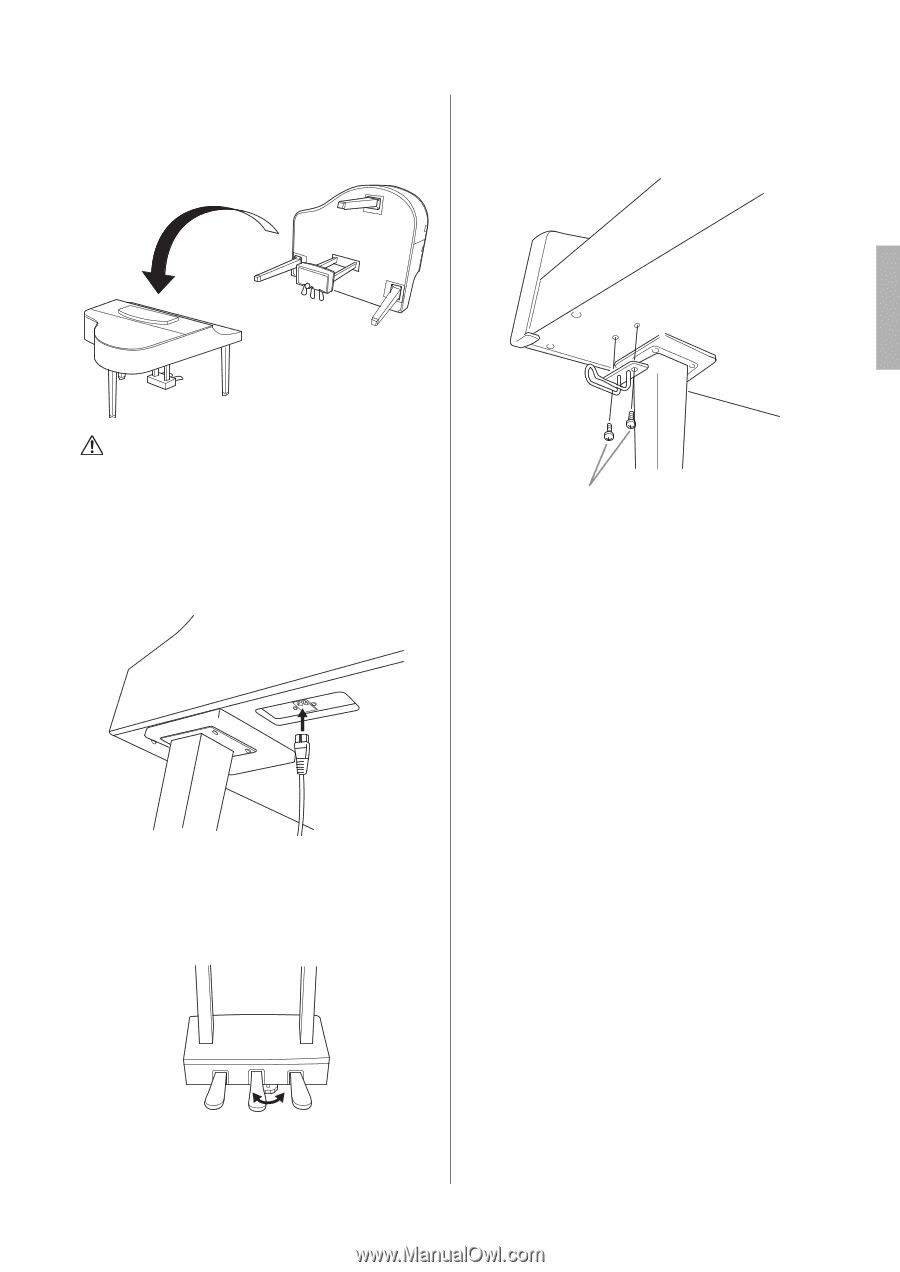
3. Raising the unit to the standing position. Use the front legs as support to raise the unit. Assembling the Clavinova 6. Attach the headphone hanger. You can attach a headphone hanger on the Clavinova to hang the headphones. CAUTION Be careful not to pinch your fingers. When you raise the unit, do not hold the key cover. 4. Connect the power cord. Insert the AC power cord plug into the [AC IN] connector. 4 x 10 mm thin screws 5. Set the adjuster. Rotate the adjuster until it comes in firm contact with the floor surface. 119 CLP-585/575/545/535/565GP Owner's Manual
-
 1
1 -
2
-
3
-
4
-
5
-
6
-
7
-
8
-
9
-
10
-
11
-
12
-
13
-
14
-
15
-
16
-
17
-
18
-
19
-
20
-
21
-
22
-
23
-
24
-
25
-
26
-
27
-
28
-
29
-
30
-
31
-
32
-
33
-
34
-
35
-
36
-
37
-
38
-
39
-
40
-
41
-
42
-
43
-
44
-
45
-
46
-
47
-
48
-
49
-
50
-
51
-
52
-
53
-
54
-
55
-
56
-
57
-
58
-
59
-
60
-
61
-
62
-
63
-
64
-
65
-
66
-
67
-
68
-
69
-
70
-
71
-
72
-
73
-
74
-
75
-
76
-
77
-
78
-
79
-
80
-
81
-
82
-
83
-
84
-
85
-
86
-
87
-
88
-
89
-
90
-
91
-
92
-
93
-
94
-
95
-
96
-
97
-
98
-
99
-
100
-
101
-
102
-
103
-
104
-
105
-
106
-
107
-
108
-
109
-
110
-
111
-
112
-
113
-
 114
114 -
 115
115 -
 116
116 -
 117
117 -
 118
118 -
 119
119 -
 120
120 -
 121
121 -
 122
122 -
 123
123 -
 124
124 -
125
-
126
 |
 |
Assembling the Clavinova
119
CLP-585/575/545/535/565GP Owner’s Manual
3.
Raising the unit to the standing
position.
Use the front legs as support to raise the unit.
CAUTION
Be caref
u
l not to pinch yo
u
r fingers. When yo
u
raise the
u
nit, do
not hold the key cover.
4.
Connect the power cord.
Insert the AC power cord plug into the [AC IN]
connector.
5.
Set the adjuster.
Rotate the adjuster until it comes in firm contact
with the floor surface.
6.
Attach the headphone hanger.
You can attach a headphone hanger on the
Clavinova to hang the headphones.
4 x 10 mm thin scre
w
s