Brother International HL 2700CN Users Manual - English - Page 102
Installing additional memory,
 |
UPC - 840356824994
View all Brother International HL 2700CN manuals
Add to My Manuals
Save this manual to your list of manuals |
Page 102 highlights
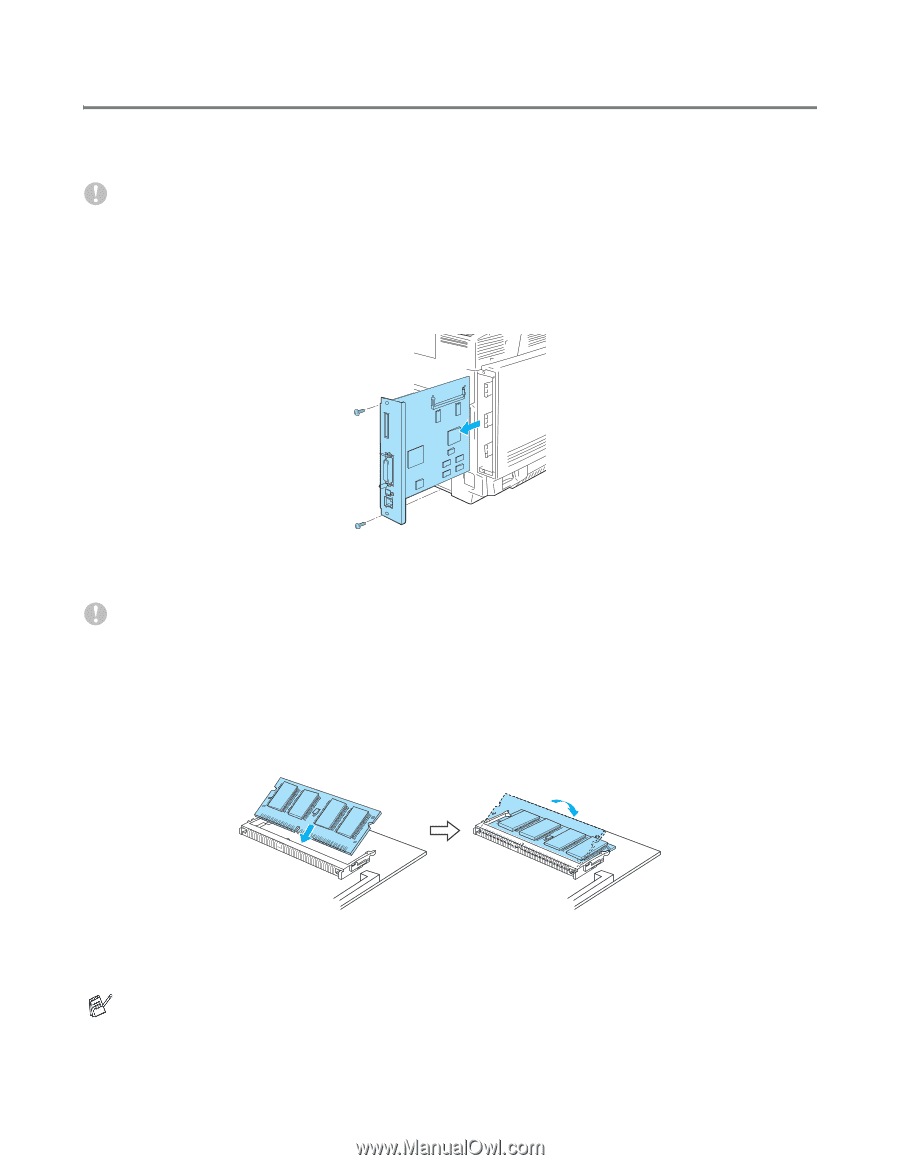
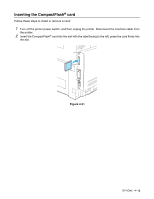
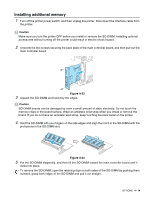
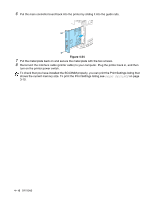
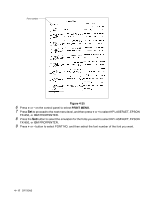
Installing additional memory 1 Turn off the printer power switch, and then unplug the printer. Disconnect the interface cable from the printer. Caution Make sure you turn the printer OFF before you install or remove the SO-DIMM. Installing optional accessories without turning off the printer could result in electric shock hazard. 2 Unscrew the two screws securing the back plate of the main controller board, and then pull out the main controller board. Figure 4-22 3 Unpack the SO-DIMM and hold it by the edges. Caution SO-DIMM boards can be damaged by even a small amount of static electricity. Do not touch the memory chips or the board surface. Wear an antistatic wrist strap when you install or remove the board. If you do not have an antistatic wrist strap, keep touching the bare metal on the printer. 4 Hold the SO-DIMM with your fingers on the side edges and align the notch in the SO-DIMM with the protrusions in the SO-DIMM slot. Figure 4-23 5 Put the SO-DIMM diagonally, and then tilt the SO-DIMM toward the main controller board until it clicks into place. To remove the SO-DIMM, open the retaining clips on both sides of the SO-DIMM by pushing them outward, grasp both edges of the SO-DIMM and pull it out straight. OPTIONS 4 - 14
-
 1
1 -
2
-
3
-
4
-
5
-
6
-
7
-
8
-
9
-
10
-
11
-
12
-
13
-
14
-
15
-
16
-
17
-
18
-
19
-
20
-
21
-
22
-
23
-
24
-
25
-
26
-
27
-
28
-
29
-
30
-
31
-
32
-
33
-
34
-
35
-
36
-
37
-
38
-
39
-
40
-
41
-
42
-
43
-
44
-
45
-
46
-
47
-
48
-
49
-
50
-
51
-
52
-
53
-
54
-
55
-
56
-
57
-
58
-
59
-
60
-
61
-
62
-
63
-
64
-
65
-
66
-
67
-
68
-
69
-
70
-
71
-
72
-
73
-
74
-
75
-
76
-
77
-
78
-
79
-
80
-
81
-
82
-
83
-
84
-
85
-
86
-
87
-
88
-
89
-
90
-
91
-
92
-
93
-
94
-
95
-
96
-
 97
97 -
 98
98 -
 99
99 -
 100
100 -
 101
101 -
 102
102 -
 103
103 -
 104
104 -
 105
105 -
 106
106 -
 107
107 -
108
-
109
-
110
-
111
-
112
-
113
-
114
-
115
-
116
-
117
-
118
-
119
-
120
-
121
-
122
-
123
-
124
-
125
-
126
-
127
-
128
-
129
-
130
-
131
-
132
-
133
-
134
-
135
-
136
-
137
-
138
-
139
-
140
-
141
-
142
-
143
-
144
-
145
-
146
-
147
-
148
-
149
-
150
-
151
-
152
-
153
-
154
-
155
-
156
-
157
-
158
-
159
-
160
-
161
-
162
 |
 |