Brother International HL-7050N Network Users Manual - English - Page 126
Using BRAdmin and the IPX/SPX Protocol to set the IP address, IPX/SPX filter, Device
 |
UPC - 012502603375
View all Brother International HL-7050N manuals
Add to My Manuals
Save this manual to your list of manuals |
Page 126 highlights
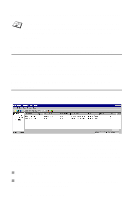
Using BRAdmin and the IPX/SPX Protocol to set the IP address If your PC is using the Novell Netware Client software and is using the IPX/SPX protocol, do the following: 1 Select IPX/SPX filter in the left frame of the main window. 2 Check the print server name (the default node name is BRN_xxxxxx, where xxxxxx is the last six digits of the Ethernet address (MAC address)) . If you cannot find your server name, select the Device menu and choose Search Active Devices (you can also press the F4 key) and try again. You can find the node name and MAC address by printing out the printer configuration page. Refer to the Quick Setup Guide for information on how to print the configuration page on your print server. 3 Select the print server that you wish to configure and double click it. You will be asked for a password. The default password is access. 4 Select the TCP/IP tab and set the IP address, Subnet mask and Gateway as needed. 5 In the IP Config box, click the Static radio button. 6 Click OK. Restart the print server by using BRAdmin, WebBrowser or TELNET. If you are not sure how to restart the print server, you may simply turn the printer's power switch off, and then switch it on. TCP/IP CONFIGURATION 12 - 3
-
 1
1 -
2
-
3
-
4
-
5
-
6
-
7
-
8
-
9
-
10
-
11
-
12
-
13
-
14
-
15
-
16
-
17
-
18
-
19
-
20
-
21
-
22
-
23
-
24
-
25
-
26
-
27
-
28
-
29
-
30
-
31
-
32
-
33
-
34
-
35
-
36
-
37
-
38
-
39
-
40
-
41
-
42
-
43
-
44
-
45
-
46
-
47
-
48
-
49
-
50
-
51
-
52
-
53
-
54
-
55
-
56
-
57
-
58
-
59
-
60
-
61
-
62
-
63
-
64
-
65
-
66
-
67
-
68
-
69
-
70
-
71
-
72
-
73
-
74
-
75
-
76
-
77
-
78
-
79
-
80
-
81
-
82
-
83
-
84
-
85
-
86
-
87
-
88
-
89
-
90
-
91
-
92
-
93
-
94
-
95
-
96
-
97
-
98
-
99
-
100
-
101
-
102
-
103
-
104
-
105
-
106
-
107
-
108
-
109
-
110
-
111
-
112
-
113
-
114
-
115
-
116
-
117
-
118
-
119
-
120
-
 121
121 -
 122
122 -
 123
123 -
 124
124 -
 125
125 -
 126
126 -
 127
127 -
 128
128 -
 129
129 -
 130
130 -
 131
131 -
132
-
133
-
134
-
135
-
136
-
137
-
138
-
139
-
140
-
141
-
142
-
143
-
144
-
145
-
146
-
147
-
148
-
149
-
150
-
151
-
152
-
153
-
154
-
155
-
156
-
157
-
158
-
159
-
160
-
161
-
162
-
163
-
164
 |
 |