Brother International HL-7050N Network Users Manual - English - Page 95
APPLETALK ETHERTALK TCP/IP PRINTING, Entering the IP address and Queue
 |
UPC - 012502603375
View all Brother International HL-7050N manuals
Add to My Manuals
Save this manual to your list of manuals |
Page 95 highlights
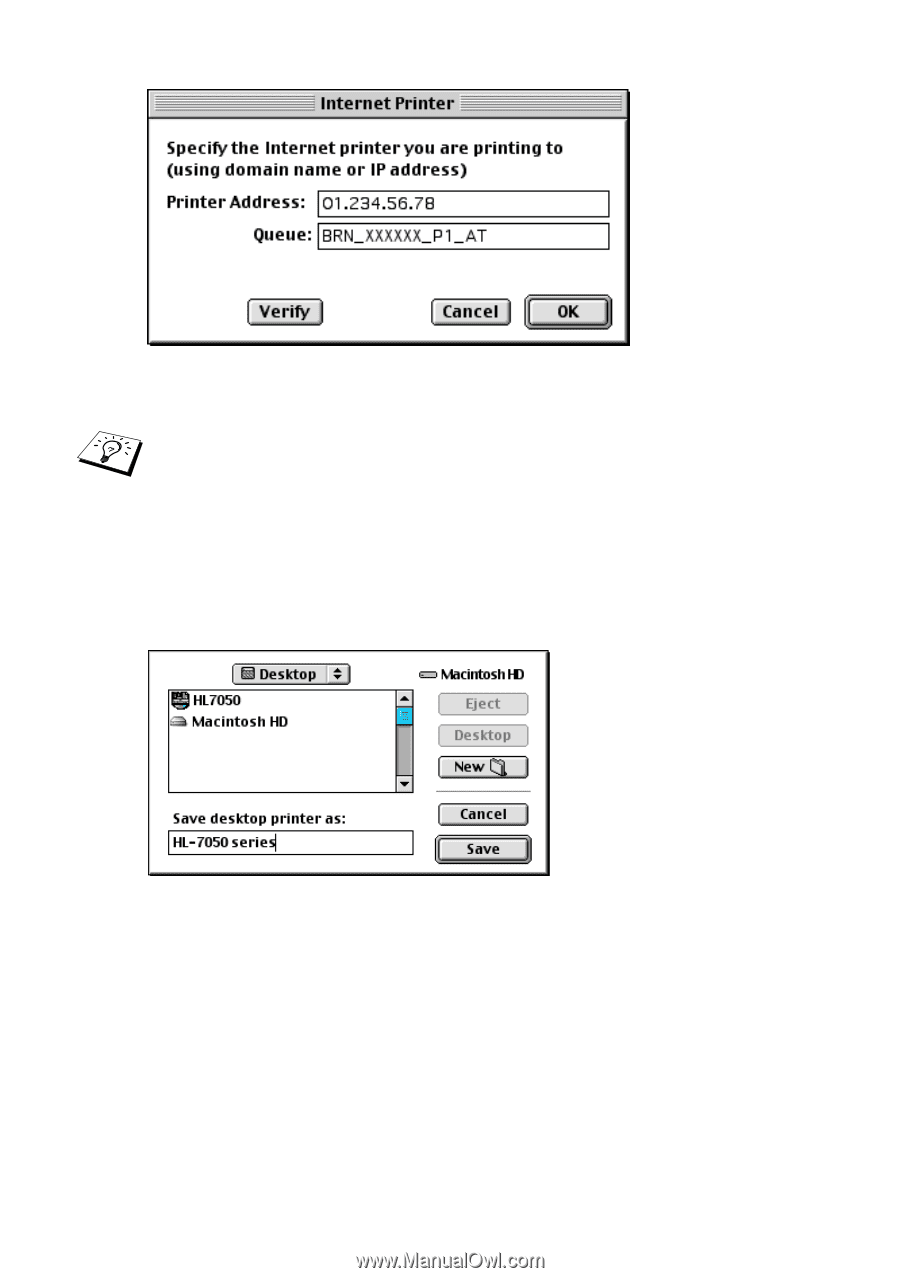
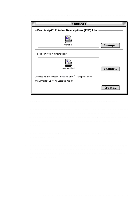
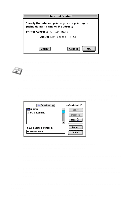
Figure 5 Entering the IP address and Queue If you do not specify the correct value the printer may not print, or it may not print the data correctly. Please ensure that the value you enter here matches with the Service name of the printer. 5 Click OK to go back to the previous screen. 6 You are now ready to create the printer for use. To do that, click the Create button and you will see the following: Figure 6 Saving the printer to the Desktop (screen shown is from the HL-7050) 7 Enter the name of the printer in the Save desktop printer As: option and click on Save. 8 We must now make this our default printer by clicking the printer name once and then select Printing and Set Default Printer. Whenever you send a print job, the printer that you just created will be used. 7 - 7 APPLETALK (ETHERTALK) TCP/IP PRINTING
-
 1
1 -
2
-
3
-
4
-
5
-
6
-
7
-
8
-
9
-
10
-
11
-
12
-
13
-
14
-
15
-
16
-
17
-
18
-
19
-
20
-
21
-
22
-
23
-
24
-
25
-
26
-
27
-
28
-
29
-
30
-
31
-
32
-
33
-
34
-
35
-
36
-
37
-
38
-
39
-
40
-
41
-
42
-
43
-
44
-
45
-
46
-
47
-
48
-
49
-
50
-
51
-
52
-
53
-
54
-
55
-
56
-
57
-
58
-
59
-
60
-
61
-
62
-
63
-
64
-
65
-
66
-
67
-
68
-
69
-
70
-
71
-
72
-
73
-
74
-
75
-
76
-
77
-
78
-
79
-
80
-
81
-
82
-
83
-
84
-
85
-
86
-
87
-
88
-
89
-
 90
90 -
 91
91 -
 92
92 -
 93
93 -
 94
94 -
 95
95 -
 96
96 -
 97
97 -
 98
98 -
 99
99 -
 100
100 -
101
-
102
-
103
-
104
-
105
-
106
-
107
-
108
-
109
-
110
-
111
-
112
-
113
-
114
-
115
-
116
-
117
-
118
-
119
-
120
-
121
-
122
-
123
-
124
-
125
-
126
-
127
-
128
-
129
-
130
-
131
-
132
-
133
-
134
-
135
-
136
-
137
-
138
-
139
-
140
-
141
-
142
-
143
-
144
-
145
-
146
-
147
-
148
-
149
-
150
-
151
-
152
-
153
-
154
-
155
-
156
-
157
-
158
-
159
-
160
-
161
-
162
-
163
-
164
 |
 |