Brother International HL-7050N Network Users Manual - English - Page 94
Printer LPR, Selecting the PPD and LPR Configuration, Change
 |
UPC - 012502603375
View all Brother International HL-7050N manuals
Add to My Manuals
Save this manual to your list of manuals |
Page 94 highlights
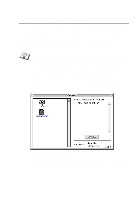
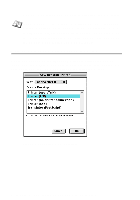
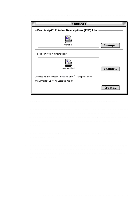
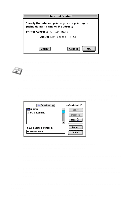
1 Select the Printer (LPR) option and click OK. You will then see the following Figure 4 Selecting the PPD and LPR Configuration 2 At this point we must select the correct PPD file for the printer and also configure the correct LPR information. Click the Change button in the PostScript Printer Description (PPD) File section and select the appropriate PPD file for your model. 3 Now select the Change button below the LPR Printer Selection text. 4 You must then enter the IP address and service name details of the printer. When specifying the Queue, use the value brn_xxxxxx_p1_at where xxxxxx are the last 6 digits of the Ethernet address. APPLETALK (ETHERTALK) TCP/IP PRINTING 7 - 6
-
 1
1 -
2
-
3
-
4
-
5
-
6
-
7
-
8
-
9
-
10
-
11
-
12
-
13
-
14
-
15
-
16
-
17
-
18
-
19
-
20
-
21
-
22
-
23
-
24
-
25
-
26
-
27
-
28
-
29
-
30
-
31
-
32
-
33
-
34
-
35
-
36
-
37
-
38
-
39
-
40
-
41
-
42
-
43
-
44
-
45
-
46
-
47
-
48
-
49
-
50
-
51
-
52
-
53
-
54
-
55
-
56
-
57
-
58
-
59
-
60
-
61
-
62
-
63
-
64
-
65
-
66
-
67
-
68
-
69
-
70
-
71
-
72
-
73
-
74
-
75
-
76
-
77
-
78
-
79
-
80
-
81
-
82
-
83
-
84
-
85
-
86
-
87
-
88
-
 89
89 -
 90
90 -
 91
91 -
 92
92 -
 93
93 -
 94
94 -
 95
95 -
 96
96 -
 97
97 -
 98
98 -
 99
99 -
100
-
101
-
102
-
103
-
104
-
105
-
106
-
107
-
108
-
109
-
110
-
111
-
112
-
113
-
114
-
115
-
116
-
117
-
118
-
119
-
120
-
121
-
122
-
123
-
124
-
125
-
126
-
127
-
128
-
129
-
130
-
131
-
132
-
133
-
134
-
135
-
136
-
137
-
138
-
139
-
140
-
141
-
142
-
143
-
144
-
145
-
146
-
147
-
148
-
149
-
150
-
151
-
152
-
153
-
154
-
155
-
156
-
157
-
158
-
159
-
160
-
161
-
162
-
163
-
164
 |
 |
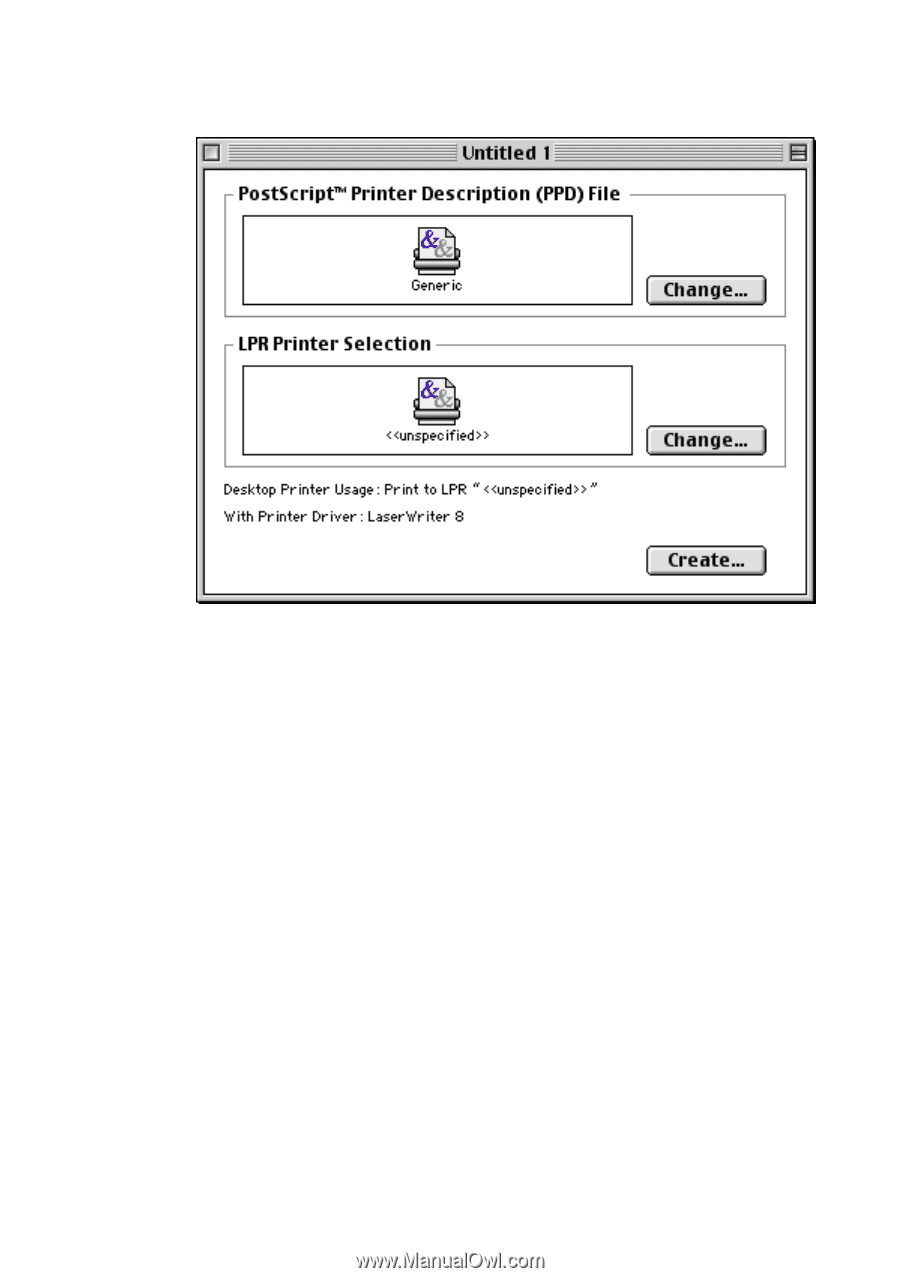
APPLETALK (ETHERTALK) TCP/IP PRINTING 7 - 6
1
Select the
Printer (LPR
) option and click
OK
. You will then
see the following
Figure 4 Selecting the PPD and LPR Configuration
2
At this point we must select the correct PPD file for the printer
and also configure the correct LPR information. Click the
Change
button in the
PostScript Printer Description (PPD)
File
section and select the appropriate PPD file for your
model.
3
Now select the
Change
button below the
LPR Printer
Selection
text.
4
You must then enter the IP address and service name details
of the printer. When specifying the
Queue
, use the value
brn_xxxxxx_p1_at
where
xxxxxx
are the last 6 digits of
the Ethernet address.