Brother International MFC-J4410DW Users Manual Basic - English - Page 155
Scan to File, Start, Options, Scan to Media, Scan to Network, Scan to FTP, Scan to email PC, Scan
 |
View all Brother International MFC-J4410DW manuals
Add to My Manuals
Save this manual to your list of manuals |
Page 155 highlights
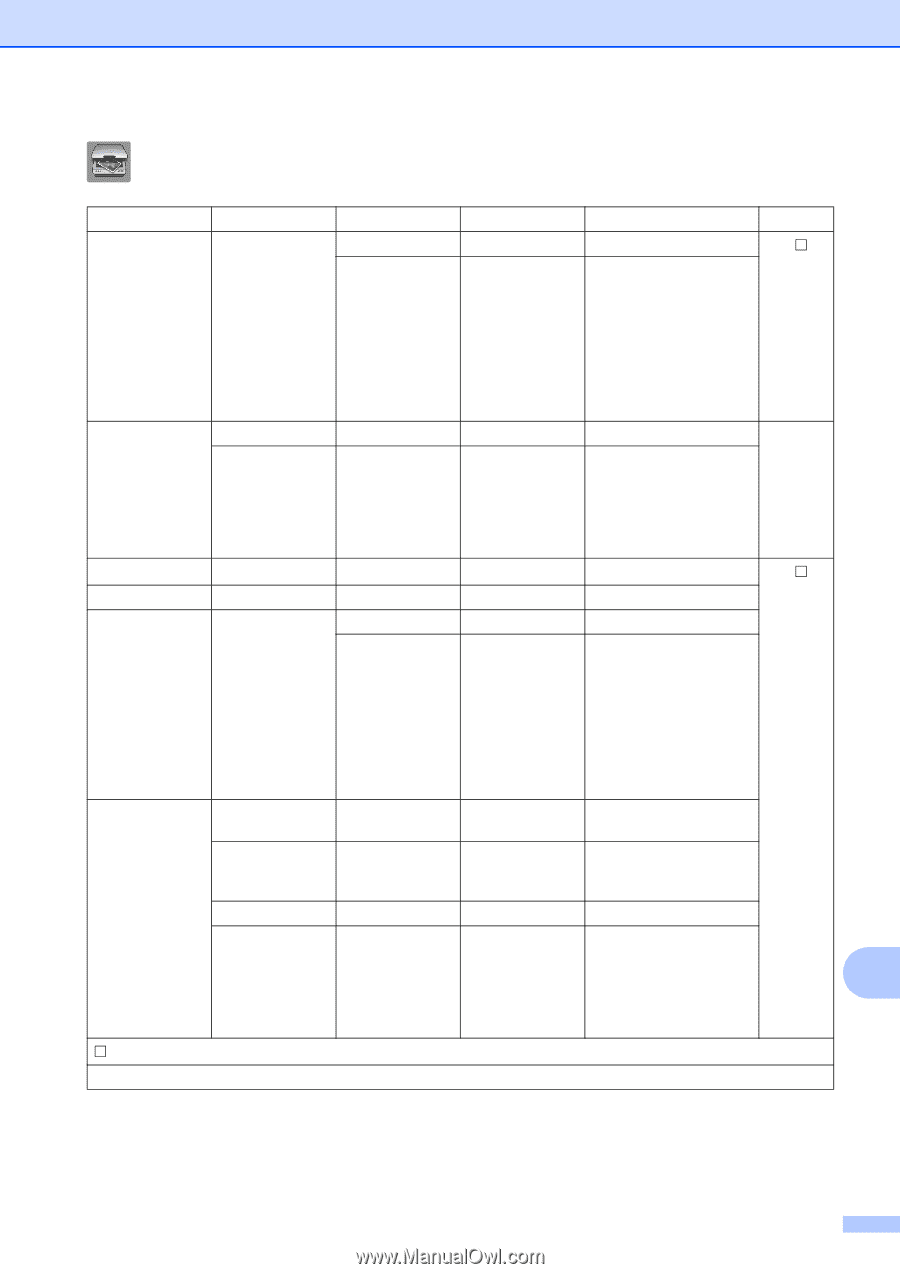
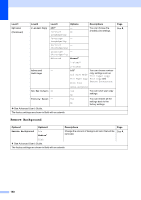
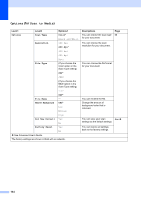
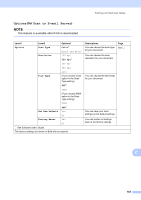
Settings and features tables (Scan) C Level1 Level2 Level3 Options Descriptions Page Scan to File PC Start Options - (For more information, see the Options (for Scan to File, Scan to email and Scan to Image) in the following table.) Start scanning. Configure the detailed settings. See . Scan to Media - (when a memory card or USB - Flash memory drive is inserted) Start Options - Start scanning. 65 (For more information, see the Options (for Scan to Media) in the following table.) Configure the detailed settings. Scan to Network - Start - Start scanning. See . Scan to FTP - Scan to email PC Start - Start - Start scanning. Start scanning. Options (For more information, see the Options (for Scan to File, Scan to email and Scan to Image) in the following table.) Configure the detailed settings. Scan to E-mail Manual - - Manually enter the Server address of the recipient. (Available after Address Book - - Choose the address of IFAX is the recipient from the downloaded) Address Book. - Start - Start scanning. - Options (For more Configure the detailed information, see the Options (for settings. C Scan to E-mail Server) in the following table.) See Software User's Guide. The factory settings are shown in Bold with an asterisk. 141
-
 1
1 -
2
-
3
-
4
-
5
-
6
-
7
-
8
-
9
-
10
-
11
-
12
-
13
-
14
-
15
-
16
-
17
-
18
-
19
-
20
-
21
-
22
-
23
-
24
-
25
-
26
-
27
-
28
-
29
-
30
-
31
-
32
-
33
-
34
-
35
-
36
-
37
-
38
-
39
-
40
-
41
-
42
-
43
-
44
-
45
-
46
-
47
-
48
-
49
-
50
-
51
-
52
-
53
-
54
-
55
-
56
-
57
-
58
-
59
-
60
-
61
-
62
-
63
-
64
-
65
-
66
-
67
-
68
-
69
-
70
-
71
-
72
-
73
-
74
-
75
-
76
-
77
-
78
-
79
-
80
-
81
-
82
-
83
-
84
-
85
-
86
-
87
-
88
-
89
-
90
-
91
-
92
-
93
-
94
-
95
-
96
-
97
-
98
-
99
-
100
-
101
-
102
-
103
-
104
-
105
-
106
-
107
-
108
-
109
-
110
-
111
-
112
-
113
-
114
-
115
-
116
-
117
-
118
-
119
-
120
-
121
-
122
-
123
-
124
-
125
-
126
-
127
-
128
-
129
-
130
-
131
-
132
-
133
-
134
-
135
-
136
-
137
-
138
-
139
-
140
-
141
-
142
-
143
-
144
-
145
-
146
-
147
-
148
-
149
-
 150
150 -
 151
151 -
 152
152 -
 153
153 -
 154
154 -
 155
155 -
 156
156 -
 157
157 -
 158
158 -
 159
159 -
 160
160 -
161
-
162
-
163
-
164
-
165
-
166
-
167
-
168
-
169
-
170
-
171
-
172
-
173
-
174
-
175
-
176
-
177
-
178
-
179
-
180
-
181
-
182
-
183
 |
 |