Brother International MFC-J4410DW Users Manual Basic - English - Page 79
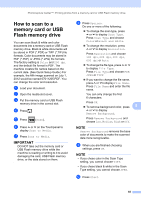
How to scan to a memory card or USB Flash memory drive
 |
View all Brother International MFC-J4410DW manuals
Add to My Manuals
Save this manual to your list of manuals |
Page 79 highlights
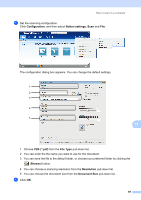
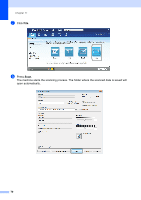
PhotoCapture Center™: Printing photos from a memory card or USB Flash memory drive How to scan to a memory card or USB Flash memory drive 9 You can scan black & white and color documents into a memory card or USB Flash memory drive. Black & white documents will be stored in PDF (*.PDF) or TIFF (*.TIF) file formats. Color documents may be stored in PDF (*.PDF) or JPEG (*.JPG) file formats. The factory setting is Color and 200 dpi and the default file format is PDF. The machine creates file names based on the current date. (See Quick Setup Guide.) For example, the fifth image scanned on July 1, 2012 would be named 07011205.PDF. You can change the color and resolution. a Load your document. b Open the media slot cover. c Put the memory card or USB Flash memory drive in the correct slot. d Press . e Press (Scan). f Press s or t on the Touchpanel to display Scan to Media. g Press Scan to Media. IMPORTANT DO NOT take out the memory card or USB Flash memory drive while the machine is reading or writing to it to avoid damaging the card, USB Flash memory drive, or the data stored on them. h Press Options. Do one or more of the following: To change the scan type, press s or t to display Scan Type. Press Scan Type and choose Color or Black and White. To change the resolution, press s or t to display Resolution. Press Resolution and choose 100 dpi, 200 dpi, 300 dpi, 600 dpi or Auto. To change the file type, press s or t to display File Type. Press File Type and choose PDF, JPEG or TIFF. If you want to change the file name, press s or t to display File Name. Press File Name and enter the file name. You can only change the first 6 characters. Press OK. To remove background color, press 9 s or t to display Remove Background. Press Remove Background and choose Low, Medium, High or Off. NOTE Remove Background removes the base color of documents to make the scanned data more recognizable. i When you are finished choosing settings, press OK. NOTE • If you chose color in the Scan Type setting, you cannot choose TIFF. • If you chose black & white in the Scan Type setting, you cannot choose JPEG. j Press Start. 65
-
 1
1 -
2
-
3
-
4
-
5
-
6
-
7
-
8
-
9
-
10
-
11
-
12
-
13
-
14
-
15
-
16
-
17
-
18
-
19
-
20
-
21
-
22
-
23
-
24
-
25
-
26
-
27
-
28
-
29
-
30
-
31
-
32
-
33
-
34
-
35
-
36
-
37
-
38
-
39
-
40
-
41
-
42
-
43
-
44
-
45
-
46
-
47
-
48
-
49
-
50
-
51
-
52
-
53
-
54
-
55
-
56
-
57
-
58
-
59
-
60
-
61
-
62
-
63
-
64
-
65
-
66
-
67
-
68
-
69
-
70
-
71
-
72
-
73
-
 74
74 -
 75
75 -
 76
76 -
 77
77 -
 78
78 -
 79
79 -
 80
80 -
 81
81 -
 82
82 -
 83
83 -
 84
84 -
85
-
86
-
87
-
88
-
89
-
90
-
91
-
92
-
93
-
94
-
95
-
96
-
97
-
98
-
99
-
100
-
101
-
102
-
103
-
104
-
105
-
106
-
107
-
108
-
109
-
110
-
111
-
112
-
113
-
114
-
115
-
116
-
117
-
118
-
119
-
120
-
121
-
122
-
123
-
124
-
125
-
126
-
127
-
128
-
129
-
130
-
131
-
132
-
133
-
134
-
135
-
136
-
137
-
138
-
139
-
140
-
141
-
142
-
143
-
144
-
145
-
146
-
147
-
148
-
149
-
150
-
151
-
152
-
153
-
154
-
155
-
156
-
157
-
158
-
159
-
160
-
161
-
162
-
163
-
164
-
165
-
166
-
167
-
168
-
169
-
170
-
171
-
172
-
173
-
174
-
175
-
176
-
177
-
178
-
179
-
180
-
181
-
182
-
183
 |
 |