Canon LV-8225 LV-7290 User's Manual - Page 14
Remote Control Unit Battery Installation, Remote Control Unit Operating Range, Remote Control Code
 |
View all Canon LV-8225 manuals
Add to My Manuals
Save this manual to your list of manuals |
Page 14 highlights
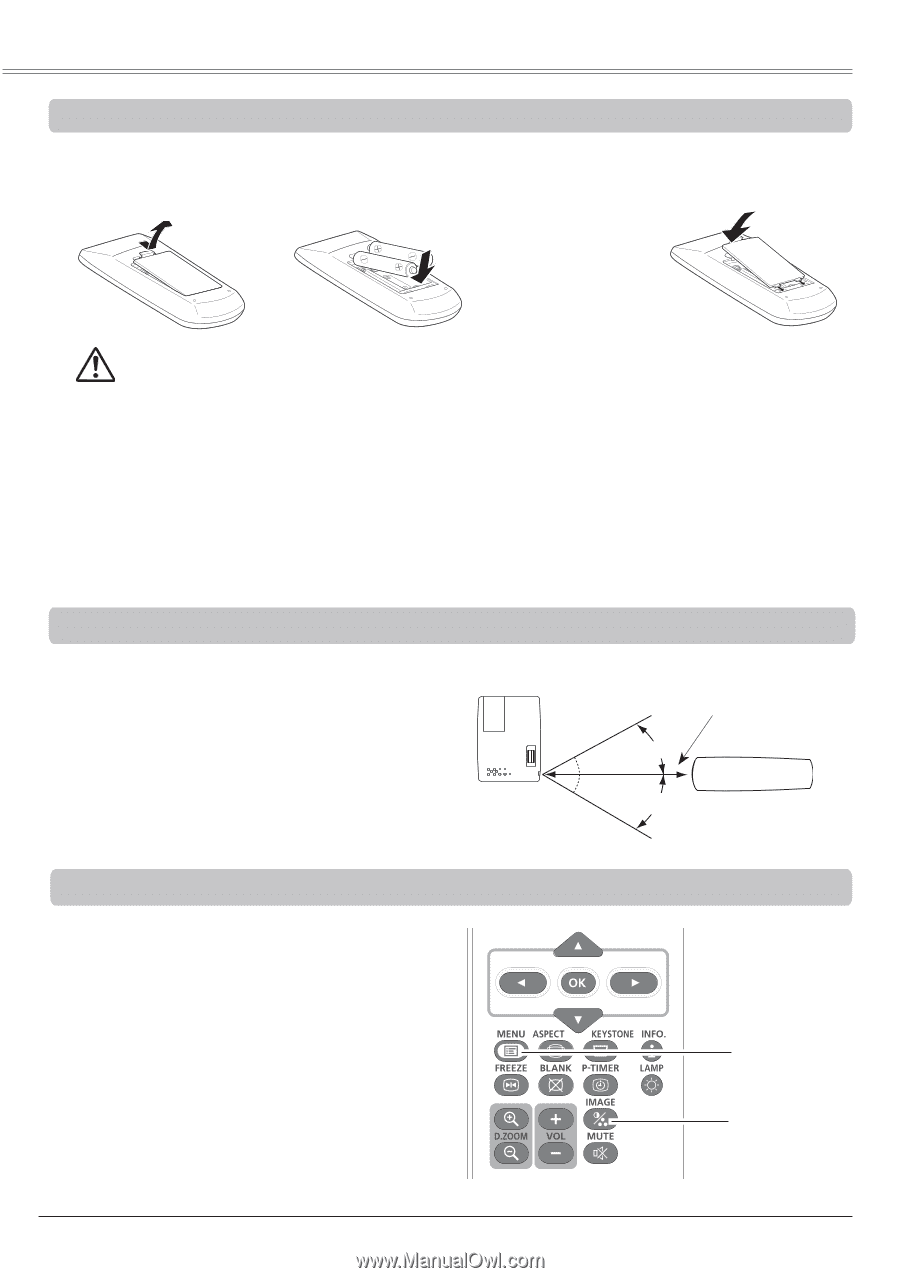
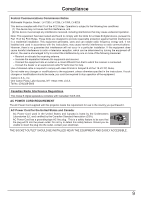
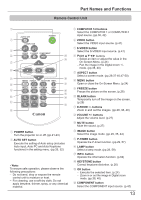
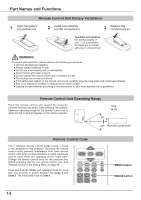
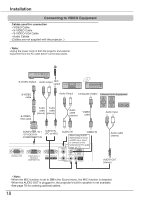
Part Names and Functions Remote Control Unit Battery Installation 1 Open the battery compartment lid. 2 Install new batteries into the compartment. 3 Replace the compartment lid. Two AAA size batteries For correct polarity (+ and -), be sure battery terminals are in contact with pins in compartment. WARNING To ensure safe operation, please observe the following precautions : ● Use two (2) AAA type batteries. ● Always replace batteries in sets. ● Do not use a new battery with a used battery. ● Avoid contact with water or liquid. ● Do not expose the remote control unit to moisture or heat. ● Do not drop the remote control unit. ● If the battery has leaked on the remote control unit, carefully wipe the case clean and install new batteries. ● Risk of an explosion if battery is replaced by an incorrect type. ● Dispose of used batteries according to the instructions or your local disposal rule or guidelines. Remote Control Unit Operating Range Point the remote control unit toward the projector (Infrared Remote Receiver) when pressing the buttons. Maximum operating range for the remote control unit is about 16.4'(5 m) and 60 degrees in front of the projector. 30° 16.4' (5 m) 30° Remote control unit Remote Control Code The 2 different remote control codes (Code 1-Code 2) are assigned to this projector. Switching the remote control codes prevents interference from other remote control units when several projectors or video equipment next to each other are operated at the same time. Change the remote control code for the projector first before changing that for the remote control unit. See "Remote control" in the Setting Menu on page 59. Press and hold the MENU and IMAGE buttons for more than five seconds to switch between the Code 1 and Code 2. The initial code is set to Code 1. MENU button IMAGE button 14
-
 1
1 -
2
-
3
-
4
-
5
-
6
-
7
-
8
-
 9
9 -
 10
10 -
 11
11 -
 12
12 -
 13
13 -
 14
14 -
 15
15 -
 16
16 -
 17
17 -
 18
18 -
 19
19 -
20
-
21
-
22
-
23
-
24
-
25
-
26
-
27
-
28
-
29
-
30
-
31
-
32
-
33
-
34
-
35
-
36
-
37
-
38
-
39
-
40
-
41
-
42
-
43
-
44
-
45
-
46
-
47
-
48
-
49
-
50
-
51
-
52
-
53
-
54
-
55
-
56
-
57
-
58
-
59
-
60
-
61
-
62
-
63
-
64
-
65
-
66
-
67
-
68
-
69
-
70
-
71
-
72
-
73
-
74
-
75
-
76
-
77
-
78
-
79
-
80
-
81
-
82
-
83
 |
 |