Canon LV-8225 LV-7290 User's Manual - Page 33
Manual PC Adjustment, PC adJust Menu, Fine sync, Total dots, Horizontal position, Vertical position
 |
View all Canon LV-8225 manuals
Add to My Manuals
Save this manual to your list of manuals |
Page 33 highlights
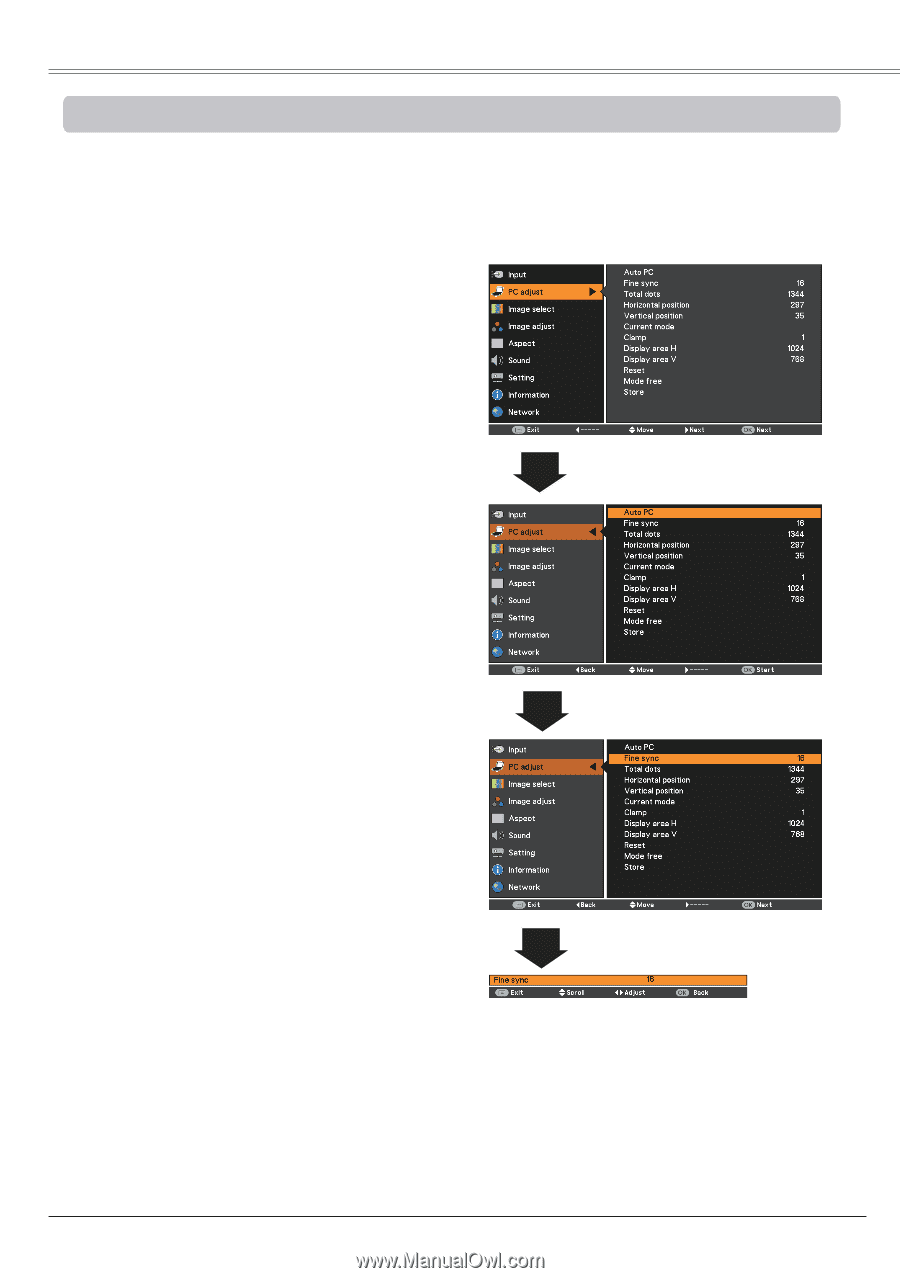
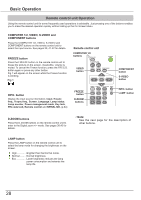
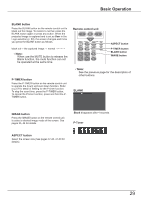
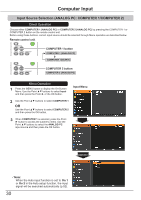
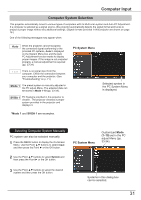
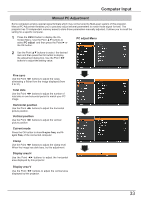
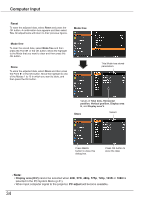
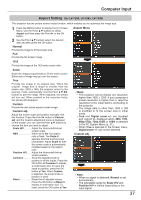
Computer Input Manual PC Adjustment Some computers employ special signal formats which may not be tuned by Multi-scan system of this projector. Manual PC Adjustment enables you to precisely adjust several parameters to match those signal formats. The projector has 10 independent memory areas to store those parameters manually adjusted. It allows you to recall the setting for a specific computer. 1 Press the MENU button to display the OnScreen Menu. Use the Point ▲▼ buttons to select PC adjust and then press the Point ► or the OK button. PC adjust Menu 2 Use the Point ▲▼ buttons to select the desired item and then press the OK button to display the adjustment dialog box. Use the Point ◄► buttons to adjust the setting value. Fine sync Use the Point ◄► buttons to adjust the value, eliminating a flicker from the image displayed (from 0 to 31). Total dots Use the Point ◄► buttons to adjust the number of total dots in one horizontal period to match your PC image. Horizontal position Use the Point ◄► buttons to adjust the horizontal picture position. Vertical position Use the Point ◄► buttons to adjust the vertical picture position. Current mode Press the OK button to show H-sync freq. and Vsync freq. of the connected computer. Clamp Use the Point ◄► buttons to adjust the clamp level. When the image has dark bars, try this adjustment. Display area H Use the Point ◄► buttons to adjust the horizontal area displayed by this projector. Display area V Use the Point ◄► buttons to adjust the vertical area displayed by this projector. 33
-
 1
1 -
2
-
3
-
4
-
5
-
6
-
7
-
8
-
9
-
10
-
11
-
12
-
13
-
14
-
15
-
16
-
17
-
18
-
19
-
20
-
21
-
22
-
23
-
24
-
25
-
26
-
27
-
 28
28 -
 29
29 -
 30
30 -
 31
31 -
 32
32 -
 33
33 -
 34
34 -
 35
35 -
 36
36 -
 37
37 -
 38
38 -
39
-
40
-
41
-
42
-
43
-
44
-
45
-
46
-
47
-
48
-
49
-
50
-
51
-
52
-
53
-
54
-
55
-
56
-
57
-
58
-
59
-
60
-
61
-
62
-
63
-
64
-
65
-
66
-
67
-
68
-
69
-
70
-
71
-
72
-
73
-
74
-
75
-
76
-
77
-
78
-
79
-
80
-
81
-
82
-
83
 |
 |