Canon LV-8225 LV-7290 User's Manual - Page 29
BLANK button, P-TIMER button, IMAGE button, ASPECT button, Remote control unit, BLANK, P-Timer
 |
View all Canon LV-8225 manuals
Add to My Manuals
Save this manual to your list of manuals |
Page 29 highlights
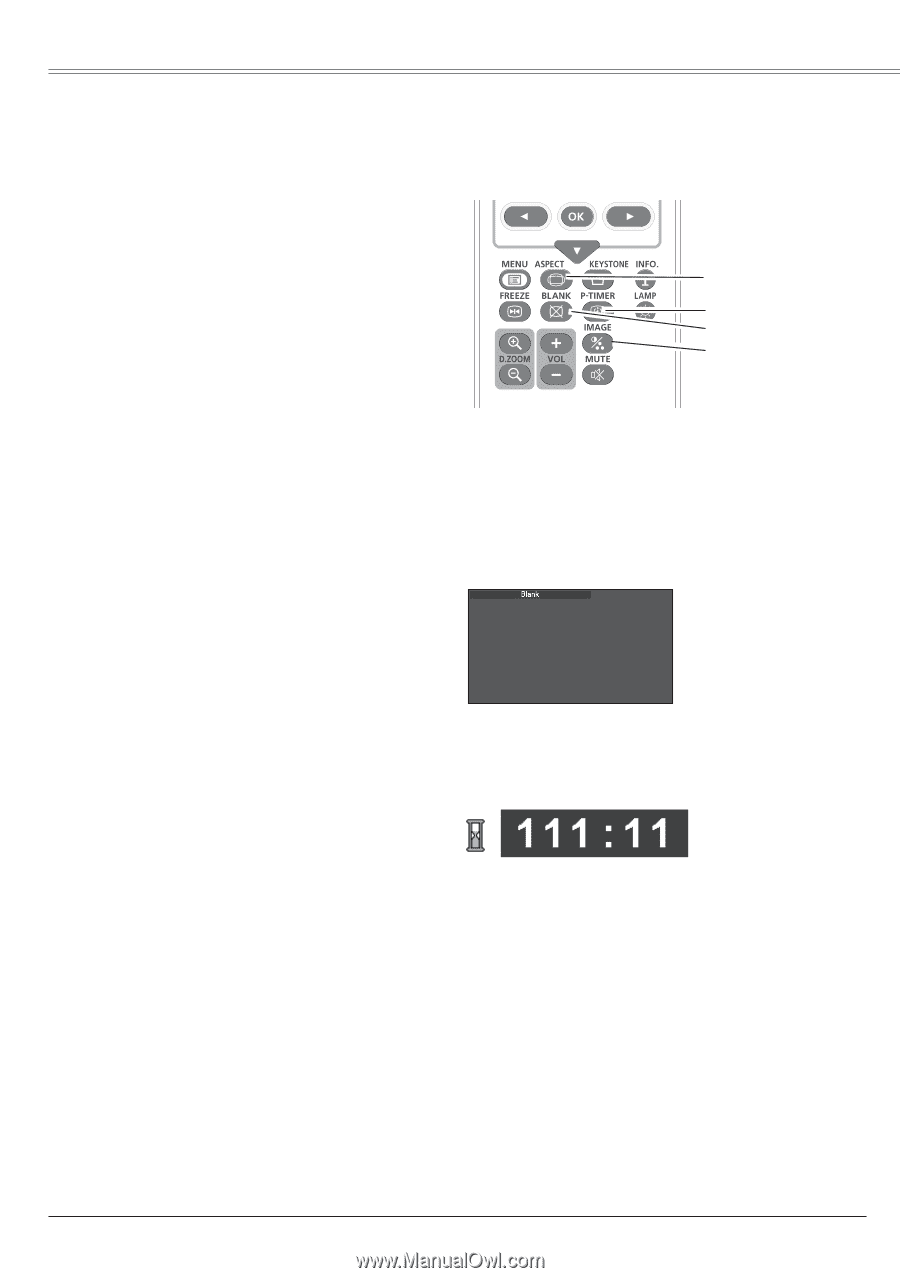
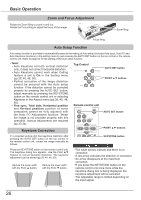
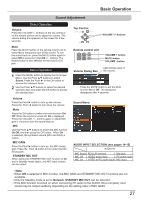
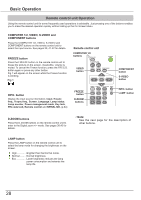
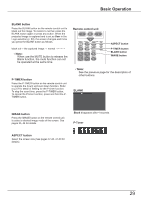
Basic Operation BLANK button Press the BLANK button on the remote control unit to black out the image. To restore to normal, press the BLANK button again or press any button. When the projected image is captured and is set as User in the Logo selection (p. 53), the screen changes each time you press the BLANK button as follows. black out→ the captured image → normal Note: When use the MUTE button to release the Blank function, the mute function can not be operated at the same time. Remote control unit ASPECT button P-TIMER button BLANK button IMAGE button P-TIMER button Press the P-TIMER button on the remote control unit to operate the Count up/Count down function. Refer to p.57 for detail of Setting for the P-timer function. To stop the count time, press the P-TIMER button. To cancel the P-timer function, press and hold the PTIMER button. Note: See the previous page for the description of other buttons. BLANK IMAGE button Press the IMAGE button on the remote control unit to select a desired image mode of the screen. See pages 35, 44 for details. Blank disappears after 4 seconds. P-Timer ASPECT button Select the screen size (See pages 37-40, 47-50 for details). 29
-
 1
1 -
2
-
3
-
4
-
5
-
6
-
7
-
8
-
9
-
10
-
11
-
12
-
13
-
14
-
15
-
16
-
17
-
18
-
19
-
20
-
21
-
22
-
23
-
 24
24 -
 25
25 -
 26
26 -
 27
27 -
 28
28 -
 29
29 -
 30
30 -
 31
31 -
 32
32 -
 33
33 -
 34
34 -
35
-
36
-
37
-
38
-
39
-
40
-
41
-
42
-
43
-
44
-
45
-
46
-
47
-
48
-
49
-
50
-
51
-
52
-
53
-
54
-
55
-
56
-
57
-
58
-
59
-
60
-
61
-
62
-
63
-
64
-
65
-
66
-
67
-
68
-
69
-
70
-
71
-
72
-
73
-
74
-
75
-
76
-
77
-
78
-
79
-
80
-
81
-
82
-
83
 |
 |