Canon VB-S800D Mark II Network Camera Operation Guide - Page 56
Flow for the Setting of the Camera Angle, Step 1 Configuring the Camera, Step 2 Setting Zoom
 |
View all Canon VB-S800D Mark II manuals
Add to My Manuals
Save this manual to your list of manuals |
Page 56 highlights
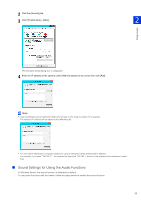
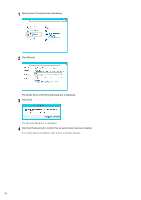
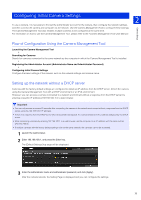
Flow for the Setting of the Camera Angle Adjust the camera angle when installing the camera or after changing the installation location. The camera angle settings are configured by accessing the Setting Page (P. 76). Step 1 Configuring the Camera Set the digital zoom and video flip, which affect the camera angle. [Digital Zoom] (P. 96) in [Camera] > [Camera] > [Camera Control] on the Setting Page. H730 [Video Flip] (P. 98) in [Camera] > [Camera] > [Installation Conditions] on the Setting Page. Step 2 Setting Zoom Set the zoom position with the zoom slider. [Camera] > [Initial Settings] (P. 99) on the Setting Page. Important If you change the zoom after configuring the intelligent function, privacy mask, preset, and ADSR, those settings must be configured again. H730 If you set [Digital Zoom] to [Enable] in [Camera] > [Camera] > [Camera Control] on the Setting Page in Step 1, the digital zoom area (yellow) is displayed and digital zoom becomes available. The higher the digital zoom ratio, the lower the video quality becomes. Digital Zoom Range Step 3 Setting the Focus H730 You can manually focus on the subject, or fix the focus at infinity. When manually operating the focus, you can use the Oneshot AF feature to focus on the subject. [Camera] > [Initial Settings] > [Camera Settings] > [Focus] (P. 101) on the Setting Page. Note For precautions, etc. regarding the focus, please refer to the "Important" and "Note" sections of [Camera] > [Initial Settings] > [Camera Settings] > [Focus] on the Setting Page (P. 101). 38
-
 1
1 -
2
-
3
-
4
-
5
-
6
-
7
-
8
-
9
-
10
-
11
-
12
-
13
-
14
-
15
-
16
-
17
-
18
-
19
-
20
-
21
-
22
-
23
-
24
-
25
-
26
-
27
-
28
-
29
-
30
-
31
-
32
-
33
-
34
-
35
-
36
-
37
-
38
-
39
-
40
-
41
-
42
-
43
-
44
-
45
-
46
-
47
-
48
-
49
-
50
-
 51
51 -
 52
52 -
 53
53 -
 54
54 -
 55
55 -
 56
56 -
 57
57 -
 58
58 -
 59
59 -
 60
60 -
 61
61 -
62
-
63
-
64
-
65
-
66
-
67
-
68
-
69
-
70
-
71
-
72
-
73
-
74
-
75
-
76
-
77
-
78
-
79
-
80
-
81
-
82
-
83
-
84
-
85
-
86
-
87
-
88
-
89
-
90
-
91
-
92
-
93
-
94
-
95
-
96
-
97
-
98
-
99
-
100
-
101
-
102
-
103
-
104
-
105
-
106
-
107
-
108
-
109
-
110
-
111
-
112
-
113
-
114
-
115
-
116
-
117
-
118
-
119
-
120
-
121
-
122
-
123
-
124
-
125
-
126
-
127
-
128
-
129
-
130
-
131
-
132
-
133
-
134
-
135
-
136
-
137
-
138
-
139
-
140
-
141
-
142
-
143
-
144
-
145
-
146
-
147
-
148
-
149
-
150
-
151
-
152
-
153
-
154
-
155
-
156
-
157
-
158
-
159
-
160
-
161
-
162
-
163
-
164
-
165
-
166
-
167
-
168
-
169
-
170
-
171
-
172
-
173
-
174
-
175
-
176
-
177
-
178
-
179
-
180
-
181
-
182
-
183
-
184
-
185
-
186
-
187
-
188
-
189
-
190
-
191
-
192
-
193
-
194
-
195
-
196
-
197
-
198
-
199
-
200
-
201
-
202
-
203
-
204
-
205
-
206
-
207
-
208
-
209
-
210
-
211
-
212
-
213
-
214
-
215
-
216
-
217
-
218
-
219
-
220
-
221
-
222
-
223
-
224
-
225
-
226
-
227
-
228
-
229
-
230
-
231
-
232
-
233
-
234
-
235
-
236
-
237
-
238
-
239
-
240
-
241
-
242
-
243
-
244
-
245
-
246
-
247
-
248
-
249
-
250
-
251
-
252
-
253
-
254
-
255
-
256
-
257
-
258
-
259
-
260
 |
 |