Canon imagePROGRAF iPF760 Basic Guide - Page 15
Removing the Roll from the Printer, Tab Selection screen, Paper Menu, Eject Paper
 |
View all Canon imagePROGRAF iPF760 manuals
Add to My Manuals
Save this manual to your list of manuals |
Page 15 highlights
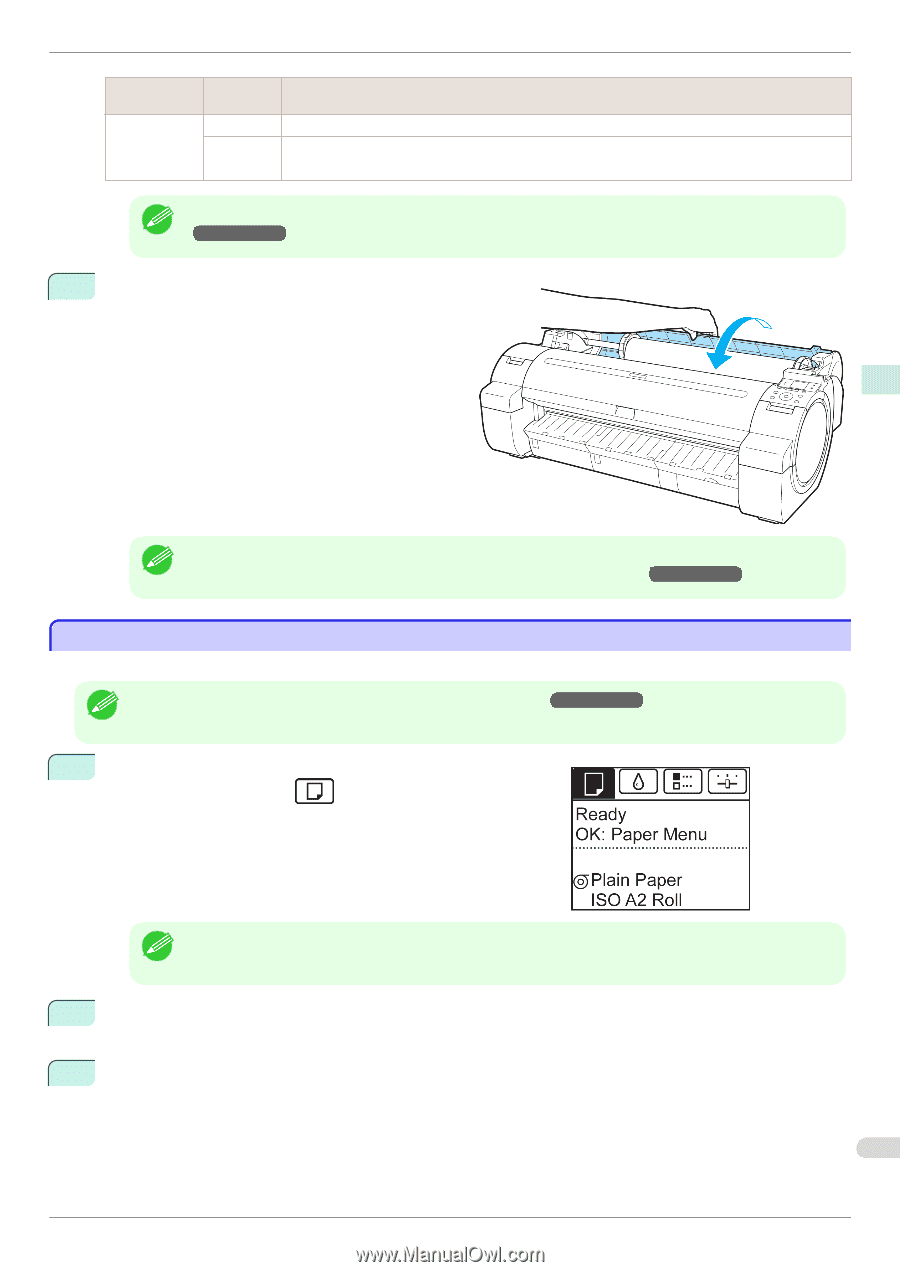
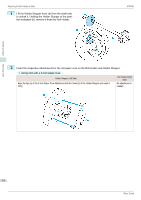
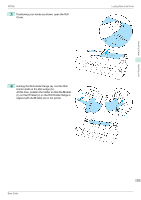
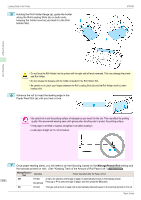
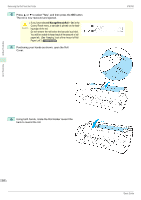
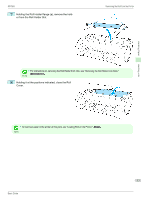
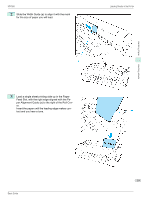
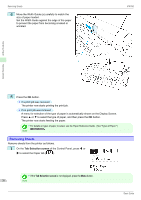
iPF760 Removing the Roll from the Printer ManageRemainRoll Barcodes On Printed Not printed Printer Operation After the Paper is Fed There is no need to specify the type and length of the paper. A menu for selection of the paper type and length is automatically shown on the Display Screen. Press ▲ or ▼ to select the type and length of paper loaded, and then press the OK button. • For details on types of paper to select, see the Paper Reference Guide. (See "Types of Paper.") Note →User's Guide 8 Holding it at the positions indicated, close the Roll Cover. Handling Paper Handling rolls • Cut the edge of the roll after the paper is advanced if it is soiled or if there are cuts from scissors or the blade Note after removing creased edges. (See "Specifying the Cutting Method for Rolls.") →User's Guide Removing the Roll from the Printer Remove rolls from the printer as follows. • If you need to cut the roll, see "Specifying the Cutting Method for Rolls." →User's Guide Note 1 On the Tab Selection screen of the Control Panel, press ◀ or ▶ to select the Paper tab ( ). • If the Tab Selection screen is not displayed, press the Menu button. Note 2 Press the OK button. The Paper Menu is displayed. 3 Press ▲ or ▼ to select Eject Paper, and then press the OK button. 15 Basic Guide
-
 1
1 -
2
-
3
-
4
-
5
-
6
-
7
-
8
-
9
-
 10
10 -
 11
11 -
 12
12 -
 13
13 -
 14
14 -
 15
15 -
 16
16 -
 17
17 -
 18
18 -
 19
19 -
 20
20 -
21
-
22
-
23
-
24
-
25
-
26
-
27
-
28
-
29
-
30
-
31
-
32
-
33
-
34
-
35
-
36
-
37
-
38
-
39
-
40
-
41
-
42
-
43
-
44
-
45
-
46
-
47
-
48
-
49
-
50
-
51
-
52
-
53
-
54
-
55
-
56
-
57
-
58
-
59
-
60
-
61
-
62
-
63
-
64
-
65
-
66
-
67
-
68
-
69
-
70
-
71
-
72
-
73
-
74
-
75
-
76
-
77
-
78
-
79
-
80
-
81
-
82
-
83
-
84
-
85
-
86
-
87
-
88
-
89
-
90
-
91
-
92
-
93
-
94
-
95
-
96
-
97
-
98
-
99
-
100
-
101
-
102
-
103
-
104
-
105
-
106
-
107
-
108
-
109
-
110
-
111
-
112
-
113
-
114
-
115
-
116
-
117
-
118
-
119
-
120
-
121
-
122
-
123
-
124
-
125
-
126
-
127
-
128
-
129
-
130
-
131
-
132
 |
 |