Canon imagePROGRAF iPF760 Basic Guide - Page 28
Tab Selection screen, Set./Adj. Menu, Maintenance, Replace P.head
 |
View all Canon imagePROGRAF iPF760 manuals
Add to My Manuals
Save this manual to your list of manuals |
Page 28 highlights
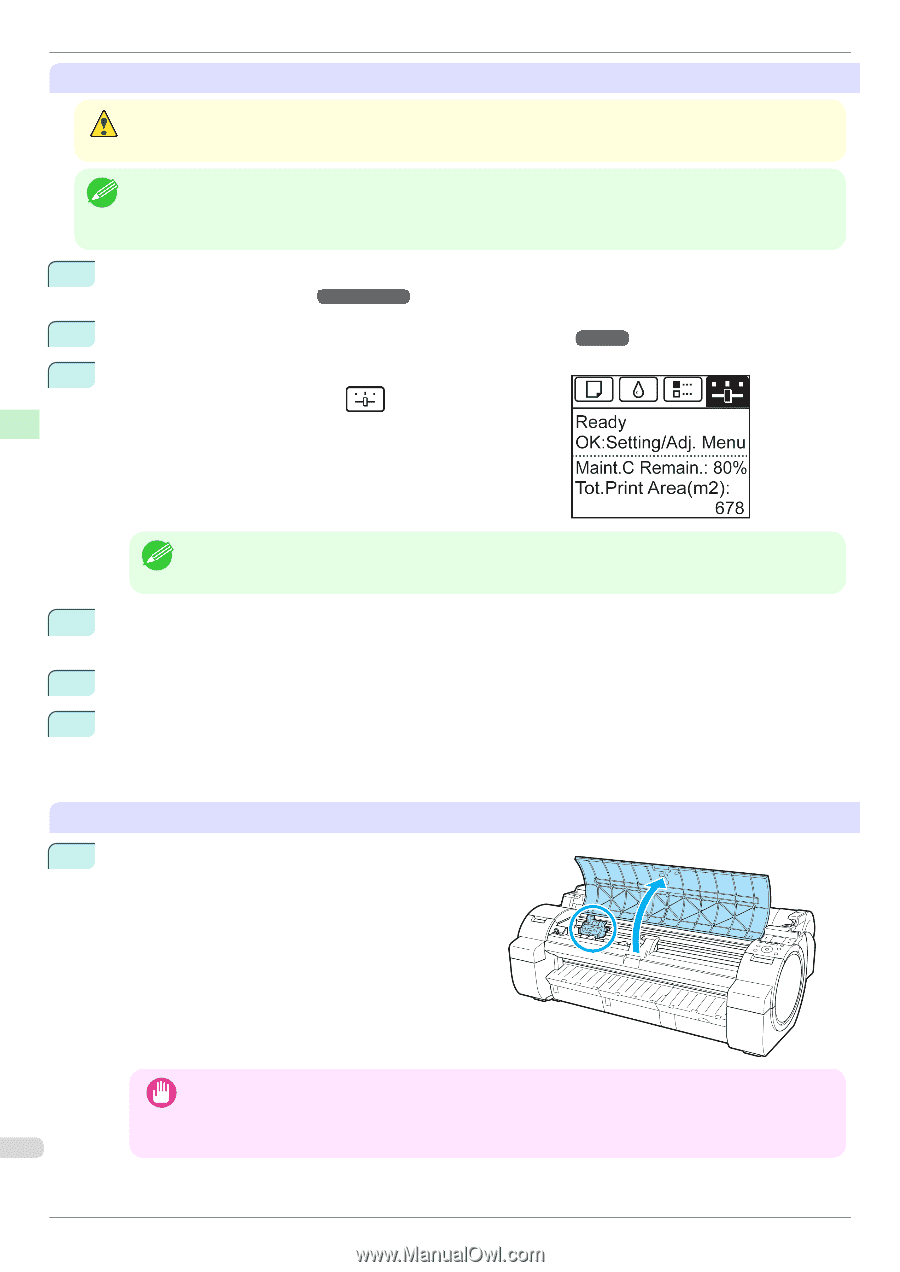
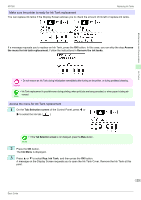
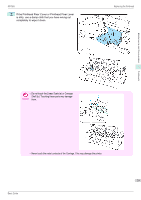
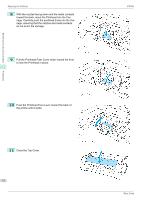
Maintenance and Consumables Printheads Replacing the Printhead iPF760 Access the menu for Printhead replacement • When replacing the Printhead immediately after printing, wait a few minutes before replacing it. The metal parts of the Caution Printhead become hot during printing, and there is a risk of burns from touching these parts. • Prepare a new Ink Tank when ink levels are low. Note • Your hands may become dirty during Printhead replacement. Use the gloves provided with the new Printhead for re- placement. 1 If the roll is not ejected because of the cutting method selected, cut it manually and remove it. (See "Cutting Roll Paper After Printing.") →User's Guide 2 Clean inside the Top Cover. (See "Cleaning Inside the Top Cover.") →P.39 3 On the Tab Selection screen of the Control Panel, press ◀ or ▶ to select the Settings/Adj. tab ( ). • If the Tab Selection screen is not displayed, press the Menu button. Note 4 Press the OK button. The Set./Adj. Menu is displayed. 5 Press ▲ or ▼ to select Maintenance, and then press the OK button. 6 Press ▲ or ▼ to select Replace P.head, and then press the OK button. Ink is now drawn into the Maintenance Cartridge. After about two minutes, a message is shown on the Display Screen instructing you to open the Top Cover. Replace the Printhead 1 Open the Top Cover. Instructions are now shown on the Display Screen regarding Printhead replacement. • During Printhead replacement, do not move the Carriage from the position indicated. If you accidentally move Important the Carriage, you will hear a warning tone, and Printhead replacement is no longer possible. If you move the Carriage by mistake, close the Top Cover. The Carriage will be moved to the position as 28 indicated. Basic Guide
-
 1
1 -
2
-
3
-
4
-
5
-
6
-
7
-
8
-
9
-
10
-
11
-
12
-
13
-
14
-
15
-
16
-
17
-
18
-
19
-
20
-
21
-
22
-
 23
23 -
 24
24 -
 25
25 -
 26
26 -
 27
27 -
 28
28 -
 29
29 -
 30
30 -
 31
31 -
 32
32 -
 33
33 -
34
-
35
-
36
-
37
-
38
-
39
-
40
-
41
-
42
-
43
-
44
-
45
-
46
-
47
-
48
-
49
-
50
-
51
-
52
-
53
-
54
-
55
-
56
-
57
-
58
-
59
-
60
-
61
-
62
-
63
-
64
-
65
-
66
-
67
-
68
-
69
-
70
-
71
-
72
-
73
-
74
-
75
-
76
-
77
-
78
-
79
-
80
-
81
-
82
-
83
-
84
-
85
-
86
-
87
-
88
-
89
-
90
-
91
-
92
-
93
-
94
-
95
-
96
-
97
-
98
-
99
-
100
-
101
-
102
-
103
-
104
-
105
-
106
-
107
-
108
-
109
-
110
-
111
-
112
-
113
-
114
-
115
-
116
-
117
-
118
-
119
-
120
-
121
-
122
-
123
-
124
-
125
-
126
-
127
-
128
-
129
-
130
-
131
-
132
 |
 |