Canon imagePROGRAF iPF760 Basic Guide - Page 42
Head Cleaning A, Head Cleaning B, Nozzle, Check, Tab Selection screen, Set./Adj. Menu, Maintenance,
 |
View all Canon imagePROGRAF iPF760 manuals
Add to My Manuals
Save this manual to your list of manuals |
Page 42 highlights
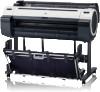
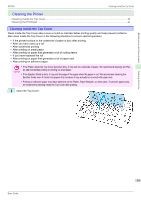
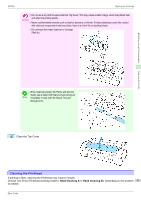
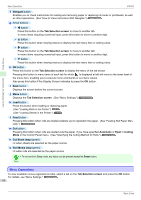
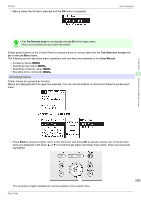
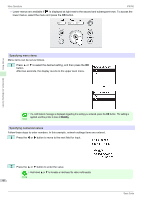
Maintenance and Consumables Cleaning the Printer Cleaning the Printhead iPF760 • Head Cleaning A Use this mode if printing is faint or contains foreign substances. This method of cleaning consumes the least amount of ink. It takes about three and a half minutes to complete. • Head Cleaning B Use this mode if no ink is ejected at all, or if Head Cleaning A does not solve the problem. It takes about four minutes to complete. • Do not remove the Maintenance Cartridge or ink tanks during either Head Cleaning A or Head Cleaning B. Caution • If printing does not improve after Head Cleaning B, try repeating Head Cleaning B once or twice. If this still does not improve printing, the Printhead may have reached the end of its useful life. Contact your Canon dealer for assistance. Note • Nozzles are periodically checked to ensure they are clear. Configure the settings on the Control Panel menu in Nozzle Check. (See "Menu Settings.") →User's Guide Perform cleaning as follows. 1 On the Tab Selection screen of the Control Panel, press ◀ or ▶ to select the Settings/Adj. tab ( ). • If the Tab Selection screen is not displayed, press the Menu button. Note 2 Press the OK button. The Set./Adj. Menu is displayed. 3 Press ▲ or ▼ to select Maintenance, and then press the OK button. 4 Press ▲ or ▼ to select Head Cleaning, and then press the OK button. 5 Press ▲ or ▼ to select Head Cleaning A or Head Cleaning B, and then press the OK button. Head cleaning is now executed. 6 Print a test pattern to check the nozzles, and determine whether cleaning has cleared the nozzles. (See "Checking for Nozzle Clogging.") →User's Guide 42 Basic Guide
-
 1
1 -
2
-
3
-
4
-
5
-
6
-
7
-
8
-
9
-
10
-
11
-
12
-
13
-
14
-
15
-
16
-
17
-
18
-
19
-
20
-
21
-
22
-
23
-
24
-
25
-
26
-
27
-
28
-
29
-
30
-
31
-
32
-
33
-
34
-
35
-
36
-
 37
37 -
 38
38 -
 39
39 -
 40
40 -
 41
41 -
 42
42 -
 43
43 -
 44
44 -
 45
45 -
 46
46 -
 47
47 -
48
-
49
-
50
-
51
-
52
-
53
-
54
-
55
-
56
-
57
-
58
-
59
-
60
-
61
-
62
-
63
-
64
-
65
-
66
-
67
-
68
-
69
-
70
-
71
-
72
-
73
-
74
-
75
-
76
-
77
-
78
-
79
-
80
-
81
-
82
-
83
-
84
-
85
-
86
-
87
-
88
-
89
-
90
-
91
-
92
-
93
-
94
-
95
-
96
-
97
-
98
-
99
-
100
-
101
-
102
-
103
-
104
-
105
-
106
-
107
-
108
-
109
-
110
-
111
-
112
-
113
-
114
-
115
-
116
-
117
-
118
-
119
-
120
-
121
-
122
-
123
-
124
-
125
-
126
-
127
-
128
-
129
-
130
-
131
-
132
 |
 |