Canon imagePROGRAF iPF760 Basic Guide - Page 23
Access, the menu for ink tank replacement., Remove the ink tanks., Tab Selection screen, Ink Menu
 |
View all Canon imagePROGRAF iPF760 manuals
Add to My Manuals
Save this manual to your list of manuals |
Page 23 highlights
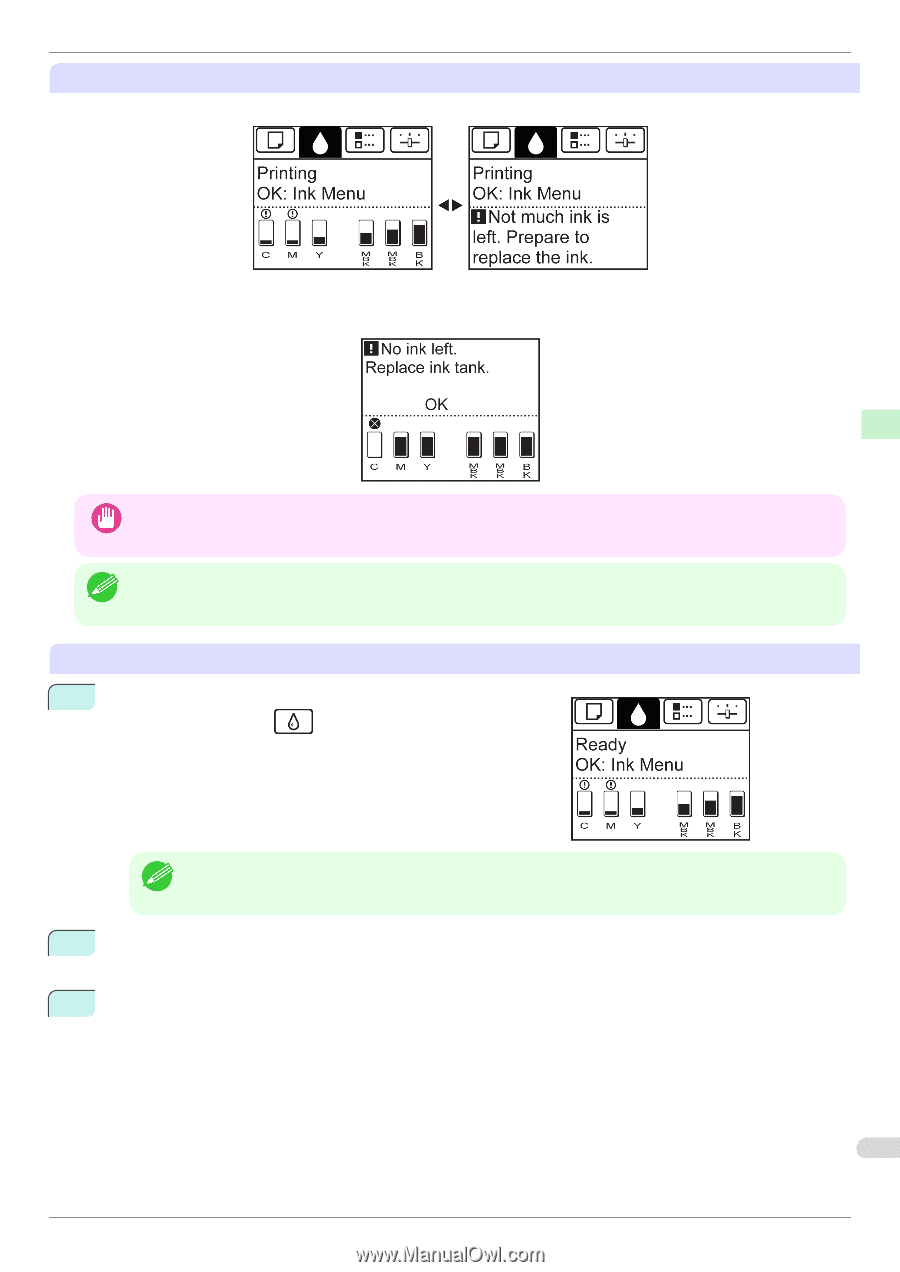
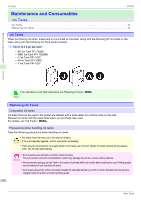
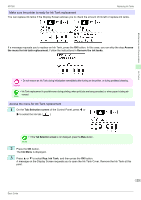
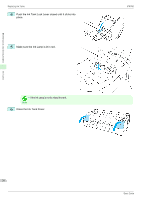
iPF760 Replacing Ink Tanks Make sure the printer is ready for Ink Tank replacement You can replace ink tanks if the Display Screen advises you to check the amount of ink left or replace ink tanks. Maintenance and Consumables Ink Tanks If a message requests you to replace an Ink Tank, press the OK button. In this case, you can skip the step Access the menu for ink tank replacement. Follow the instructions in Remove the ink tanks. • Do not remove an Ink Tank during initialization immediately after turning on the printer, or during printhead cleaning. Important • Ink Tank replacement is possible even during printing, when print jobs are being canceled, or when paper is being ad- vanced. Note Access the menu for Ink Tank replacement 1 On the Tab Selection screen of the Control Panel, press ◀ or ▶ to select the Ink tab ( ). • If the Tab Selection screen is not displayed, press the Menu button. Note 2 Press the OK button. The Ink Menu is displayed. 3 Press ▲ or ▼ to select Rep. Ink Tank, and then press the OK button. A message on the Display Screen requests you to open the Ink Tank Cover. Remove the Ink Tank at this point. 23 Basic Guide
-
 1
1 -
2
-
3
-
4
-
5
-
6
-
7
-
8
-
9
-
10
-
11
-
12
-
13
-
14
-
15
-
16
-
17
-
 18
18 -
 19
19 -
 20
20 -
 21
21 -
 22
22 -
 23
23 -
 24
24 -
 25
25 -
 26
26 -
 27
27 -
 28
28 -
29
-
30
-
31
-
32
-
33
-
34
-
35
-
36
-
37
-
38
-
39
-
40
-
41
-
42
-
43
-
44
-
45
-
46
-
47
-
48
-
49
-
50
-
51
-
52
-
53
-
54
-
55
-
56
-
57
-
58
-
59
-
60
-
61
-
62
-
63
-
64
-
65
-
66
-
67
-
68
-
69
-
70
-
71
-
72
-
73
-
74
-
75
-
76
-
77
-
78
-
79
-
80
-
81
-
82
-
83
-
84
-
85
-
86
-
87
-
88
-
89
-
90
-
91
-
92
-
93
-
94
-
95
-
96
-
97
-
98
-
99
-
100
-
101
-
102
-
103
-
104
-
105
-
106
-
107
-
108
-
109
-
110
-
111
-
112
-
113
-
114
-
115
-
116
-
117
-
118
-
119
-
120
-
121
-
122
-
123
-
124
-
125
-
126
-
127
-
128
-
129
-
130
-
131
-
132
 |
 |