Canon imagePROGRAF iPF760 Basic Guide - Page 66
Software Installation, Installing the Printer Driver (Windows)
 |
View all Canon imagePROGRAF iPF760 manuals
Add to My Manuals
Save this manual to your list of manuals |
Page 66 highlights
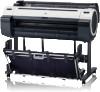
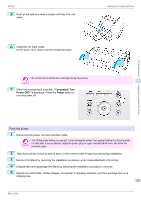
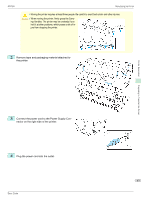
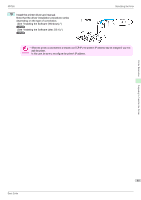
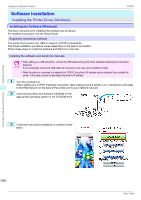
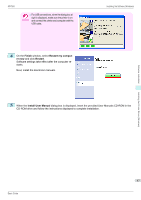
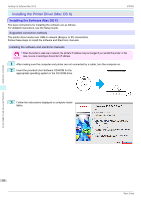
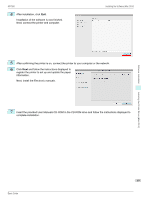
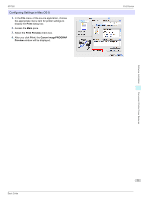
Software Installation Installing the Software (Windows) Software Installation Installing the Printer Driver (Windows) Installing the Software (Windows) The basic instructions for installing the software are as follows. For detailed instructions, see the Setup Guide. Supported connection methods The printer driver works over USB or network (TCP/IP) connections. The driver installation procedure varies depending on the type of connection. Follow these steps to install the software and Electronic manuals. iPF760 Installing the software and electronic manuals • When setting up a USB connection, connect the USB cable during printer driver installation following the instructions displayed. Important If you accidentally connect the USB cable first, the printer driver may not be installed correctly. • When the printer is connected to a network (via TCP/IP), the printer's IP address may be changed if you reinstall the printer. In this case, be sure to reconfigure the printer's IP address. 1 Turn the computer on. When setting up a TCP/IP (network) connection, after making sure the printer is on, connect the LAN cable to the Ethernet port on the back of the printer and to your network hub port. 2 Insert the provided User Software CD-ROM for the appropriate operating system in the CD-ROM drive. 3 Follow the instructions displayed to complete installation. Installing the Printer Driver (Windows) 66 Basic Guide
-
 1
1 -
2
-
3
-
4
-
5
-
6
-
7
-
8
-
9
-
10
-
11
-
12
-
13
-
14
-
15
-
16
-
17
-
18
-
19
-
20
-
21
-
22
-
23
-
24
-
25
-
26
-
27
-
28
-
29
-
30
-
31
-
32
-
33
-
34
-
35
-
36
-
37
-
38
-
39
-
40
-
41
-
42
-
43
-
44
-
45
-
46
-
47
-
48
-
49
-
50
-
51
-
52
-
53
-
54
-
55
-
56
-
57
-
58
-
59
-
60
-
 61
61 -
 62
62 -
 63
63 -
 64
64 -
 65
65 -
 66
66 -
 67
67 -
 68
68 -
 69
69 -
 70
70 -
 71
71 -
72
-
73
-
74
-
75
-
76
-
77
-
78
-
79
-
80
-
81
-
82
-
83
-
84
-
85
-
86
-
87
-
88
-
89
-
90
-
91
-
92
-
93
-
94
-
95
-
96
-
97
-
98
-
99
-
100
-
101
-
102
-
103
-
104
-
105
-
106
-
107
-
108
-
109
-
110
-
111
-
112
-
113
-
114
-
115
-
116
-
117
-
118
-
119
-
120
-
121
-
122
-
123
-
124
-
125
-
126
-
127
-
128
-
129
-
130
-
131
-
132
 |
 |