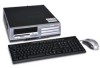
Compaq D51s Troubleshooting Guide - Page 8
Using Categories in Compaq Diagnostics for Windows, Start > Compaq Information Center > Compaq - specifications
 |
UPC - 890552632367
View all Compaq D51s manuals
Add to My Manuals
Save this manual to your list of manuals |
Page 8 highlights
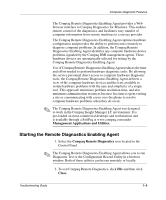
Computer Diagnostic Features 3. Click Next to install Compaq Diagnostics for Windows. 4. After the program has finished installing, you may be prompted to restart the computer, or it may automatically restart. If prompted, click Finish to restart the computer or Cancel to exit the program. You must restart the computer to complete the installation of Compaq Diagnostics for Windows. ✎ If you want to upgrade an existing version of Compaq Diagnostics for Windows installed on your computer, visit www.compaq.com/support/files and click on an applicable product. In the next window, find Option 2-Locate by Category. Select Management Applications and Utilities. Click Locate Software and download the latest version. Execute the downloaded file and select Repair to update the installed version. This will cause the new version to overwrite the old version. Using Categories in Compaq Diagnostics for Windows To use the categories do the following: 1. Click Start > Compaq Information Center > Compaq Diagnostics for Windows. You can also select the Compaq Diagnostics for Windows icon, located in the Control Panel. The screen displays the overview of the computer hardware and software. 2. For specific hardware and software information, select a category from the Categories pull-down menu or the appropriate icon on the toolbar. ✎ As you move your cursor over the toolbar icons, the corresponding category name displays near the cursor. 3. To display more detailed information in a selected category, click More in the Information Level box in the lower left corner of the window or click Level at the top of the screen and select More. 4. Review, print, and/or save this information as needed. 1-4 Troubleshooting Guide
-
 1
1 -
2
-
 3
3 -
 4
4 -
 5
5 -
 6
6 -
 7
7 -
 8
8 -
 9
9 -
 10
10 -
 11
11 -
 12
12 -
 13
13 -
14
-
15
-
16
-
17
-
18
-
19
-
20
-
21
-
22
-
23
-
24
-
25
-
26
-
27
-
28
-
29
-
30
-
31
-
32
-
33
-
34
-
35
-
36
-
37
-
38
-
39
-
40
-
41
-
42
-
43
-
44
-
45
-
46
-
47
-
48
-
49
-
50
-
51
-
52
-
53
-
54
-
55
-
56
-
57
-
58
-
59
-
60
-
61
-
62
-
63
-
64
-
65
-
66
-
67
-
68
-
69
-
70
-
71
-
72
-
73
-
74
-
75
-
76
-
77
-
78
-
79
-
80
-
81
-
82
-
83
 |
 |