D-Link DSN-6410 User Manual for DSN-6410 - Page 74
Enclosure management
 |
View all D-Link DSN-6410 manuals
Add to My Manuals
Save this manual to your list of manuals |
Page 74 highlights
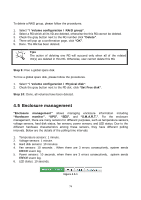
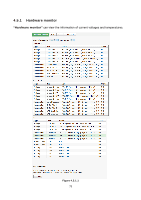
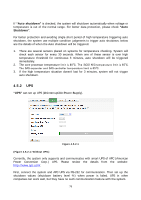
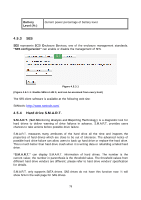
To delete a RAID group, please follow the procedures: 1. Select "/ Volume configuration / RAID group". 2. Select a RG which all its VD are deleted, otherwise the this RG cannot be deleted. 3. Check the gray button next to the RG number click "Delete". 4. There will pop up a confirmation page, click "OK". 5. Done. The RG has been deleted. Tips The action of deleting one RG will succeed only when all of the related VD(s) are deleted in this RG. Otherwise, user cannot delete this RG. Step 9: Free a global spare disk. To free a global spare disk, please follow the procedures. 1. Select "/ Volume configuration / Physical disk". 2. Check the gray button next to the PD slot; click "Set Free disk". Step 10: Done, all volumes have been deleted. 4.5 Enclosure management "Enclosure management" allows managing enclosure information including "Hardware monitor", "UPS", "SES", and "S.M.A.R.T.". For the enclosure management, there are many sensors for different purposes, such as temperature sensors, voltage sensors, hard disk status, fan sensors, power sensors, and LED status. Due to the different hardware characteristics among these sensors, they have different polling intervals. Below are the details of the polling time intervals: 1. Temperature sensors: 1 minute. 2. Voltage sensors: 1 minute. 3. Hard disk sensors: 10 minutes. 4. Fan sensors: 10 seconds . When there are 3 errors consecutively, system sends ERROR event log. 5. Power sensors: 10 seconds, when there are 3 errors consecutively, system sends ERROR event log. 6. LED status: 10 seconds. Figure 4.5.1 74
-
 1
1 -
2
-
3
-
4
-
5
-
6
-
7
-
8
-
9
-
10
-
11
-
12
-
13
-
14
-
15
-
16
-
17
-
18
-
19
-
20
-
21
-
22
-
23
-
24
-
25
-
26
-
27
-
28
-
29
-
30
-
31
-
32
-
33
-
34
-
35
-
36
-
37
-
38
-
39
-
40
-
41
-
42
-
43
-
44
-
45
-
46
-
47
-
48
-
49
-
50
-
51
-
52
-
53
-
54
-
55
-
56
-
57
-
58
-
59
-
60
-
61
-
62
-
63
-
64
-
65
-
66
-
67
-
68
-
 69
69 -
 70
70 -
 71
71 -
 72
72 -
 73
73 -
 74
74 -
 75
75 -
 76
76 -
 77
77 -
 78
78 -
 79
79 -
80
-
81
-
82
-
83
-
84
-
85
-
86
-
87
-
88
-
89
-
90
-
91
-
92
-
93
-
94
-
95
-
96
-
97
-
98
-
99
-
100
-
101
-
102
-
103
-
104
-
105
-
106
-
107
-
108
-
109
-
110
-
111
-
112
-
113
-
114
-
115
-
116
-
117
-
118
-
119
-
120
-
121
-
122
-
123
-
124
-
125
-
126
-
127
-
128
-
129
-
130
-
131
-
132
-
133
-
134
-
135
-
136
-
137
-
138
-
139
-
140
-
141
-
142
-
143
-
144
-
145
-
146
 |
 |