D-Link DSN-6410 User Manual for DSN-6410 - Page 88
RG migration
 |
View all D-Link DSN-6410 manuals
Add to My Manuals
Save this manual to your list of manuals |
Page 88 highlights
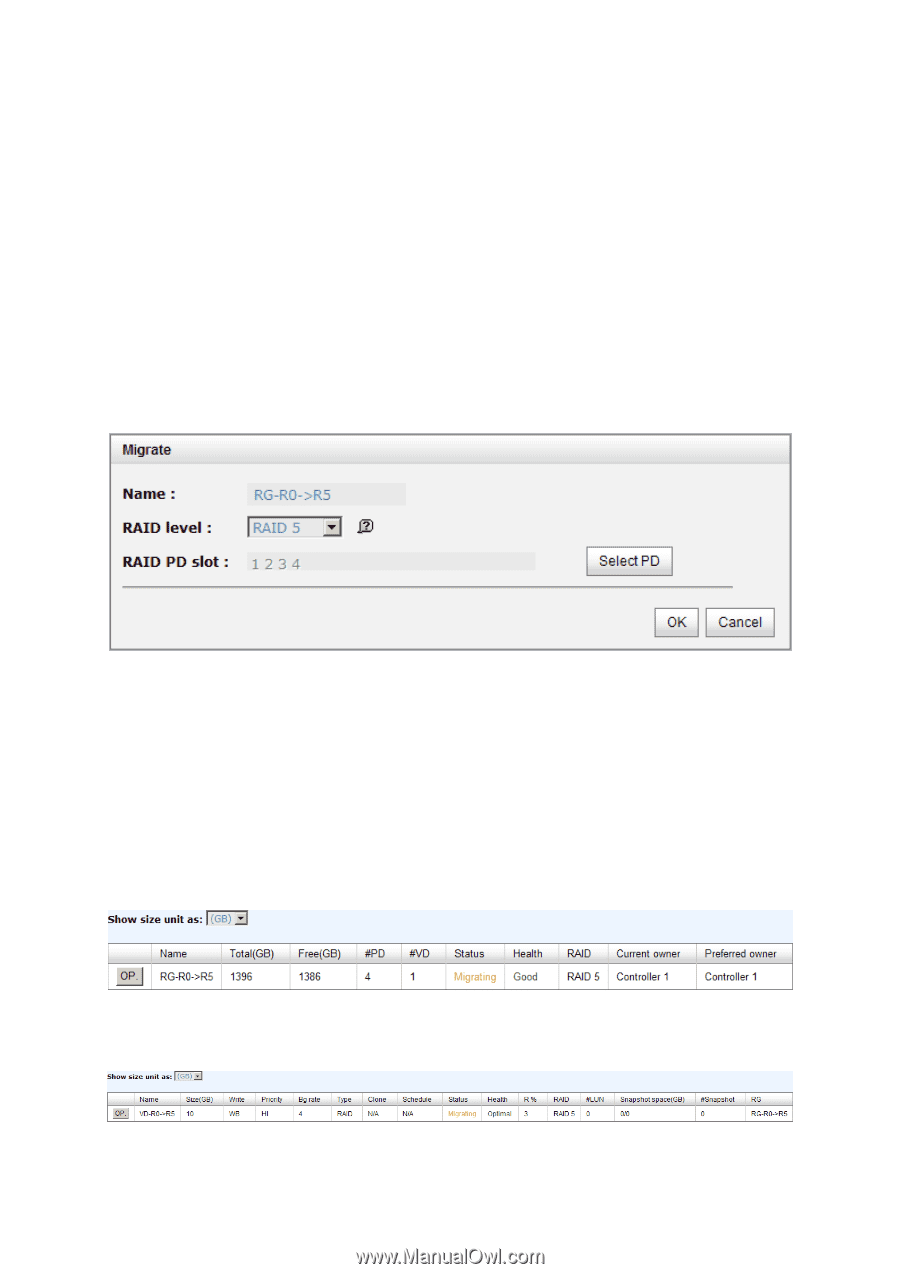
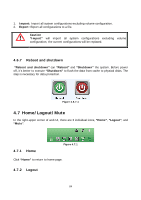
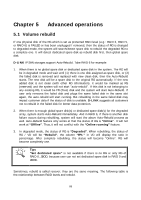
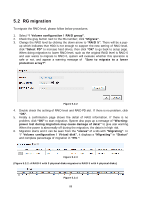
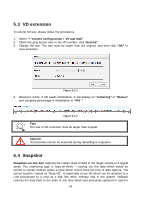
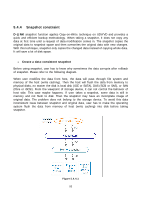
5.2 RG migration To migrate the RAID level, please follow below procedures. 1. Select "/ Volume configuration / RAID group". 2. Check the gray button next to the RG number; click "Migrate". 3. Change the RAID level by clicking the down arrow to "RAID 5". There will be a pup- up which indicates that HDD is not enough to support the new setting of RAID level, click "Select PD" to increase hard drives, then click "OK" to go back to setup page. When doing migration to lower RAID level, such as the original RAID level is RAID 6 and user wants to migrate to RAID 0, system will evaluate whether this operation is safe or not, and appear a warning message of "Sure to migrate to a lower protection array?". Figure 5.2.2 4. Double check the setting of RAID level and RAID PD slot. If there is no problem, click "OK". 5. Finally a confirmation page shows the detail of RAID information. If there is no problem, click "OK" to start migration. System also pops up a message of "Warning: power lost during migration may cause damage of data!" to give user warning. When the power is abnormally off during the migration, the data is in high risk. 6. Migration starts and it can be seen from the "status" of a RG with "Migrating". In "/ Volume configuration / Virtual disk", it displays a "Migrating" in "Status" and complete percentage of migration in "R%". Figure 5.2.3 (Figure 5.2.2: A RAID 0 with 3 physical disks migrates to RAID 5 with 4 physical disks.) Figure 5.2.4 88
-
 1
1 -
2
-
3
-
4
-
5
-
6
-
7
-
8
-
9
-
10
-
11
-
12
-
13
-
14
-
15
-
16
-
17
-
18
-
19
-
20
-
21
-
22
-
23
-
24
-
25
-
26
-
27
-
28
-
29
-
30
-
31
-
32
-
33
-
34
-
35
-
36
-
37
-
38
-
39
-
40
-
41
-
42
-
43
-
44
-
45
-
46
-
47
-
48
-
49
-
50
-
51
-
52
-
53
-
54
-
55
-
56
-
57
-
58
-
59
-
60
-
61
-
62
-
63
-
64
-
65
-
66
-
67
-
68
-
69
-
70
-
71
-
72
-
73
-
74
-
75
-
76
-
77
-
78
-
79
-
80
-
81
-
82
-
 83
83 -
 84
84 -
 85
85 -
 86
86 -
 87
87 -
 88
88 -
 89
89 -
 90
90 -
 91
91 -
 92
92 -
 93
93 -
94
-
95
-
96
-
97
-
98
-
99
-
100
-
101
-
102
-
103
-
104
-
105
-
106
-
107
-
108
-
109
-
110
-
111
-
112
-
113
-
114
-
115
-
116
-
117
-
118
-
119
-
120
-
121
-
122
-
123
-
124
-
125
-
126
-
127
-
128
-
129
-
130
-
131
-
132
-
133
-
134
-
135
-
136
-
137
-
138
-
139
-
140
-
141
-
142
-
143
-
144
-
145
-
146
 |
 |