Dell PowerEdge 4100 Service Manual - Page 48
Front-Panel Inserts
 |
View all Dell PowerEdge 4100 manuals
Add to My Manuals
Save this manual to your list of manuals |
Page 48 highlights
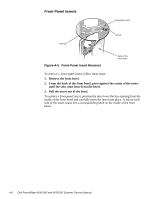
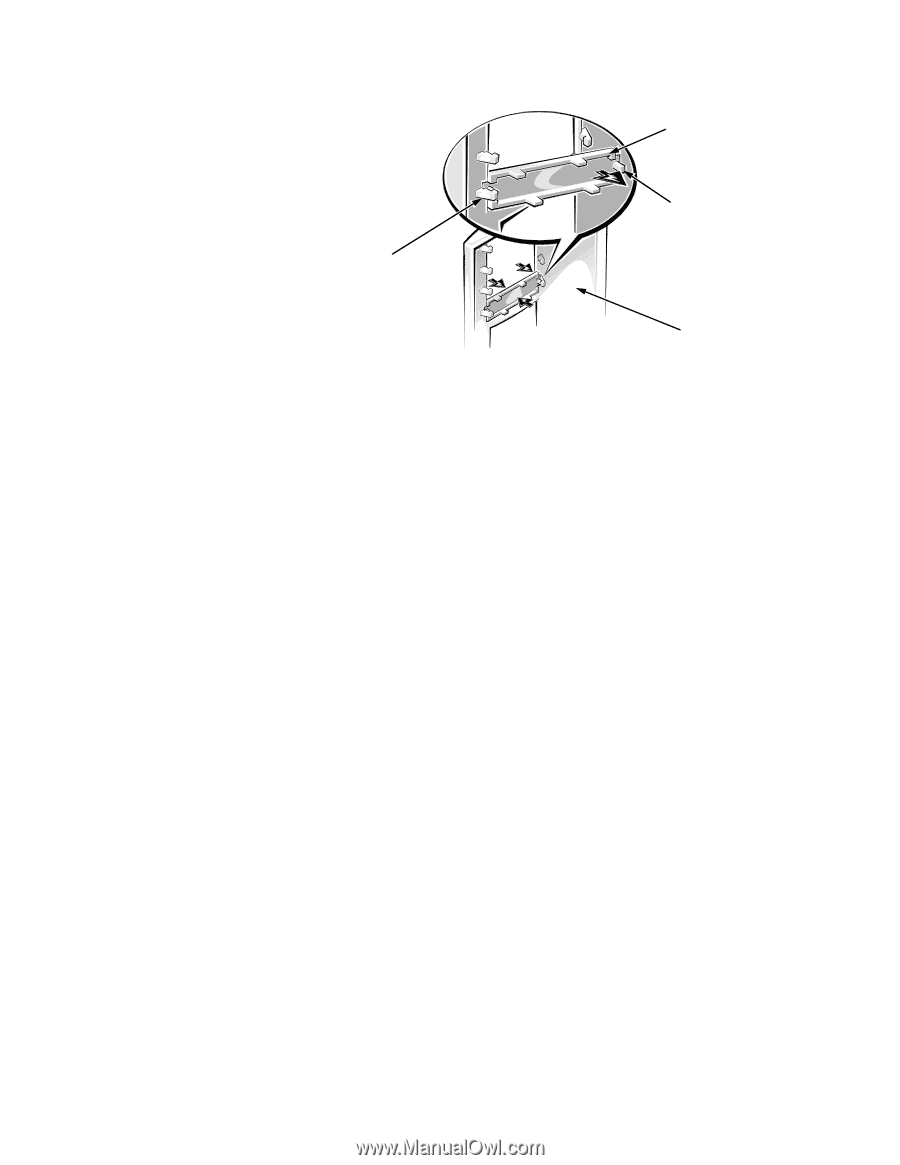
Front-Panel Inserts front-panel insert latch (2) tab (2) Figure 4-5. Front-Panel Insert Removal back of the front bezel To remove a front-panel insert, follow these steps: 1. Remove the front bezel. 2. From the back of the front bezel, press against the center of the insert until the tabs come loose from the bezel. 3. Pull the insert out of the bezel. To replace a front-panel insert, position the insert over the bay opening from the inside of the front bezel and carefully press the insert into place. A tab on each side of the insert snaps into a corresponding latch on the inside of the front bezel. 4-6 Dell PowerEdge 4100/180 and 4100/200 Systems Service Manual
-
 1
1 -
2
-
3
-
4
-
5
-
6
-
7
-
8
-
9
-
10
-
11
-
12
-
13
-
14
-
15
-
16
-
17
-
18
-
19
-
20
-
21
-
22
-
23
-
24
-
25
-
26
-
27
-
28
-
29
-
30
-
31
-
32
-
33
-
34
-
35
-
36
-
37
-
38
-
39
-
40
-
41
-
42
-
 43
43 -
 44
44 -
 45
45 -
 46
46 -
 47
47 -
 48
48 -
 49
49 -
 50
50 -
 51
51 -
 52
52 -
 53
53 -
54
-
55
-
56
-
57
-
58
-
59
-
60
-
61
-
62
-
63
-
64
-
65
-
66
-
67
-
68
-
69
-
70
-
71
-
72
-
73
-
74
-
75
-
76
-
77
-
78
-
79
-
80
-
81
-
82
 |
 |
4-6
Dell PowerEdge 4100/180 and 4100/200 Systems Service Manual
Front-Panel Inserts
Figure 4-5.
Front-Panel Insert Removal
To remove a
front-panel insert, follow these steps:
1.
Remove the front bezel.
2.
From the back of the front bezel, press against the center of the insert
until the tabs come loose from the bezel.
3.
Pull the insert out of the bezel.
To replace a front-panel insert
,
position the insert over the bay opening from the
inside of the front bezel and carefully press the insert into place. A tab on each
side of the insert snaps into a corresponding latch on the inside of the front
bezel.
back of the
front bezel
tab (2)
front-panel insert
latch (2)