Dell PowerEdge 4100 Service Manual - Page 54
Power Supply
 |
View all Dell PowerEdge 4100 manuals
Add to My Manuals
Save this manual to your list of manuals |
Page 54 highlights
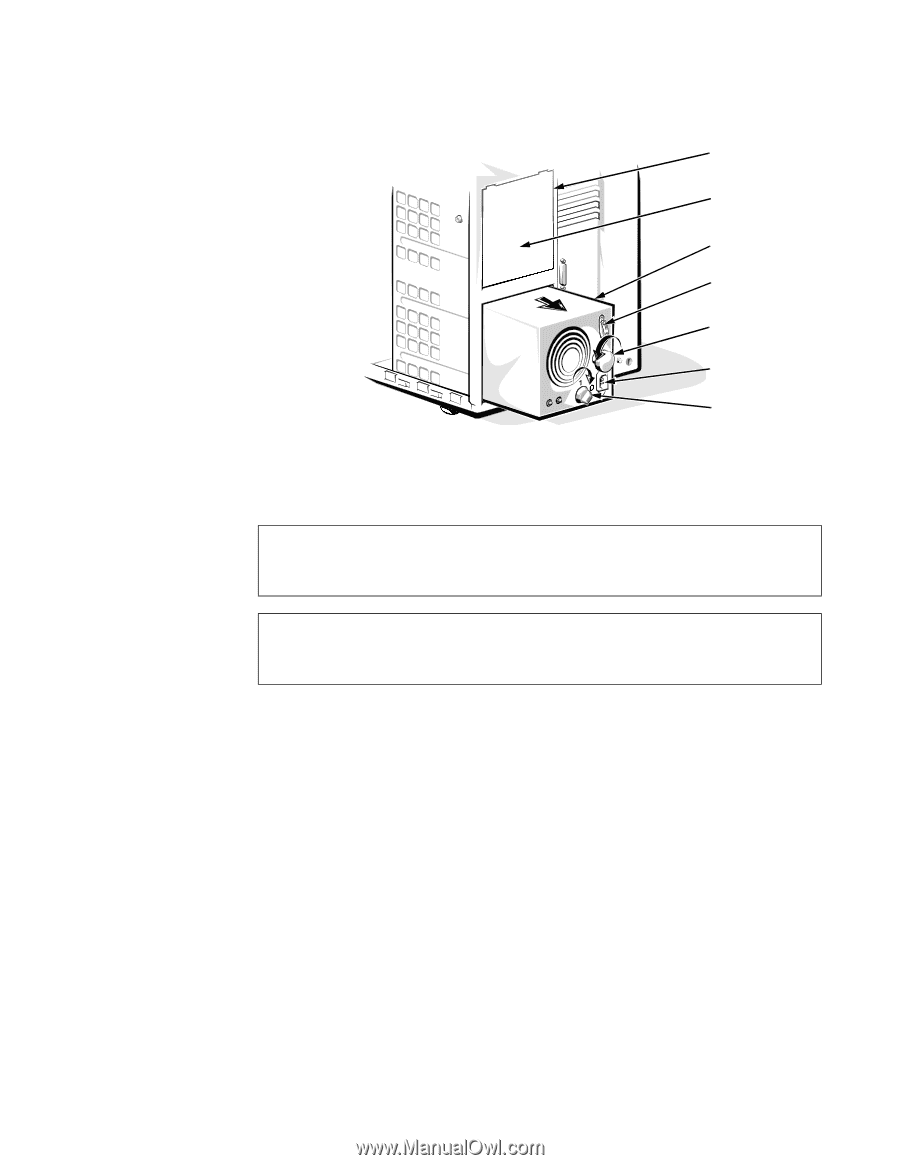
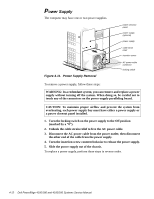
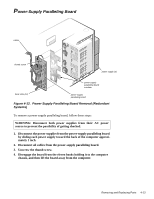
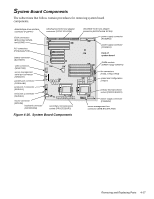
Power Supply The computer may have one or two power supplies. Figure 4-11. Power Supply Removal power closeout panel power supply (optional) power supply cable strain relief insertion screw AC power cable connector locking switch To remove a power supply, follow these steps: WARNING: In a redundant system, you can remove and replace a power supply without turning off the system. When doing so, be careful not to touch any of the connectors on the power-supply paralleling board. CAUTION: To maintain proper airflow and prevent the system from overheating, each power supply bay must have either a power supply or a power closeout panel installed. 1. Turn the locking switch on the power supply to the Off position (marked by a "0"). 2. Unhook the cable strain relief to free the AC power cable. 3. Disconnect the AC power cable from the power outlet; then disconnect the other end of the cable from the power supply. 4. Turn the insertion screw counterclockwise to release the power supply. 5. Slide the power supply out of the chassis. To replace a power supply, perform these steps in reverse order. 4-12 Dell PowerEdge 4100/180 and 4100/200 Systems Service Manual
-
 1
1 -
2
-
3
-
4
-
5
-
6
-
7
-
8
-
9
-
10
-
11
-
12
-
13
-
14
-
15
-
16
-
17
-
18
-
19
-
20
-
21
-
22
-
23
-
24
-
25
-
26
-
27
-
28
-
29
-
30
-
31
-
32
-
33
-
34
-
35
-
36
-
37
-
38
-
39
-
40
-
41
-
42
-
43
-
44
-
45
-
46
-
47
-
48
-
 49
49 -
 50
50 -
 51
51 -
 52
52 -
 53
53 -
 54
54 -
 55
55 -
 56
56 -
 57
57 -
 58
58 -
 59
59 -
60
-
61
-
62
-
63
-
64
-
65
-
66
-
67
-
68
-
69
-
70
-
71
-
72
-
73
-
74
-
75
-
76
-
77
-
78
-
79
-
80
-
81
-
82
 |
 |