Dell PowerEdge 4100 Service Manual - Page 52
Hard-Disk Drive Removal
 |
View all Dell PowerEdge 4100 manuals
Add to My Manuals
Save this manual to your list of manuals |
Page 52 highlights
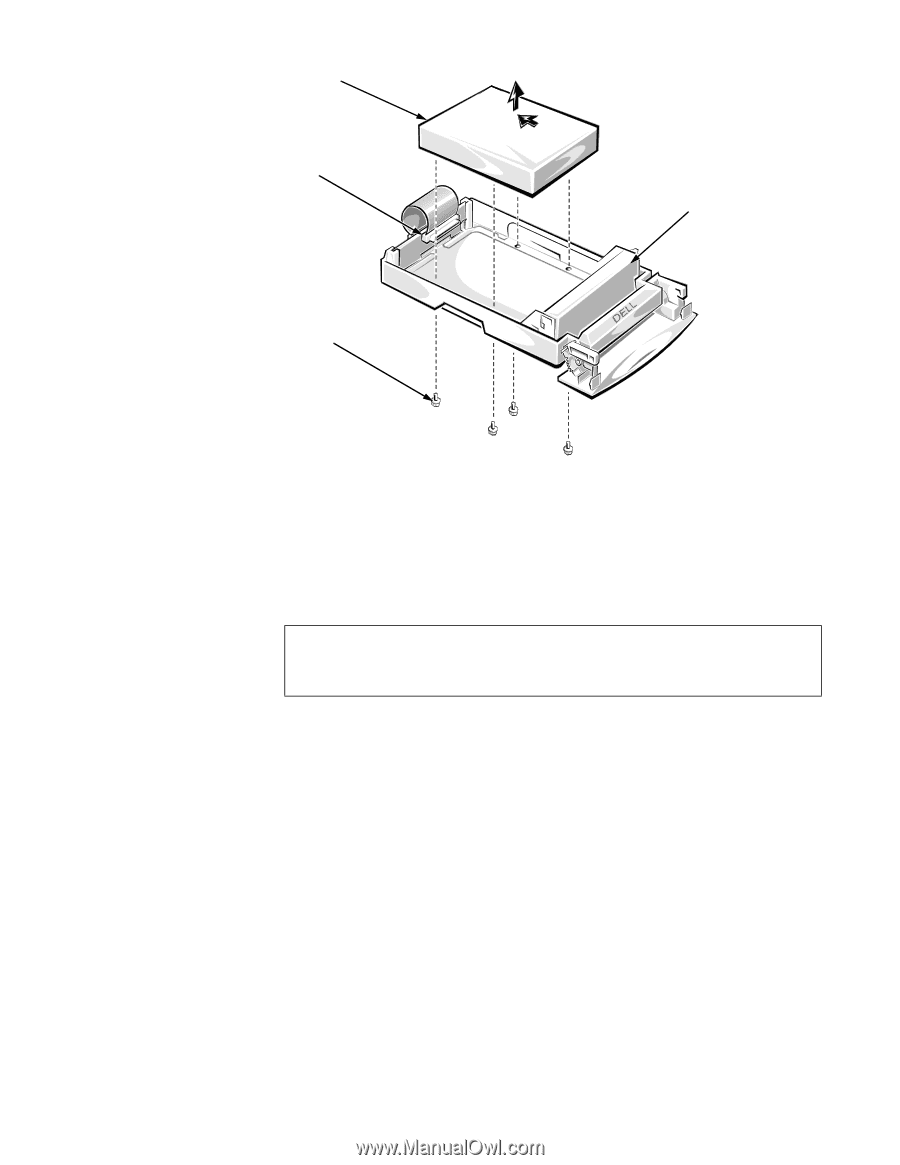
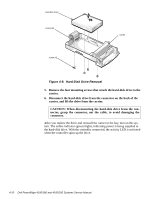
hard-disk drive connector screw (4) carrier Figure 4-9. Hard-Disk Drive Removal 5. Remove the four mounting screws that attach the hard-disk drive to the carrier. 6. Disconnect the hard-disk drive from the connector on the back of the carrier, and lift the drive from the carrier. CAUTION: When disconnecting the hard-disk drive from the connector, grasp the connector, not the cable, to avoid damaging the connector. After you replace the drive and reinstall the carrier in the bay, turn on the system. The online indicator (green) lights, indicating power is being supplied to the hard-disk drive. With the controller connected, the activity LED is activated when the controller spins up the drive. 4-10 Dell PowerEdge 4100/180 and 4100/200 Systems Service Manual
-
 1
1 -
2
-
3
-
4
-
5
-
6
-
7
-
8
-
9
-
10
-
11
-
12
-
13
-
14
-
15
-
16
-
17
-
18
-
19
-
20
-
21
-
22
-
23
-
24
-
25
-
26
-
27
-
28
-
29
-
30
-
31
-
32
-
33
-
34
-
35
-
36
-
37
-
38
-
39
-
40
-
41
-
42
-
43
-
44
-
45
-
46
-
 47
47 -
 48
48 -
 49
49 -
 50
50 -
 51
51 -
 52
52 -
 53
53 -
 54
54 -
 55
55 -
 56
56 -
 57
57 -
58
-
59
-
60
-
61
-
62
-
63
-
64
-
65
-
66
-
67
-
68
-
69
-
70
-
71
-
72
-
73
-
74
-
75
-
76
-
77
-
78
-
79
-
80
-
81
-
82
 |
 |