Dell PowerEdge 4100 Service Manual - Page 61
Dimms
 |
View all Dell PowerEdge 4100 manuals
Add to My Manuals
Save this manual to your list of manuals |
Page 61 highlights
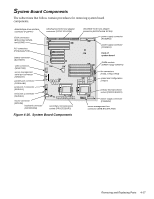
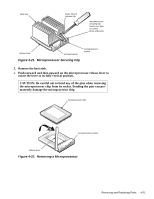
DIMMs DIMM securing clip (2) 2. 1. Figure 4-18. DIMM Removal To remove a DIMM, push outward on the DIMM socket's securing clips until the DIMM is released from its socket. Then lift the DIMM away from the socket. DIMM securing clip (2) 2. 1. Figure 4-19. DIMM Installation To replace a DIMM, push outward on the securing clips at each end of the socket until they snap open. Orient the DIMM to the socket, and press the DIMM straight down into the socket slot until the securing clips snap into place around both ends of the DIMM. Removing and Replacing Parts 4-19
-
 1
1 -
2
-
3
-
4
-
5
-
6
-
7
-
8
-
9
-
10
-
11
-
12
-
13
-
14
-
15
-
16
-
17
-
18
-
19
-
20
-
21
-
22
-
23
-
24
-
25
-
26
-
27
-
28
-
29
-
30
-
31
-
32
-
33
-
34
-
35
-
36
-
37
-
38
-
39
-
40
-
41
-
42
-
43
-
44
-
45
-
46
-
47
-
48
-
49
-
50
-
51
-
52
-
53
-
54
-
55
-
 56
56 -
 57
57 -
 58
58 -
 59
59 -
 60
60 -
 61
61 -
 62
62 -
 63
63 -
 64
64 -
 65
65 -
 66
66 -
67
-
68
-
69
-
70
-
71
-
72
-
73
-
74
-
75
-
76
-
77
-
78
-
79
-
80
-
81
-
82
 |
 |
Removing and Replacing Parts
4-19
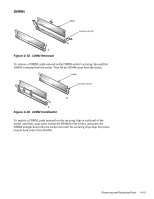
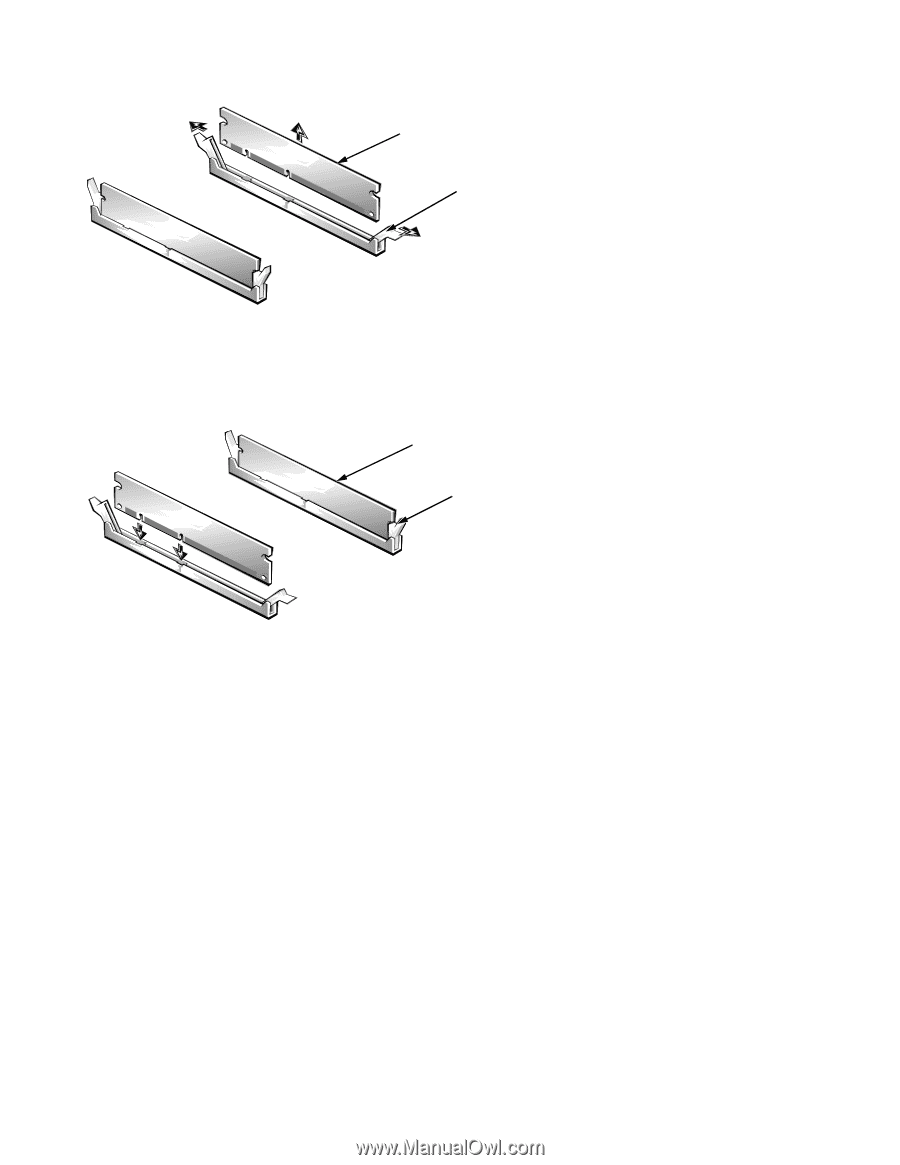
DIMMs
Figure 4-18.
DIMM Removal
To remove a DIMM, push outward on the DIMM socket’s securing clips until the
DIMM is released from its socket. Then lift the DIMM away from the socket.
Figure 4-19.
DIMM Installation
To replace a DIMM, push outward on the securing clips at each end of the
socket until they snap open. Orient the DIMM to the socket, and press the
DIMM straight down into the socket slot until the securing clips snap into place
around both ends of the DIMM.
1.
securing clip (2)
2.
DIMM
securing clip (2)
1.
2.
DIMM