Dell PowerEdge 4100 Service Manual - Page 50
Drive-Mounting Rails Removal
 |
View all Dell PowerEdge 4100 manuals
Add to My Manuals
Save this manual to your list of manuals |
Page 50 highlights
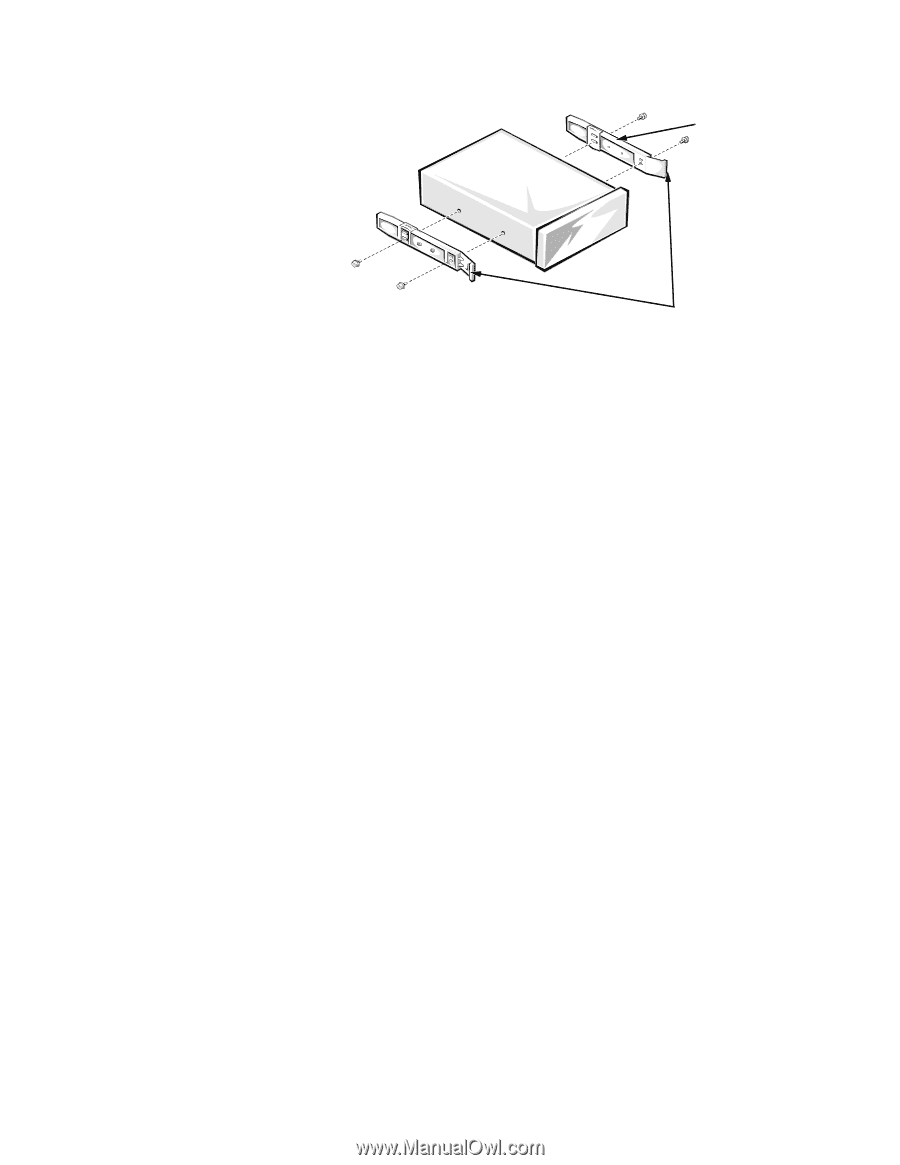
3. Remove the drive-mounting rails from the drive (see Figure 4-7). drive-mounting rails (2) Figure 4-7. Drive-Mounting Rails Removal drive-release tabs 4. If the drive is a SCSI drive, record the setting of the SCSI address jumpers and SCSI bus termination jumper. Some drives use an adapter between the SCSI cable and the drive connector. Check the back of the old drive for an adapter. If present, remove the adapter and retain it for use on the new drive. When reinstalling the SCSI drive, set the SCSI address jumpers and the SCSI bus termination jumpers to the settings you recorded. 4-8 Dell PowerEdge 4100/180 and 4100/200 Systems Service Manual
-
 1
1 -
2
-
3
-
4
-
5
-
6
-
7
-
8
-
9
-
10
-
11
-
12
-
13
-
14
-
15
-
16
-
17
-
18
-
19
-
20
-
21
-
22
-
23
-
24
-
25
-
26
-
27
-
28
-
29
-
30
-
31
-
32
-
33
-
34
-
35
-
36
-
37
-
38
-
39
-
40
-
41
-
42
-
43
-
44
-
 45
45 -
 46
46 -
 47
47 -
 48
48 -
 49
49 -
 50
50 -
 51
51 -
 52
52 -
 53
53 -
 54
54 -
 55
55 -
56
-
57
-
58
-
59
-
60
-
61
-
62
-
63
-
64
-
65
-
66
-
67
-
68
-
69
-
70
-
71
-
72
-
73
-
74
-
75
-
76
-
77
-
78
-
79
-
80
-
81
-
82
 |
 |
4-8
Dell PowerEdge 4100/180 and 4100/200 Systems Service Manual
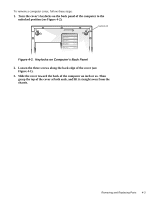
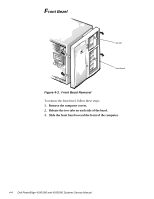
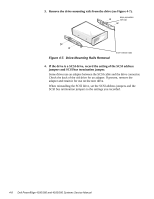
3.
Remove the drive-mounting rails from the drive (see Figure 4-7).
Figure 4-7.
Drive-Mounting Rails Removal
4.
If the drive is a SCSI drive, record the setting of the SCSI address
jumpers and SCSI bus termination jumper.
Some drives use an adapter between the SCSI cable and the drive connector.
Check the back of the old drive for an adapter. If present, remove the
adapter and retain it for use on the new drive.
When reinstalling the SCSI drive, set the SCSI address jumpers and the
SCSI bus termination jumpers to the settings you recorded.
drive-release tabs
drive-mounting
rails (2)