Dell PowerEdge 4350 Dell PowerEdge 4350 Systems Installation and Troubleshooti - Page 4
I|u²hohnwulvnd²vw|wduµ²
 |
View all Dell PowerEdge 4350 manuals
Add to My Manuals
Save this manual to your list of manuals |
-
 1
1 -
 2
2 -
 3
3 -
 4
4 -
 5
5 -
 6
6 -
 7
7 -
 8
8 -
 9
9 -
 10
10 -
11
-
12
-
13
-
14
-
15
-
16
-
17
-
18
-
19
-
20
-
21
-
22
-
23
-
24
-
25
-
26
-
27
-
28
-
29
-
30
-
31
-
32
-
33
-
34
-
35
-
36
-
37
-
38
-
39
-
40
-
41
-
42
-
43
-
44
-
45
-
46
-
47
-
48
-
49
-
50
-
51
-
52
-
53
-
54
-
55
-
56
-
57
-
58
-
59
-
60
-
61
-
62
-
63
-
64
-
65
-
66
-
67
-
68
-
69
-
70
-
71
-
72
-
73
-
74
-
75
-
76
-
77
-
78
-
79
-
80
-
81
-
82
-
83
-
84
-
85
-
86
-
87
-
88
-
89
-
90
-
91
-
92
-
93
-
94
-
95
-
96
-
97
-
98
-
99
-
100
-
101
-
102
-
103
-
104
-
105
-
106
-
107
-
108
-
109
-
110
-
111
-
112
-
113
-
114
-
115
-
116
-
117
-
118
-
119
-
120
-
121
-
122
-
123
-
124
-
125
-
126
-
127
-
128
-
129
-
130
-
131
-
132
-
133
-
134
-
135
-
136
-
137
-
138
-
139
-
140
-
141
-
142
-
143
-
144
-
145
-
146
-
147
-
148
-
149
-
150
-
151
-
152
-
153
-
154
-
155
-
156
-
157
-
158
-
159
-
160
-
161
-
162
-
163
-
164
-
165
-
166
-
167
-
168
-
169
-
170
-
171
-
172
-
173
-
174
-
175
-
176
-
177
-
178
-
179
-
180
-
181
-
182
-
183
-
184
-
185
-
186
-
187
-
188
-
189
-
190
-
191
-
192
-
193
-
194
-
195
-
196
-
197
-
198
-
199
-
200
-
201
-
202
-
203
-
204
-
205
-
206
-
207
-
208
 |
 |

vi
9$51,1*±²’HWWD²V\VWHP²NDQ²KD²IOHUD²QlWNDEODUµ²(Q²EHK|ULJ²VHUYLFHWHNQLNHU²
PnVWH²NRSSOD²ORVV²DOOD²QlWNDEODU²LQQDQ²VHUYLFH²XWI|UV²I|U²DWW²PLQVND²ULVNHQ²
I|U²HOHNWULVND²VW|WDUµ²
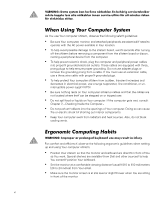
:KHQ±8VLQJ±<RXU±&RPSXWHU±6\VWHP
As you use your computer system, observe the following safety guidelines:
²
Be sure your computer, monitor, and attached peripherals are electrically rated to
operate with the AC power available in your location.
²
To help avoid possible damage to the system board, wait 5 seconds after turning
off the system before removing a component from the system board or discon-
necting a peripheral device from the computer.
²
To help prevent electric shock, plug the computer and peripheral power cables
into properly grounded electrical outlets. These cables are equipped with three-
prong plugs to help ensure proper grounding. Do not use adapter plugs or
remove the grounding prong from a cable. If you must use an extension cable,
use a three-wire cable with properly grounded plugs.
²
To help protect your computer system from sudden, transient increases and
decreases in electrical power, use a surge suppressor, line conditioner, or un-
interruptible power supply (UPS).
²
Be sure nothing rests on your computer system±s cables and that the cables are
not located where they can be stepped on or tripped over.
²
Do not spill food or liquids on your computer. If the computer gets wet, consult
Chapter 7, ²Checking Inside the Computer.³
²
Do not push any objects into the openings of your computer. Doing so can cause
fire or electric shock by shorting out interior components.
²
Keep your computer away from radiators and heat sources. Also, do not block
cooling vents.
(UJRQRPLF±&RPSXWLQJ±+DELWV
:$51,1*±²,PSURSHU²RU²SURORQJHG²NH\ERDUG²XVH²PD\²UHVXOW²LQ²LQMXU\µ
For comfort and efficiency, observe the following ergonomic guidelines when setting
up and using your computer system:
²
Position your system so that the monitor and keyboard are directly in front of you
as you work. Special shelves are available (from Dell and other sources) to help
you correctly position your keyboard.
²
Set the monitor at a comfortable viewing distance (usually 510 to 610 millimeters
[20 to 24 inches] from your eyes).
²
Make sure the monitor screen is at eye level or slightly lower when you are sitting
in front of the monitor.