Dell PowerEdge T30 Owners Manual - Page 21
Initial system setup and configuration, Setting up your system
 |
View all Dell PowerEdge T30 manuals
Add to My Manuals
Save this manual to your list of manuals |
Page 21 highlights
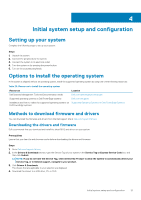
4 Initial system setup and configuration Setting up your system Complete the following steps to set up your system: Steps 1. Unpack the system. 2. Connect the peripherals to the system. 3. Connect the system to its electrical outlet. 4. Turn the system on by pressing the power button. 5. Turn on the attached peripherals. Options to install the operating system If the system is shipped without an operating system, install the supported operating system by using one of the following resources: Table 20. Resources to install the operating system Resources Location Dell Systems Management Tools and Documentation media Dell.com/operatingsystemmanuals Supported operating systems on Dell PowerEdge systems Dell.com/ossupport Installation and How-to videos for supported operating systems on Supported Operating Systems for Dell PowerEdge Systems Dell PowerEdge systems Methods to download firmware and drivers You can download the firmware and drivers from the Dell support site at Dell.com/support/drivers. Downloading the drivers and firmware Dell recommends that you download and install the latest BIOS and drivers on your system. Prerequisites Ensure that you clear the web browser cache before downloading the drivers and firmware. Steps 1. Go to Dell.com/support/drivers. 2. In the Drivers & Downloads section, type the Service Tag of your system in the Service Tag or Express Service Code box, and then click Submit. NOTE: If you do not have the Service Tag, select Detect My Product to allow the system to automatically detect your Service Tag, or in General support, navigate to your product. 3. Click Drivers & Downloads. The drivers that are applicable to your selection are displayed. 4. Download the drivers to a USB drive, CD, or DVD. Initial system setup and configuration 21
-
 1
1 -
2
-
3
-
4
-
5
-
6
-
7
-
8
-
9
-
10
-
11
-
12
-
13
-
14
-
15
-
 16
16 -
 17
17 -
 18
18 -
 19
19 -
 20
20 -
 21
21 -
 22
22 -
 23
23 -
 24
24 -
 25
25 -
 26
26 -
27
-
28
-
29
-
30
-
31
-
32
-
33
-
34
-
35
-
36
-
37
-
38
-
39
-
40
-
41
-
42
-
43
-
44
-
45
-
46
-
47
-
48
-
49
-
50
-
51
-
52
-
53
-
54
-
55
-
56
-
57
-
58
-
59
-
60
-
61
-
62
-
63
-
64
-
65
-
66
-
67
-
68
-
69
-
70
-
71
-
72
-
73
-
74
-
75
-
76
-
77
-
78
-
79
-
80
-
81
-
82
-
83
-
84
-
85
-
86
-
87
-
88
-
89
-
90
-
91
-
92
-
93
-
94
-
95
-
96
-
97
-
98
-
99
-
100
-
101
-
102
-
103
 |
 |