Dell PowerEdge T30 Owners Manual - Page 54
Removing a 2.5-inch hard drive from the optical drive bay, Next steps
 |
View all Dell PowerEdge T30 manuals
Add to My Manuals
Save this manual to your list of manuals |
Page 54 highlights
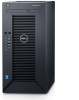
Figure 21. Removing a 2.5-inch hard drive from the optical drive bay a. 2.5-inch hard drive screws (8) NOTE: The screws used to secure the hard drive to the hard drive cage are available on the front of the hard drive cage. Next steps 1. Connect the power and data cables to the hard drive in the optical drive bay. 2. Install a 2.5-inch hard drive in the optical drive bay. 3. Follow the procedure listed in the After working inside your system section. Related tasks Before working inside your system Removing the hard drive cage Installing a 2.5-inch hard drive(s) in the optical drive bay After working inside your system Related reference Safety instructions 54 Installing and removing system components
-
 1
1 -
2
-
3
-
4
-
5
-
6
-
7
-
8
-
9
-
10
-
11
-
12
-
13
-
14
-
15
-
16
-
17
-
18
-
19
-
20
-
21
-
22
-
23
-
24
-
25
-
26
-
27
-
28
-
29
-
30
-
31
-
32
-
33
-
34
-
35
-
36
-
37
-
38
-
39
-
40
-
41
-
42
-
43
-
44
-
45
-
46
-
47
-
48
-
 49
49 -
 50
50 -
 51
51 -
 52
52 -
 53
53 -
 54
54 -
 55
55 -
 56
56 -
 57
57 -
 58
58 -
 59
59 -
60
-
61
-
62
-
63
-
64
-
65
-
66
-
67
-
68
-
69
-
70
-
71
-
72
-
73
-
74
-
75
-
76
-
77
-
78
-
79
-
80
-
81
-
82
-
83
-
84
-
85
-
86
-
87
-
88
-
89
-
90
-
91
-
92
-
93
-
94
-
95
-
96
-
97
-
98
-
99
-
100
-
101
-
102
-
103
 |
 |

Figure 21. Removing a 2.5-inch hard drive from the optical drive bay
a.
2.5-inch hard drive screws (8)
NOTE:
The screws used to secure the hard drive to the hard drive cage are available on the front of the hard drive
cage.
Next steps
1.
Connect the power and data cables to the hard drive in the optical drive bay.
2.
Install a 2.5-inch hard drive in the optical drive bay.
3.
Follow the procedure listed in the After working inside your system section.
Related tasks
Before working inside your system
Removing the hard drive cage
Installing a 2.5-inch hard drive(s) in the optical drive bay
After working inside your system
Related reference
Safety instructions
54
Installing and removing system components