Dell PowerEdge T30 Owners Manual - Page 49
Removing the hard drive cage
 |
View all Dell PowerEdge T30 manuals
Add to My Manuals
Save this manual to your list of manuals |
Page 49 highlights
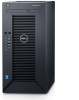
Choosing the right hard drive type depends on the usage pattern. Improper use of entry-level hard drives (including workloads exceeding 550 TB/year) leads to significant risk and increases the failure rate of the drives. Due to industry advances, in some cases, the larger capacity drives have been changed to a larger sector size. The larger sector size can have impacts on operating systems and applications. For more information about these hard drives, see the 512e and 4Kn Disk Formats white paper and 4K Sector HDD FAQ document at Dell.com/poweredgemanuals. When you format a hard drive, allow enough time for the formatting to be complete. Be aware that high-capacity hard drives can take a long time to format. Removing the hard drive cage Prerequisites CAUTION: Many repairs may only be done by a certified service technician. You should only perform troubleshooting and simple repairs as authorized in your product documentation, or as directed by the online or telephone service and support team. Damage due to servicing that is not authorized by Dell is not covered by your warranty. Read and follow the safety instructions that are shipped with your product. 1. Follow the safety guidelines listed in the Safety instructions section. 2. Follow the procedure listed in the Before working inside your system section. 3. If applicable, remove the power and data cables from the hard drives in the hard drive cage. 4. Remove the bezel. Steps Slide and hold the hard drive cage latch and pull the hard drive cage out of the system. Figure 17. Removing the hard drive cage Next steps 1. Install the hard drive cage. 2. Follow the procedure listed in the After working inside your system section. Related tasks Before working inside your system Removing the bezel Installing the hard drive cage After working inside your system Related reference Safety instructions Installing and removing system components 49
-
 1
1 -
2
-
3
-
4
-
5
-
6
-
7
-
8
-
9
-
10
-
11
-
12
-
13
-
14
-
15
-
16
-
17
-
18
-
19
-
20
-
21
-
22
-
23
-
24
-
25
-
26
-
27
-
28
-
29
-
30
-
31
-
32
-
33
-
34
-
35
-
36
-
37
-
38
-
39
-
40
-
41
-
42
-
43
-
 44
44 -
 45
45 -
 46
46 -
 47
47 -
 48
48 -
 49
49 -
 50
50 -
 51
51 -
 52
52 -
 53
53 -
 54
54 -
55
-
56
-
57
-
58
-
59
-
60
-
61
-
62
-
63
-
64
-
65
-
66
-
67
-
68
-
69
-
70
-
71
-
72
-
73
-
74
-
75
-
76
-
77
-
78
-
79
-
80
-
81
-
82
-
83
-
84
-
85
-
86
-
87
-
88
-
89
-
90
-
91
-
92
-
93
-
94
-
95
-
96
-
97
-
98
-
99
-
100
-
101
-
102
-
103
 |
 |
