Dell PowerEdge T30 Owners Manual - Page 30
BIOS recovery, BIOS recovery using USB key, Trusted Platform Module specification
 |
View all Dell PowerEdge T30 manuals
Add to My Manuals
Save this manual to your list of manuals |
Page 30 highlights
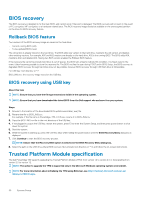
BIOS recovery The BIOS recovery is designed to fix the main BIOS, and cannot work if the boot is damaged. The BIOS recovery will not work in the event of EC corruption, ME corruption, or a hardware related issue. The BIOS recovery image should be available on the unencrypted partition on the drive for BIOS recovery feature. Rollback BIOS feature Two versions of the BIOS recovery image are saved on the hard drive: • Current running BIOS (old) • To-be-updated BIOS (new) The old version is already stored on the hard drive. The BIOS adds new version to the hard drive, maintains the old version, and deletes other existing versions. For example, A00 and A02 versions are already on the hard drive, A02 is the running BIOS. The BIOS adds A04, maintains A02, and deletes A00. Having two BIOS version enables the Rollback BIOS feature. If the recovery file cannot be stored (hard drive is out of space), the BIOS sets a flag to indicate this condition. The flag is reset in the event it later becomes possible to store the recovery file. The BIOS notifies the user during POST and in BIOS Setup, the BIOS recovery is degraded. BIOS recovery through hard drive may not be possible, however BIOS recovery through USB flash drive is still possible. For USB key: root directory or "\" BIOS_IMG.rcv: the recovery image stored on the USB key. BIOS recovery using USB key About this task NOTE: Ensure that you have the file type extensions visible in the operating system. NOTE: Ensure that you have downloaded the latest BIOS from the Dell support site and save it on your system. Steps 1. Browse to the location of the downloaded BIOS update executable (.exe) file. 2. Rename the file to BIOS_IMG.rcv. For example, if the file name is PowerEdge_T30_0.0.5.exe, rename it to BIOS_IMG.rcv 3. Copy the BIOS_IMG.rcv file to the root directory of the USB key. 4. If not plugged in, plug in the USB key, restart the system, press F2 to enter the System Setup, and then press power button to shut down the system. 5. Start the system. 6. While the system is starting up, press the Ctrl+Esc keys while holding the power button until the BIOS Recovery Menu dialog box is displayed. 7. Click Continue to start the BIOS recovery process. NOTE: Ensure that the Recovery BIOS option is selected in the BIOS Recovery Menu dialog box. 8. Select the path on the USB drive where BIOS recovery file is stored( root directory or "\") and follow the on-screen instructions. Trusted Platform Module specification The Dell PowerEdge T30 supports upgrading the Trusted Platform Module (TPM) from version 1.2 to version 2.0 or downgrading from version 2.0 to version 1.2. NOTE: The option to upgrade the TPM is supported only in the Microsoft Windows operating system environment. NOTE: For more information about initializing the TPM using Bitlocker, see http://technet.microsoft.com/en-us/ library/cc753140.aspx. 30 System Setup
-
 1
1 -
2
-
3
-
4
-
5
-
6
-
7
-
8
-
9
-
10
-
11
-
12
-
13
-
14
-
15
-
16
-
17
-
18
-
19
-
20
-
21
-
22
-
23
-
24
-
 25
25 -
 26
26 -
 27
27 -
 28
28 -
 29
29 -
 30
30 -
 31
31 -
 32
32 -
 33
33 -
 34
34 -
 35
35 -
36
-
37
-
38
-
39
-
40
-
41
-
42
-
43
-
44
-
45
-
46
-
47
-
48
-
49
-
50
-
51
-
52
-
53
-
54
-
55
-
56
-
57
-
58
-
59
-
60
-
61
-
62
-
63
-
64
-
65
-
66
-
67
-
68
-
69
-
70
-
71
-
72
-
73
-
74
-
75
-
76
-
77
-
78
-
79
-
80
-
81
-
82
-
83
-
84
-
85
-
86
-
87
-
88
-
89
-
90
-
91
-
92
-
93
-
94
-
95
-
96
-
97
-
98
-
99
-
100
-
101
-
102
-
103
 |
 |
