Dell TL2000 User Guide - Page 159
Configuring I/O Stations and Reserving Slots, Export Media, Dedicated Cleaning Slot
 |
View all Dell TL2000 manuals
Add to My Manuals
Save this manual to your list of manuals |
Page 159 highlights
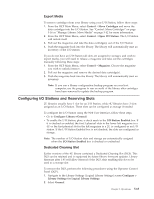
Export Media To remove cartridges from your library using your I/O Station, follow these steps: 1. From the OCP Main Menu, select Control → Move Cartridges and move the data cartridges into the I/O Station. See "Control: Move Cartridges" on page 5-16 or "Manage Library: Move Media" on page 5-42 for more information. 2. From the OCP Main Menu, select Control → Open I/O Station. The I/O Station will unlock itself 3. Pull out the magazine and take the data cartridge(s) out of the I/O Station 4. Push the magazine back into the library. The library will automatically start an inventory of the I/O station. If you do not have an I/O Station (all slots are assigned to storage), and wish to export media, you will need to release a magazine and take out the cartridges manually following these steps: 1. From the OCP Main Menu, select Control → Magazine. Choose the magazine you wish to unlock/remove. 2. Pull out the magazine and remove the desired data cartridge(s). 3. Push the magazine back into the library. The library will automatically start an inventory. Note: If you run a library configuration backup program on your host computer, use the program to run an audit of the library after cartridges have been removed to update the backup program. Configuring I/O Stations and Reserving Slots 2U libraries usually have 1 slot for an I/O Station, while 4U libraries have 3 slots assigned as an I/O Station. These slots can be configured as storage if needed. To configure the I/O Station using the Web User Interface, follow these steps. v Go to Configure Library->General. v To enable the I/O Station, place a check mark in the I/O Station Enabled box. If it is checked as enabled, the first 3 physical slots in the lower left magazine in a 4U or the first physical slot in the left magazine in a 2U is configured as an I/O station. If the I/O Station Enabled box is not checked, the slots are configured as storage. Note: The number of I/O Station slots and storage are automatically assigned when the I/O Station Enabled box is checked or unchecked. Dedicated Cleaning Slot Earlier versions of the 4U library contained a Dedicated Cleaning Slot (DCS). This DCS can be retained and is supported by future library firmware updates. Library firmware after 1.95 will allow removal of the DCS, thus enabling this slot to be used as a storage slot. To remove the DCS, perform the following procedures using the Operator Control Panel (OCP). 1. Navigate to the Library Settings (Logical Library Settings) screen Configure > Library Settings (or Logical Library Settings. 2. Select General. Chapter 5. Operations 5-65
-
 1
1 -
2
-
3
-
4
-
5
-
6
-
7
-
8
-
9
-
10
-
11
-
12
-
13
-
14
-
15
-
16
-
17
-
18
-
19
-
20
-
21
-
22
-
23
-
24
-
25
-
26
-
27
-
28
-
29
-
30
-
31
-
32
-
33
-
34
-
35
-
36
-
37
-
38
-
39
-
40
-
41
-
42
-
43
-
44
-
45
-
46
-
47
-
48
-
49
-
50
-
51
-
52
-
53
-
54
-
55
-
56
-
57
-
58
-
59
-
60
-
61
-
62
-
63
-
64
-
65
-
66
-
67
-
68
-
69
-
70
-
71
-
72
-
73
-
74
-
75
-
76
-
77
-
78
-
79
-
80
-
81
-
82
-
83
-
84
-
85
-
86
-
87
-
88
-
89
-
90
-
91
-
92
-
93
-
94
-
95
-
96
-
97
-
98
-
99
-
100
-
101
-
102
-
103
-
104
-
105
-
106
-
107
-
108
-
109
-
110
-
111
-
112
-
113
-
114
-
115
-
116
-
117
-
118
-
119
-
120
-
121
-
122
-
123
-
124
-
125
-
126
-
127
-
128
-
129
-
130
-
131
-
132
-
133
-
134
-
135
-
136
-
137
-
138
-
139
-
140
-
141
-
142
-
143
-
144
-
145
-
146
-
147
-
148
-
149
-
150
-
151
-
152
-
153
-
 154
154 -
 155
155 -
 156
156 -
 157
157 -
 158
158 -
 159
159 -
 160
160 -
 161
161 -
 162
162 -
 163
163 -
 164
164 -
165
-
166
-
167
-
168
-
169
-
170
-
171
-
172
-
173
-
174
-
175
-
176
-
177
-
178
-
179
-
180
-
181
-
182
-
183
-
184
-
185
-
186
-
187
-
188
-
189
-
190
-
191
-
192
-
193
-
194
-
195
-
196
-
197
-
198
-
199
-
200
-
201
-
202
-
203
-
204
-
205
-
206
-
207
-
208
-
209
-
210
-
211
-
212
-
213
-
214
-
215
-
216
-
217
-
218
-
219
-
220
-
221
-
222
-
223
-
224
-
225
-
226
-
227
-
228
-
229
-
230
-
231
-
232
-
233
-
234
-
235
-
236
-
237
-
238
-
239
-
240
-
241
-
242
-
243
-
244
-
245
-
246
-
247
-
248
-
249
-
250
-
251
-
252
-
253
-
254
-
255
-
256
-
257
-
258
-
259
-
260
-
261
-
262
-
263
-
264
-
265
-
266
-
267
-
268
-
269
-
270
-
271
-
272
-
273
-
274
-
275
-
276
-
277
 |
 |