Dell TL2000 User Guide - Page 70
Configuring Your Library, Choosing Your Configuration Method
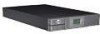 |
View all Dell TL2000 manuals
Add to My Manuals
Save this manual to your list of manuals |
Page 70 highlights
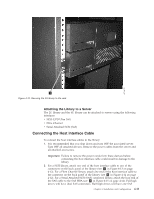
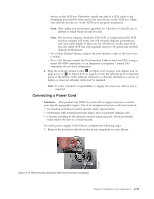
2. Plug one end of the power cord ( 6 in "Connecting the Host Interface Cable" on page 4-11) into each power supply connector on the back panel of the library. 3. Plug the other end of each power cord into the nearest properly grounded power outlet. Use separate power sources for each power supply for redundant power. Attention: To disconnect all power from the library, remove the power cord from each outlet. The power button removes power from portions of the library and the drives, but the power supplies still have AC power at their inputs. 4. Remove the protective plastic on the exterior surfaces of the library. 5. Turn ON the library using the power button. Check the Operator Control Panel display to make sure the library is receiving power. If it is not, check the power connections and your power source. During the Power-On Self Test (POST), all four LEDs are illuminated briefly, followed by a flashing Ready LED. When the initialization sequence is complete, the Home screen will be displayed. Configuring Your Library Note: Review the information in "Installation Planning" before configuring your library. The library can be configured using the Operator Control Panel and/or the Web User Interface. The recommended method for configuring your library is using the Web User Interface. Choosing Your Configuration Method If you choose to use the factory defaults for your library configuration, go to "Using Factory Defaults as Your Configuration." If you choose to use the Web User Interface for configuring your library, go to "Configuring Your Library using the Web User Interface" on page 4-15. If you choose to use the Operator Control Panel for configuring your library, go to "Configuring Your Library using the Operator Control Panel" on page 4-31. Write down all library configuration settings on the Appendix G, "Library Configuration Form," on page G-1 for future reference. Using Factory Defaults as Your Configuration The table below shows the main default library settings. If you wish to use the defaults, no other changes need to be made before using your library Item Logical Libraries Active Slots I/O Slots DHCP Internet Protocol Bar Code Label Length Library Mode Default Setting 1 Maximum Enabled Enabled IPv4 Only 8 Random 4-14 Dell PowerVault TL2000 Tape Library and TL4000 Tape Library User's Guide
-
 1
1 -
2
-
3
-
4
-
5
-
6
-
7
-
8
-
9
-
10
-
11
-
12
-
13
-
14
-
15
-
16
-
17
-
18
-
19
-
20
-
21
-
22
-
23
-
24
-
25
-
26
-
27
-
28
-
29
-
30
-
31
-
32
-
33
-
34
-
35
-
36
-
37
-
38
-
39
-
40
-
41
-
42
-
43
-
44
-
45
-
46
-
47
-
48
-
49
-
50
-
51
-
52
-
53
-
54
-
55
-
56
-
57
-
58
-
59
-
60
-
61
-
62
-
63
-
64
-
 65
65 -
 66
66 -
 67
67 -
 68
68 -
 69
69 -
 70
70 -
 71
71 -
 72
72 -
 73
73 -
 74
74 -
 75
75 -
76
-
77
-
78
-
79
-
80
-
81
-
82
-
83
-
84
-
85
-
86
-
87
-
88
-
89
-
90
-
91
-
92
-
93
-
94
-
95
-
96
-
97
-
98
-
99
-
100
-
101
-
102
-
103
-
104
-
105
-
106
-
107
-
108
-
109
-
110
-
111
-
112
-
113
-
114
-
115
-
116
-
117
-
118
-
119
-
120
-
121
-
122
-
123
-
124
-
125
-
126
-
127
-
128
-
129
-
130
-
131
-
132
-
133
-
134
-
135
-
136
-
137
-
138
-
139
-
140
-
141
-
142
-
143
-
144
-
145
-
146
-
147
-
148
-
149
-
150
-
151
-
152
-
153
-
154
-
155
-
156
-
157
-
158
-
159
-
160
-
161
-
162
-
163
-
164
-
165
-
166
-
167
-
168
-
169
-
170
-
171
-
172
-
173
-
174
-
175
-
176
-
177
-
178
-
179
-
180
-
181
-
182
-
183
-
184
-
185
-
186
-
187
-
188
-
189
-
190
-
191
-
192
-
193
-
194
-
195
-
196
-
197
-
198
-
199
-
200
-
201
-
202
-
203
-
204
-
205
-
206
-
207
-
208
-
209
-
210
-
211
-
212
-
213
-
214
-
215
-
216
-
217
-
218
-
219
-
220
-
221
-
222
-
223
-
224
-
225
-
226
-
227
-
228
-
229
-
230
-
231
-
232
-
233
-
234
-
235
-
236
-
237
-
238
-
239
-
240
-
241
-
242
-
243
-
244
-
245
-
246
-
247
-
248
-
249
-
250
-
251
-
252
-
253
-
254
-
255
-
256
-
257
-
258
-
259
-
260
-
261
-
262
-
263
-
264
-
265
-
266
-
267
-
268
-
269
-
270
-
271
-
272
-
273
-
274
-
275
-
276
-
277
 |
 |