Epson 1640XL User Manual - Page 30
EPSON Scan window., to close
 |
UPC - 010343833548
View all Epson 1640XL manuals
Add to My Manuals
Save this manual to your list of manuals |
Page 30 highlights
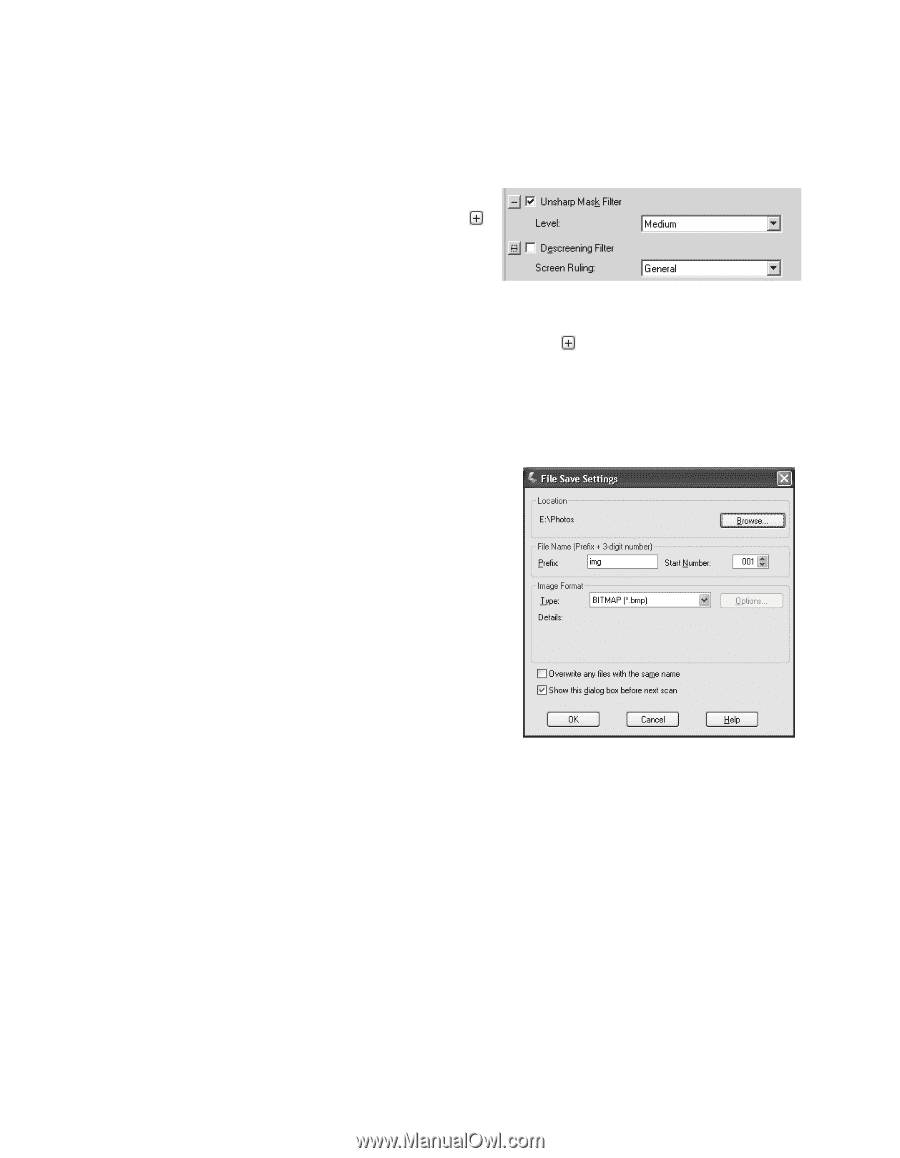
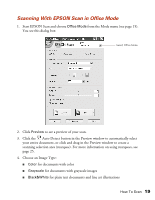
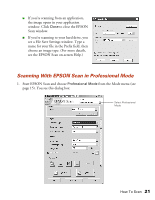
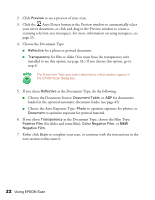
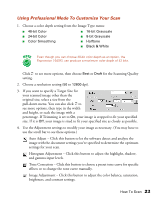
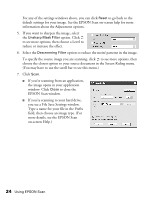
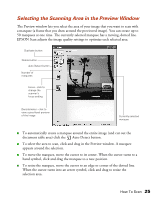
For any of the settings windows above, you can click Reset to go back to the default settings for your image. See the EPSON Scan on-screen help for more information about the Adjustment options. 5. If you want to sharpen the image, select the Unsharp Mask Filter option. Click to see more options, then choose a Level to reduce or increase the effect. 6. Select the Descreening Filter option to reduce the moiré patterns in the image. To specify the source image you are scanning, click to see more options, then choose the closest option to your source document in the Screen Ruling menu. (You may have to use the scroll bar to see this menu.) 7. Click Scan. ■ If you're scanning from an application, the image opens in your application window. Click Close to close the EPSON Scan window. ■ If you're scanning to your hard drive, you see a File Save Settings window. Type a name for your file in the Prefix field, then choose an image type. (For more details, see the EPSON Scan on-screen Help.) 24 Using EPSON Scan
-
 1
1 -
2
-
3
-
4
-
5
-
6
-
7
-
8
-
9
-
10
-
11
-
12
-
13
-
14
-
15
-
16
-
17
-
18
-
19
-
20
-
21
-
22
-
23
-
24
-
 25
25 -
 26
26 -
 27
27 -
 28
28 -
 29
29 -
 30
30 -
 31
31 -
 32
32 -
 33
33 -
 34
34 -
 35
35 -
36
-
37
-
38
-
39
-
40
-
41
-
42
-
43
-
44
-
45
-
46
-
47
-
48
-
49
-
50
-
51
-
52
-
53
-
54
-
55
-
56
-
57
-
58
-
59
-
60
-
61
-
62
-
63
-
64
-
65
-
66
-
67
-
68
-
69
-
70
-
71
-
72
-
73
-
74
-
75
-
76
-
77
-
78
-
79
-
80
-
81
-
82
-
83
-
84
-
85
-
86
-
87
-
88
-
89
-
90
-
91
-
92
-
93
-
94
-
95
-
96
 |
 |