Epson 1640XL User Manual - Page 53
Attach the ADF's connector to, using the enclosed screwdriver
 |
UPC - 010343833548
View all Epson 1640XL manuals
Add to My Manuals
Save this manual to your list of manuals |
Page 53 highlights
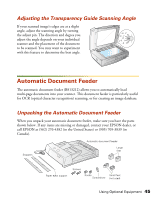
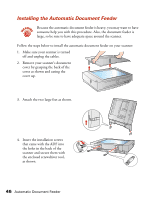
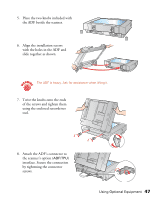
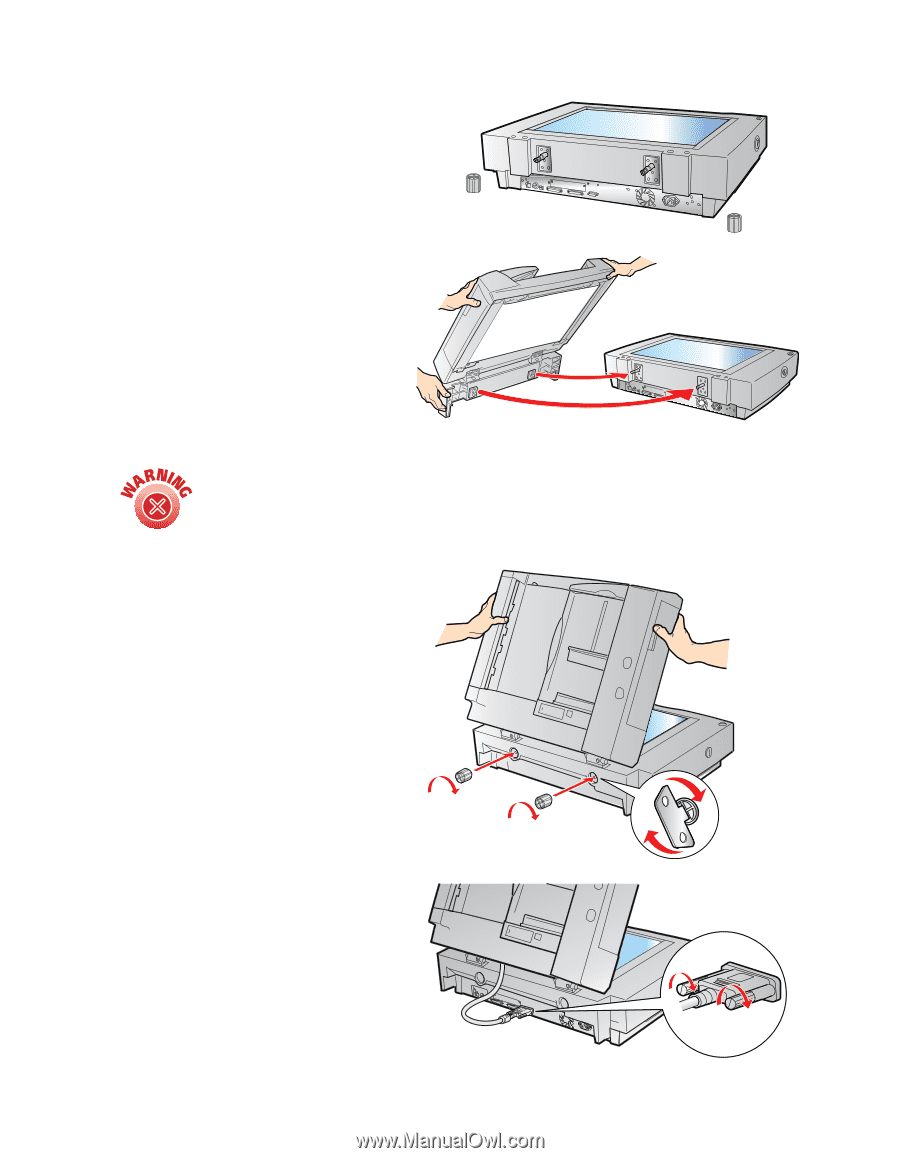
5. Place the two knobs included with the ADF beside the scanner. 6. Align the installation screws with the holes in the ADF and slide together as shown. The ADF is heavy. Ask for assistance when lifting it. 7. Twist the knobs onto the ends of the screws and tighten them using the enclosed screwdriver tool. 8. Attach the ADF's connector to the scanner's option (ADF/TPU) interface. Secure the connection by tightening the connector screws. Using Optional Equipment 47
-
 1
1 -
2
-
3
-
4
-
5
-
6
-
7
-
8
-
9
-
10
-
11
-
12
-
13
-
14
-
15
-
16
-
17
-
18
-
19
-
20
-
21
-
22
-
23
-
24
-
25
-
26
-
27
-
28
-
29
-
30
-
31
-
32
-
33
-
34
-
35
-
36
-
37
-
38
-
39
-
40
-
41
-
42
-
43
-
44
-
45
-
46
-
47
-
 48
48 -
 49
49 -
 50
50 -
 51
51 -
 52
52 -
 53
53 -
 54
54 -
 55
55 -
 56
56 -
 57
57 -
 58
58 -
59
-
60
-
61
-
62
-
63
-
64
-
65
-
66
-
67
-
68
-
69
-
70
-
71
-
72
-
73
-
74
-
75
-
76
-
77
-
78
-
79
-
80
-
81
-
82
-
83
-
84
-
85
-
86
-
87
-
88
-
89
-
90
-
91
-
92
-
93
-
94
-
95
-
96
 |
 |
Using Optional Equipment
47
5.
Place the two knobs included with
the ADF beside the scanner.
6.
Align the installation screws
with the holes in the ADF and
slide together as shown.
7.
Twist the knobs onto the ends
of the screws and tighten them
using the enclosed screwdriver
tool.
8.
Attach the ADF’s connector to
the scanner’s option (
ADF/TPU
)
interface. Secure the connection
by tightening the connector
screws.
The ADF is heavy. Ask for assistance when lifting it.