Epson 3800 Service Manual - Page 202
The adjustment levers are made of resin. Be careful not to tighten, the screws too much.
 |
UPC - 010343862081
View all Epson 3800 manuals
Add to My Manuals
Save this manual to your list of manuals |
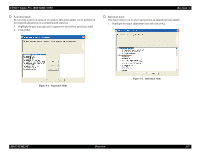
Page 202 highlights
EPSON Stylus Pro 3800/3800C/3850 3. Check the result if the value is within the standard range or not. If it is, the adjustment is not necessary. If not, proceed to the next step to carry out the adjustment. 4. Remove the HOUSING, UPPER. See "4.3.3.12 HOUSING, UPPER" (Page 106). 5. Remove the COVER, CR. See "4.3.9.2 COVER, CR" (Page 150). 6. Loosen the screws (one each) that secure the PG adjustment levers on the left and right side of the carriage unit. 7. Carry out the adjustment as follow: z When T=0.90 contacts with the head: Raise both right and left levers by the same amount. z When T=1.00 does not contact with the head: Lower both right and left levers by the same amount. 8. When the adjustment is completed, tighten the two screws and perform the measurement and adjustment again until the result satisfies the standard. C A U T IO N The adjustment levers are made of resin. Be careful not to tighten the screws too much. adjustment lever Revision A screw Figure 5-10. PG Height Adjustment ADJUSTMENT Mechanical Adjustment 202
-
 1
1 -
2
-
3
-
4
-
5
-
6
-
7
-
8
-
9
-
10
-
11
-
12
-
13
-
14
-
15
-
16
-
17
-
18
-
19
-
20
-
21
-
22
-
23
-
24
-
25
-
26
-
27
-
28
-
29
-
30
-
31
-
32
-
33
-
34
-
35
-
36
-
37
-
38
-
39
-
40
-
41
-
42
-
43
-
44
-
45
-
46
-
47
-
48
-
49
-
50
-
51
-
52
-
53
-
54
-
55
-
56
-
57
-
58
-
59
-
60
-
61
-
62
-
63
-
64
-
65
-
66
-
67
-
68
-
69
-
70
-
71
-
72
-
73
-
74
-
75
-
76
-
77
-
78
-
79
-
80
-
81
-
82
-
83
-
84
-
85
-
86
-
87
-
88
-
89
-
90
-
91
-
92
-
93
-
94
-
95
-
96
-
97
-
98
-
99
-
100
-
101
-
102
-
103
-
104
-
105
-
106
-
107
-
108
-
109
-
110
-
111
-
112
-
113
-
114
-
115
-
116
-
117
-
118
-
119
-
120
-
121
-
122
-
123
-
124
-
125
-
126
-
127
-
128
-
129
-
130
-
131
-
132
-
133
-
134
-
135
-
136
-
137
-
138
-
139
-
140
-
141
-
142
-
143
-
144
-
145
-
146
-
147
-
148
-
149
-
150
-
151
-
152
-
153
-
154
-
155
-
156
-
157
-
158
-
159
-
160
-
161
-
162
-
163
-
164
-
165
-
166
-
167
-
168
-
169
-
170
-
171
-
172
-
173
-
174
-
175
-
176
-
177
-
178
-
179
-
180
-
181
-
182
-
183
-
184
-
185
-
186
-
187
-
188
-
189
-
190
-
191
-
192
-
193
-
194
-
195
-
196
-
 197
197 -
 198
198 -
 199
199 -
 200
200 -
 201
201 -
 202
202 -
 203
203 -
 204
204 -
 205
205 -
 206
206 -
 207
207 -
208
-
209
-
210
-
211
-
212
-
213
-
214
-
215
-
216
-
217
-
218
-
219
-
220
-
221
-
222
-
223
-
224
-
225
-
226
-
227
-
228
-
229
-
230
-
231
-
232
-
233
-
234
-
235
-
236
-
237
-
238
-
239
-
240
-
241
-
242
-
243
-
244
-
245
-
246
-
247
-
248
-
249
-
250
-
251
-
252
-
253
-
254
-
255
-
256
-
257
-
258
-
259
-
260
-
261
-
262
-
263
-
264
-
265
-
266
-
267
-
268
-
269
-
270
-
271
-
272
-
273
-
274
-
275
-
276
-
277
-
278
-
279
-
280
-
281
-
282
-
283
-
284
-
285
-
286
 |
 |
