Epson 4900 Users Guide - Page 129
Changing the Date and Time, Using Maintenance Mode
 |
View all Epson 4900 manuals
Add to My Manuals
Save this manual to your list of manuals |
Page 129 highlights
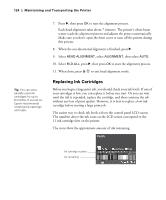
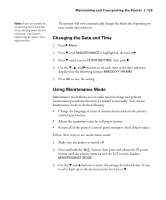
Maintaining and Transporting the Printer | 129 Note: If you are unable to access the clock settings, it has already been set via software. Use Epson NetConfig to make clock adjustments. The printer will now automatically change the black ink depending on your media type selection. Changing the Date and Time 1. Press r Menu. 2. Press d until MAINTENANCE is highlighted, then press r. 3. Press d until you see CLOCK SETTING, then press r. 4. Use the d, u, and r buttons to set each item in the date and time, displayed in the following format: MM/DD/YY HH:MM. 5. Press OK to save the setting. Using Maintenance Mode Maintenance mode allows you to make special settings and perform maintenance procedures that may be needed occasionally. You can use maintenance mode to do the following: • Change the language or units of measurements used on the printer's control panel menus. • Adjust the maximum value for roll paper tension. • Return all of the printer's control panel settings to their default values. Follow these steps to use maintenance mode: 1. Make sure the printer is turned off. 2. Press and hold the button, then press and release the P power button until the printer turns on and the LCD screen displays MAINTENANCE MODE. 3. Use the d and u buttons to select the settings described below. If you need to back up to the previous menu level, press l. 129
-
 1
1 -
2
-
3
-
4
-
5
-
6
-
7
-
8
-
9
-
10
-
11
-
12
-
13
-
14
-
15
-
16
-
17
-
18
-
19
-
20
-
21
-
22
-
23
-
24
-
25
-
26
-
27
-
28
-
29
-
30
-
31
-
32
-
33
-
34
-
35
-
36
-
37
-
38
-
39
-
40
-
41
-
42
-
43
-
44
-
45
-
46
-
47
-
48
-
49
-
50
-
51
-
52
-
53
-
54
-
55
-
56
-
57
-
58
-
59
-
60
-
61
-
62
-
63
-
64
-
65
-
66
-
67
-
68
-
69
-
70
-
71
-
72
-
73
-
74
-
75
-
76
-
77
-
78
-
79
-
80
-
81
-
82
-
83
-
84
-
85
-
86
-
87
-
88
-
89
-
90
-
91
-
92
-
93
-
94
-
95
-
96
-
97
-
98
-
99
-
100
-
101
-
102
-
103
-
104
-
105
-
106
-
107
-
108
-
109
-
110
-
111
-
112
-
113
-
114
-
115
-
116
-
117
-
118
-
119
-
120
-
121
-
122
-
123
-
 124
124 -
 125
125 -
 126
126 -
 127
127 -
 128
128 -
 129
129 -
 130
130 -
 131
131 -
 132
132 -
 133
133 -
 134
134 -
135
-
136
-
137
-
138
-
139
-
140
-
141
-
142
-
143
-
144
-
145
-
146
-
147
-
148
-
149
-
150
-
151
-
152
-
153
-
154
-
155
-
156
-
157
-
158
-
159
-
160
-
161
-
162
-
163
-
164
-
165
-
166
-
167
-
168
-
169
-
170
-
171
-
172
-
173
-
174
 |
 |
