Epson 4900 Users Guide - Page 133
Installing the New Cutter, Insert the new cutter into the holder. Make sure the cutter pin goes into
 |
View all Epson 4900 manuals
Add to My Manuals
Save this manual to your list of manuals |
Page 133 highlights
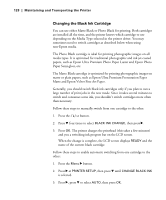
Maintaining and Transporting the Printer | 133 WARNING: The blade is sharp. Be careful when removing it. 5. Loosen the screw holding the cutter in place, then carefully remove the cutter from the printer. 6. Dispose of the cutter in accordance with local regulations. Installing the New Cutter Remove the new blade from its package, then follow these steps to install it: 1. Insert the new cutter into the holder. Make sure the cutter pin goes into the hole. Tighten the screw using a cross-head screwdriver. 133
-
 1
1 -
2
-
3
-
4
-
5
-
6
-
7
-
8
-
9
-
10
-
11
-
12
-
13
-
14
-
15
-
16
-
17
-
18
-
19
-
20
-
21
-
22
-
23
-
24
-
25
-
26
-
27
-
28
-
29
-
30
-
31
-
32
-
33
-
34
-
35
-
36
-
37
-
38
-
39
-
40
-
41
-
42
-
43
-
44
-
45
-
46
-
47
-
48
-
49
-
50
-
51
-
52
-
53
-
54
-
55
-
56
-
57
-
58
-
59
-
60
-
61
-
62
-
63
-
64
-
65
-
66
-
67
-
68
-
69
-
70
-
71
-
72
-
73
-
74
-
75
-
76
-
77
-
78
-
79
-
80
-
81
-
82
-
83
-
84
-
85
-
86
-
87
-
88
-
89
-
90
-
91
-
92
-
93
-
94
-
95
-
96
-
97
-
98
-
99
-
100
-
101
-
102
-
103
-
104
-
105
-
106
-
107
-
108
-
109
-
110
-
111
-
112
-
113
-
114
-
115
-
116
-
117
-
118
-
119
-
120
-
121
-
122
-
123
-
124
-
125
-
126
-
127
-
 128
128 -
 129
129 -
 130
130 -
 131
131 -
 132
132 -
 133
133 -
 134
134 -
 135
135 -
 136
136 -
 137
137 -
 138
138 -
139
-
140
-
141
-
142
-
143
-
144
-
145
-
146
-
147
-
148
-
149
-
150
-
151
-
152
-
153
-
154
-
155
-
156
-
157
-
158
-
159
-
160
-
161
-
162
-
163
-
164
-
165
-
166
-
167
-
168
-
169
-
170
-
171
-
172
-
173
-
174
 |
 |

133
Maintaining and Transporting the Printer
| 133
5.
Loosen the screw holding the cutter in place, then carefully remove the
cutter from the printer.
6.
Dispose of the cutter in accordance with local regulations.
Installing the New Cutter
Remove the new blade from its package, then follow these steps to install it:
1.
Insert the new cutter into the holder. Make sure the cutter pin goes into
the hole. Tighten the screw using a cross-head screwdriver.
WARNING:
The blade is
sharp. Be careful when
removing it.