Epson LX-300II Reference Guide - Page 106
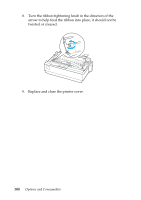
Warning, Remove the used ribbon cartridge from the printer.
 |
View all Epson LX-300II manuals
Add to My Manuals
Save this manual to your list of manuals |
Page 106 highlights
Follow these steps to install or replace the ribbon cartridge: 1. Make sure the printer is turned off. w Warning: If you have just used the printer, the print head may be hot; let it cool for a few minutes before replacing the ribbon cartridge. 2. Open the printer cover to the upright position, then pull it up to remove it. 3. Make sure the print head is in the middle of the printer. (If not, make sure it is not hot, then use your hand to slide it to the middle.) 4. Remove the used ribbon cartridge from the printer. 5. Remove the new ribbon cartridge from its package and turn the ribbon-tightening knob in the direction of the arrow to remove any slack from the ribbon so it is easier to install. 106 Options and Consumables
-
 1
1 -
2
-
3
-
4
-
5
-
6
-
7
-
8
-
9
-
10
-
11
-
12
-
13
-
14
-
15
-
16
-
17
-
18
-
19
-
20
-
21
-
22
-
23
-
24
-
25
-
26
-
27
-
28
-
29
-
30
-
31
-
32
-
33
-
34
-
35
-
36
-
37
-
38
-
39
-
40
-
41
-
42
-
43
-
44
-
45
-
46
-
47
-
48
-
49
-
50
-
51
-
52
-
53
-
54
-
55
-
56
-
57
-
58
-
59
-
60
-
61
-
62
-
63
-
64
-
65
-
66
-
67
-
68
-
69
-
70
-
71
-
72
-
73
-
74
-
75
-
76
-
77
-
78
-
79
-
80
-
81
-
82
-
83
-
84
-
85
-
86
-
87
-
88
-
89
-
90
-
91
-
92
-
93
-
94
-
95
-
96
-
97
-
98
-
99
-
100
-
 101
101 -
 102
102 -
 103
103 -
 104
104 -
 105
105 -
 106
106 -
 107
107 -
 108
108 -
 109
109 -
 110
110 -
 111
111 -
112
-
113
-
114
-
115
-
116
-
117
-
118
-
119
-
120
-
121
-
122
-
123
-
124
-
125
-
126
-
127
-
128
-
129
 |
 |
106
Options and Consumables
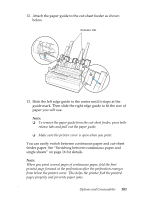
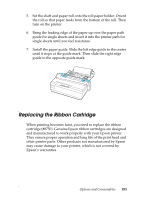
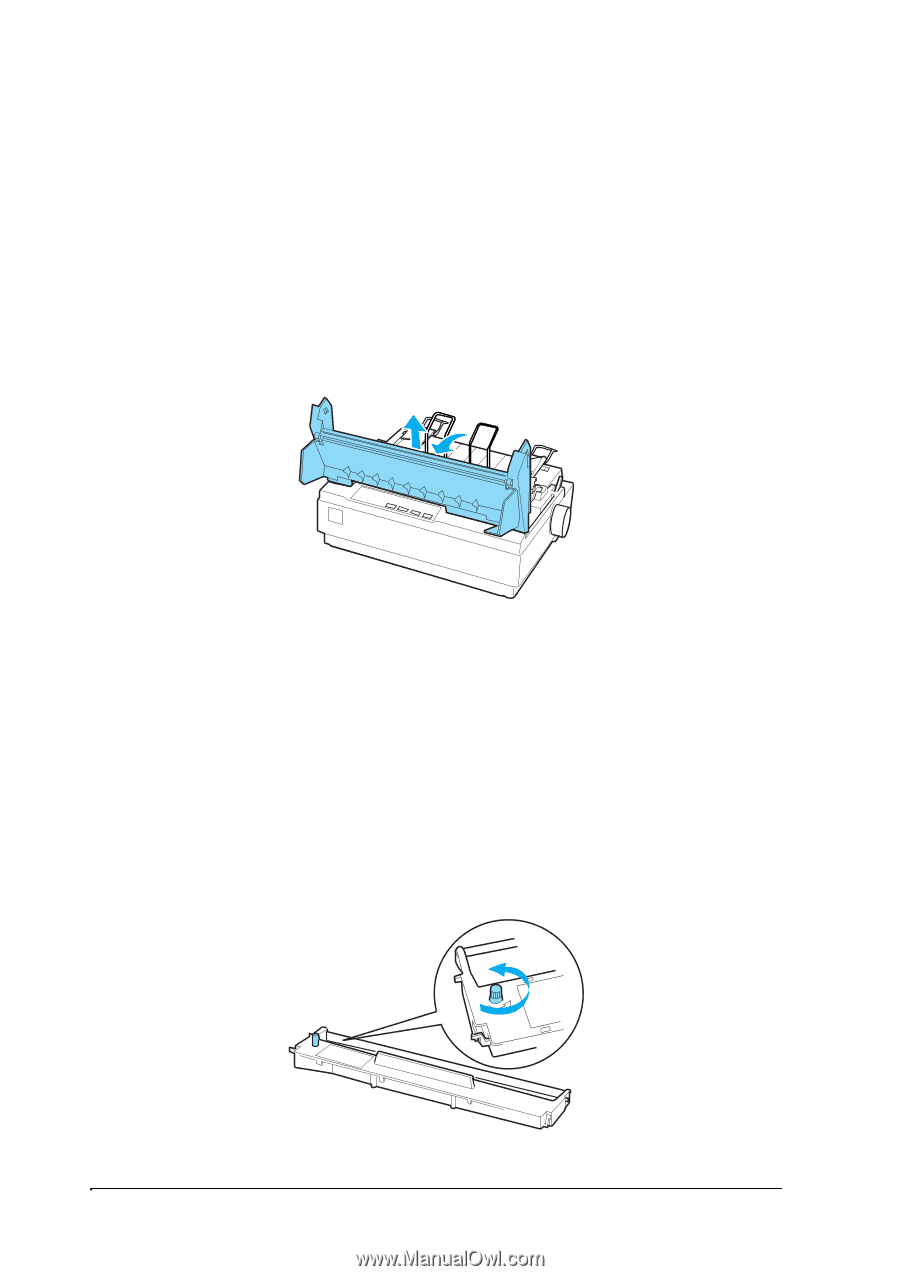
Follow these steps to install or replace the ribbon cartridge:
1.
Make sure the printer is turned off.
w
Warning:
If you have just used the printer, the print head may be hot; let it
cool for a few minutes before replacing the ribbon cartridge.
2.
Open the printer cover to the upright position, then pull it
up to remove it.
3.
Make sure the print head is in the middle of the printer.
(If not, make sure it is not hot, then use your hand to slide it
to the middle.)
4.
Remove the used ribbon cartridge from the printer.
5.
Remove the new ribbon cartridge from its package and turn
the ribbon-tightening knob in the direction of the arrow to
remove any slack from the ribbon so it is easier to install.