Epson LX-300II Reference Guide - Page 94
Printing a self test, with the printer. See Problems and solutions
 |
View all Epson LX-300II manuals
Add to My Manuals
Save this manual to your list of manuals |
Page 94 highlights
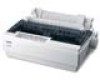
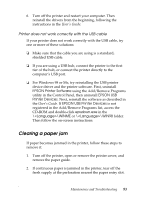
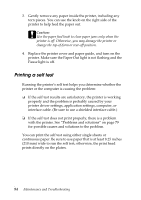
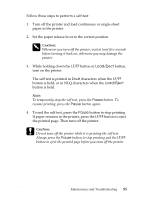
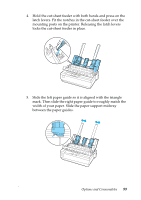
3. Gently remove any paper inside the printer, including any torn pieces. You can use the knob on the right side of the printer to help feed the paper out. cCaution: Use the paper feed knob to clear paper jams only when the printer is off. Otherwise, you may damage the printer or change the top-of-form or tear-off position. 4. Replace the printer cover and paper guide, and turn on the printer. Make sure the Paper Out light is not flashing and the Pause light is off. Printing a self test Running the printer's self test helps you determine whether the printer or the computer is causing the problem: ❏ If the self test results are satisfactory, the printer is working properly and the problem is probably caused by your printer driver settings, application settings, computer, or interface cable. (Be sure to use a shielded interface cable.) ❏ If the self test does not print properly, there is a problem with the printer. See "Problems and solutions" on page 79 for possible causes and solutions to the problem. You can print the self test using either single sheets or continuous paper. Be sure to use paper that is at least 8.25 inches (210 mm) wide to run the self test; otherwise, the print head prints directly on the platen. 94 Maintenance and Troubleshooting
-
 1
1 -
2
-
3
-
4
-
5
-
6
-
7
-
8
-
9
-
10
-
11
-
12
-
13
-
14
-
15
-
16
-
17
-
18
-
19
-
20
-
21
-
22
-
23
-
24
-
25
-
26
-
27
-
28
-
29
-
30
-
31
-
32
-
33
-
34
-
35
-
36
-
37
-
38
-
39
-
40
-
41
-
42
-
43
-
44
-
45
-
46
-
47
-
48
-
49
-
50
-
51
-
52
-
53
-
54
-
55
-
56
-
57
-
58
-
59
-
60
-
61
-
62
-
63
-
64
-
65
-
66
-
67
-
68
-
69
-
70
-
71
-
72
-
73
-
74
-
75
-
76
-
77
-
78
-
79
-
80
-
81
-
82
-
83
-
84
-
85
-
86
-
87
-
88
-
 89
89 -
 90
90 -
 91
91 -
 92
92 -
 93
93 -
 94
94 -
 95
95 -
 96
96 -
 97
97 -
 98
98 -
 99
99 -
100
-
101
-
102
-
103
-
104
-
105
-
106
-
107
-
108
-
109
-
110
-
111
-
112
-
113
-
114
-
115
-
116
-
117
-
118
-
119
-
120
-
121
-
122
-
123
-
124
-
125
-
126
-
127
-
128
-
129
 |
 |