Epson LX-300II Reference Guide - Page 18
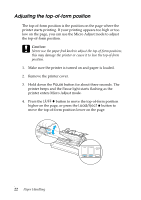
Lower the tractor onto the mounting slots at the top of the, printer as shown below
 |
View all Epson LX-300II manuals
Add to My Manuals
Save this manual to your list of manuals |
Page 18 highlights
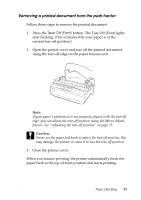
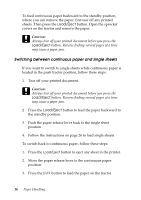
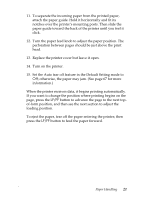
5. To remove the tractor from the push position, gently squeeze the lock tabs on both sides and then rotate the tractor up to pull it away from the printer. 6. Lower the tractor onto the mounting slots at the top of the printer as shown below, and tilt it back until you feel it lock into place. 18 Paper Handling
-
 1
1 -
2
-
3
-
4
-
5
-
6
-
7
-
8
-
9
-
10
-
11
-
12
-
 13
13 -
 14
14 -
 15
15 -
 16
16 -
 17
17 -
 18
18 -
 19
19 -
 20
20 -
 21
21 -
 22
22 -
 23
23 -
24
-
25
-
26
-
27
-
28
-
29
-
30
-
31
-
32
-
33
-
34
-
35
-
36
-
37
-
38
-
39
-
40
-
41
-
42
-
43
-
44
-
45
-
46
-
47
-
48
-
49
-
50
-
51
-
52
-
53
-
54
-
55
-
56
-
57
-
58
-
59
-
60
-
61
-
62
-
63
-
64
-
65
-
66
-
67
-
68
-
69
-
70
-
71
-
72
-
73
-
74
-
75
-
76
-
77
-
78
-
79
-
80
-
81
-
82
-
83
-
84
-
85
-
86
-
87
-
88
-
89
-
90
-
91
-
92
-
93
-
94
-
95
-
96
-
97
-
98
-
99
-
100
-
101
-
102
-
103
-
104
-
105
-
106
-
107
-
108
-
109
-
110
-
111
-
112
-
113
-
114
-
115
-
116
-
117
-
118
-
119
-
120
-
121
-
122
-
123
-
124
-
125
-
126
-
127
-
128
-
129
 |
 |
18
Paper Handling
5.
To remove the tractor from the push position, gently
squeeze the lock tabs on both sides and then rotate the
tractor up to pull it away from the printer.
6.
Lower the tractor onto the mounting slots at the top of the
printer as shown below, and tilt it back until you feel it lock
into place.