Epson PictureMate Flash - PM 280 Basics - Page 13
Printing Photos by Date, Print Preview, Layout, Print, Select, Select By Date, Proceed
 |
View all Epson PictureMate Flash - PM 280 manuals
Add to My Manuals
Save this manual to your list of manuals |
Page 13 highlights
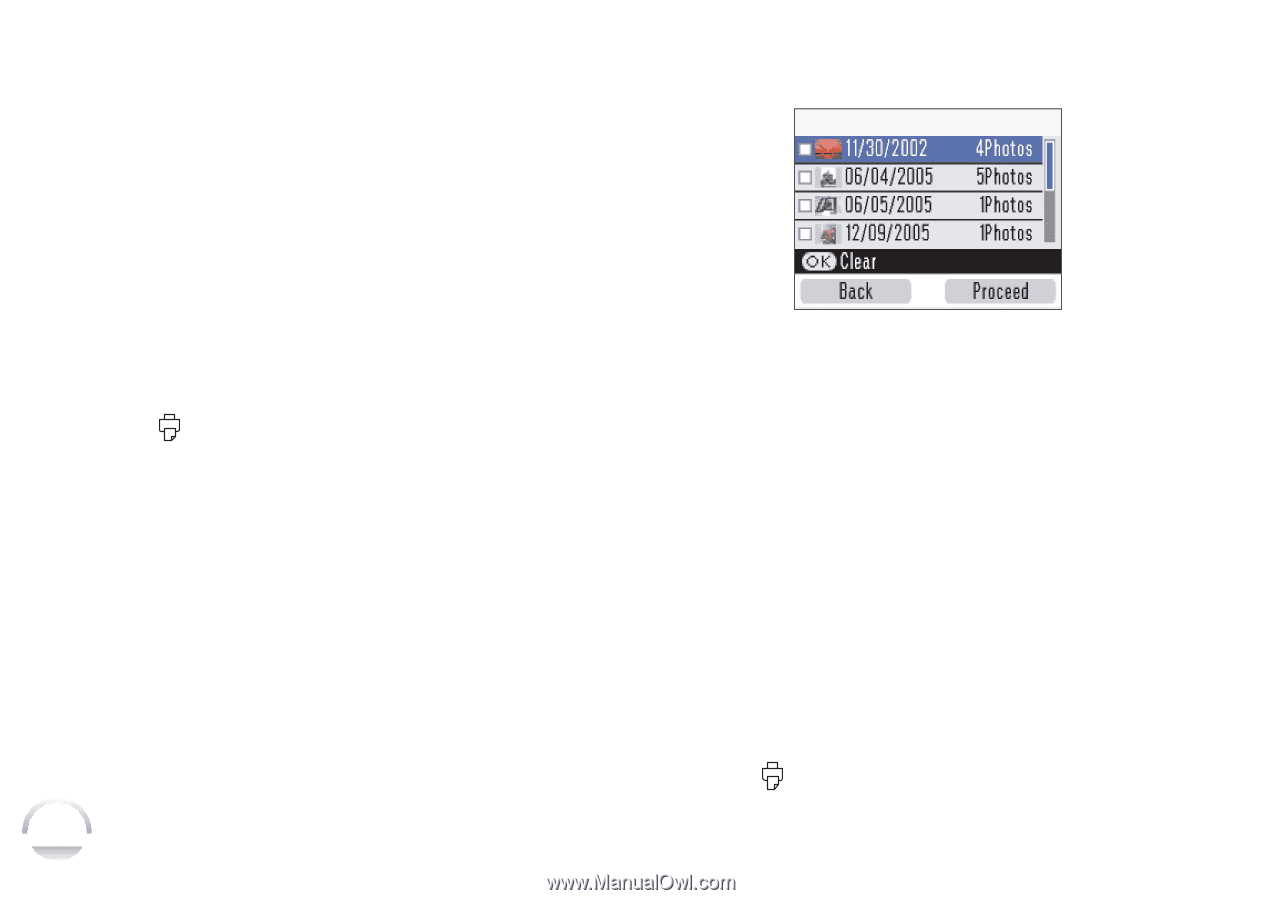
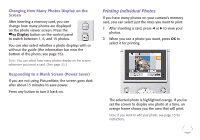
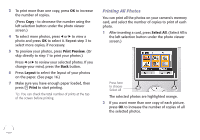
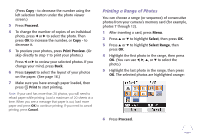
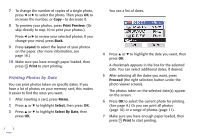
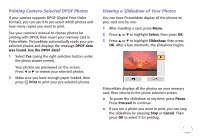
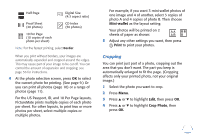
7 To change the number of copies of a single photo, press l or r to select the photo. Then press OK to increase the number, or Copy - to decrease it. 8 To preview your photos, press Print Preview. (Or skip directly to step 10 to print your photos.) Press l or r to review your selected photos. If you change your mind, press Back. 9 Press Layout to select the layout of your photos on the paper. (For more information, see page 16.) 10 Make sure you have enough paper loaded, then press Print to start printing. Printing Photos by Date You can print photos taken on specific dates. If you have a lot of photos on your memory card, this makes it easier to find the ones you want. 1 After inserting a card, press Menu. 2 Press u or d to highlight Select, then press OK. 3 Press u or d to highlight Select By Date, then press OK. 12 You see a list of dates. 4 Press u or d to highlight the date you want, then press OK. A checkmark appears in the box for the selected date. You can select additional dates, if desired. 5 After selecting all the dates you want, press Proceed (the right selection button under the photo viewer screen). The photos taken on the selected date(s) appear on the screen. 6 Press OK to select the current photo for printing. (See page 9.) Or you can print all photos (page 10) or a range of photos (page 11). 7 Make sure you have enough paper loaded, then press Print to start printing.
-
 1
1 -
2
-
3
-
4
-
5
-
6
-
7
-
 8
8 -
 9
9 -
 10
10 -
 11
11 -
 12
12 -
 13
13 -
 14
14 -
 15
15 -
 16
16 -
 17
17 -
 18
18 -
19
-
20
-
21
-
22
-
23
-
24
-
25
-
26
-
27
-
28
-
29
-
30
-
31
-
32
-
33
-
34
-
35
-
36
-
37
-
38
-
39
-
40
-
41
-
42
-
43
-
44
-
45
-
46
-
47
-
48
-
49
-
50
-
51
-
52
-
53
-
54
-
55
-
56
-
57
-
58
-
59
-
60
-
61
-
62
-
63
-
64
-
65
-
66
-
67
-
68
-
69
-
70
-
71
-
72
-
73
-
74
-
75
-
76
-
77
-
78
-
79
-
80
-
81
-
82
-
83
-
84
-
85
-
86
-
87
-
88
-
89
-
90
-
91
 |
 |