Epson PictureMate Flash - PM 280 Basics - Page 18
Cropping, For the US Passport, ID, and 10 Per layouts
 |
View all Epson PictureMate Flash - PM 280 manuals
Add to My Manuals
Save this manual to your list of manuals |
Page 18 highlights
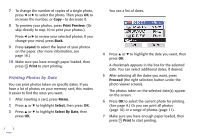
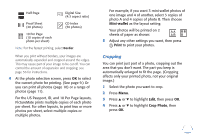
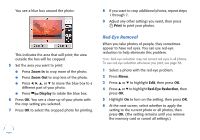
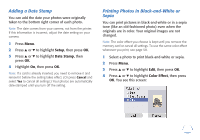
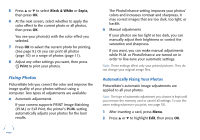
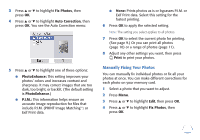
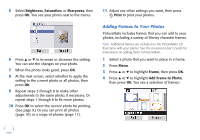
Half Page Digital Size (4:3 aspect ratio) Proof Sheet (20 photos) CD Index (56 photos) 10 Per Page (10 copies of each photo per sheet) Note: For the fastest printing, select Border. When you print without borders, your images are automatically expanded and cropped around the edges. This may cause part of your image to be cut off. You can control the amount of expansion and cropping; see page 56 for instructions. 4 At the photo selection screen, press OK to select the current photo for printing. (See page 9.) Or you can print all photos (page 10) or a range of photos (page 11). For the US Passport, ID, and 10 Per Page layouts, PictureMate prints multiple copies of each photo per sheet. For other layouts, to print two or more photos per sheet, select multiple copies or multiple photos. For example, if you want 3 mini-wallet photos of one image and 4 of another, select 3 copies of photo A and 4 copies of photo B. Then choose Mini-wallet as the layout setting. Your photos will be printed on 2 sheets of paper as shown: 5 Adjust any other settings you want, then press Print to print your photos. Cropping You can print just part of a photo, cropping out the area that you don't want. The part you keep is automatically enlarged to fit the page. (Cropping affects only your printed photo, not your original image.) 1 Select the photo you want to crop. 2 Press Menu. 3 Press u or d to highlight Edit, then press OK. 4 Press u or d to highlight Crop Photo, then press OK. 17
-
 1
1 -
2
-
3
-
4
-
5
-
6
-
7
-
8
-
9
-
10
-
11
-
12
-
 13
13 -
 14
14 -
 15
15 -
 16
16 -
 17
17 -
 18
18 -
 19
19 -
 20
20 -
 21
21 -
 22
22 -
 23
23 -
24
-
25
-
26
-
27
-
28
-
29
-
30
-
31
-
32
-
33
-
34
-
35
-
36
-
37
-
38
-
39
-
40
-
41
-
42
-
43
-
44
-
45
-
46
-
47
-
48
-
49
-
50
-
51
-
52
-
53
-
54
-
55
-
56
-
57
-
58
-
59
-
60
-
61
-
62
-
63
-
64
-
65
-
66
-
67
-
68
-
69
-
70
-
71
-
72
-
73
-
74
-
75
-
76
-
77
-
78
-
79
-
80
-
81
-
82
-
83
-
84
-
85
-
86
-
87
-
88
-
89
-
90
-
91
 |
 |
