Epson PictureMate Flash - PM 280 Basics - Page 32
At the Install Menu, click, in OS X 10.2.
 |
View all Epson PictureMate Flash - PM 280 manuals
Add to My Manuals
Save this manual to your list of manuals |
Page 32 highlights
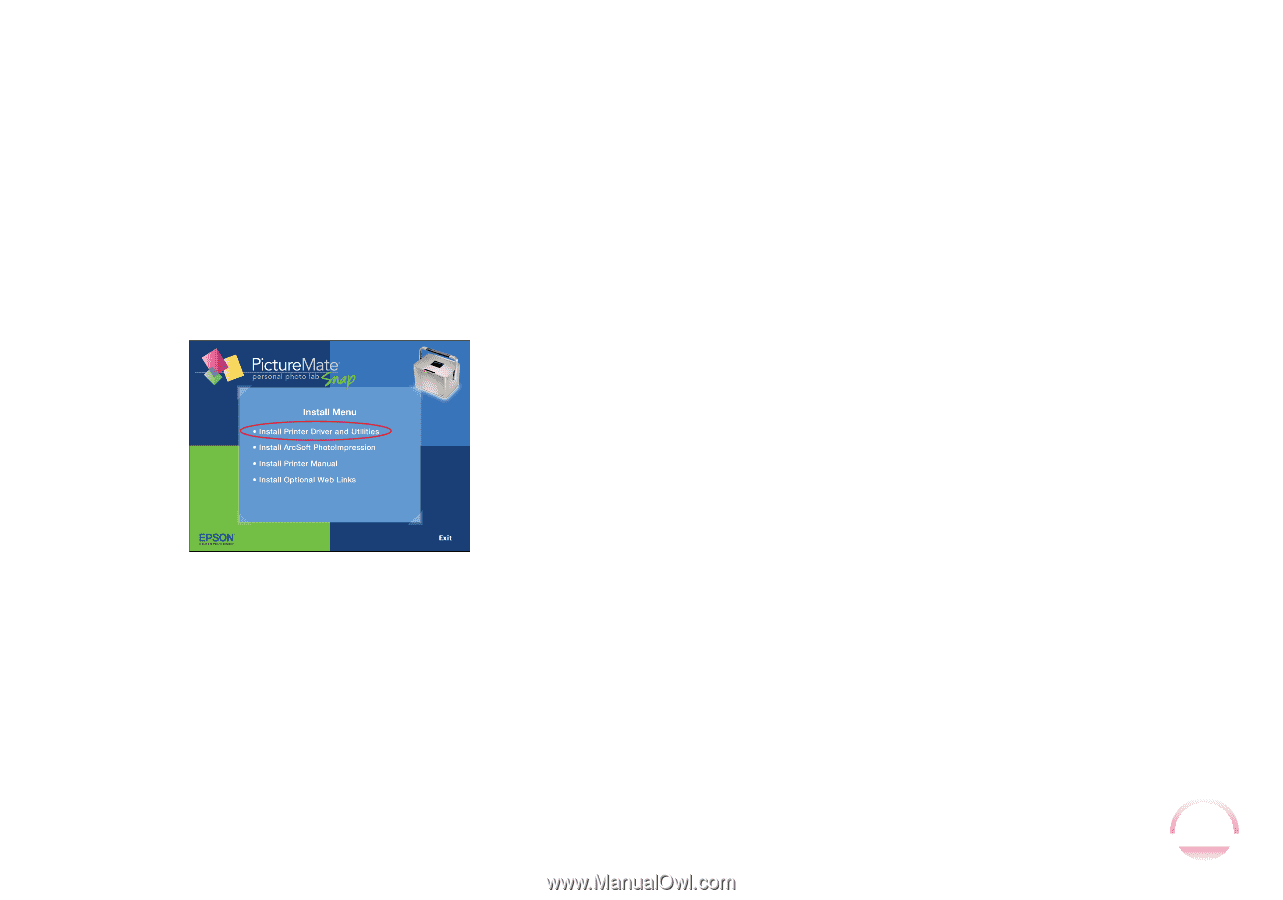
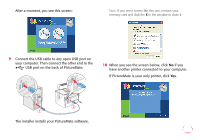
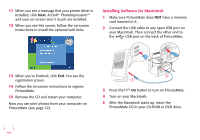
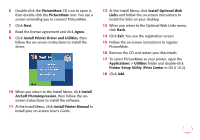
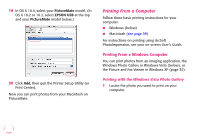
6 Double-click the PictureMate CD icon to open it, then double-click the PictureMate icon. You see a screen reminding you to connect PictureMate. 7 Click Next. 8 Read the license agreement and click Agree. 9 Click Install Printer Driver and Utilities, then follow the on-screen instructions to install the driver. 12 At the Install Menu, click Install Optional Web Links and follow the on-screen instructions to install the links on your desktop. 13 When you return to the Optional Web Links menu, click Back. 14 Click Exit. You see the registration screen. 15 Follow the on-screen instructions to register PictureMate. 16 Remove the CD and restart your Macintosh. 17 To select PictureMate as your printer, open the Applications > Utilities folder and double-click Printer Setup Utility (Print Center in OS X 10.2). 18 Click Add. 10 When you return to the Install Menu, click Install ArcSoft PhotoImpression, then follow the onscreen instructions to install the software. 11 At the Install Menu, click Install Printer Manual to install your on-screen User's Guide. 31
-
 1
1 -
2
-
3
-
4
-
5
-
6
-
7
-
8
-
9
-
10
-
11
-
12
-
13
-
14
-
15
-
16
-
17
-
18
-
19
-
20
-
21
-
22
-
23
-
24
-
25
-
26
-
 27
27 -
 28
28 -
 29
29 -
 30
30 -
 31
31 -
 32
32 -
 33
33 -
 34
34 -
 35
35 -
 36
36 -
 37
37 -
38
-
39
-
40
-
41
-
42
-
43
-
44
-
45
-
46
-
47
-
48
-
49
-
50
-
51
-
52
-
53
-
54
-
55
-
56
-
57
-
58
-
59
-
60
-
61
-
62
-
63
-
64
-
65
-
66
-
67
-
68
-
69
-
70
-
71
-
72
-
73
-
74
-
75
-
76
-
77
-
78
-
79
-
80
-
81
-
82
-
83
-
84
-
85
-
86
-
87
-
88
-
89
-
90
-
91
 |
 |