Epson PictureMate Flash - PM 280 Basics - Page 41
Print, Print Settings, Enhance Fine Details, Sepia, Black & White, fashioned look.
 |
View all Epson PictureMate Flash - PM 280 manuals
Add to My Manuals
Save this manual to your list of manuals |
Page 41 highlights
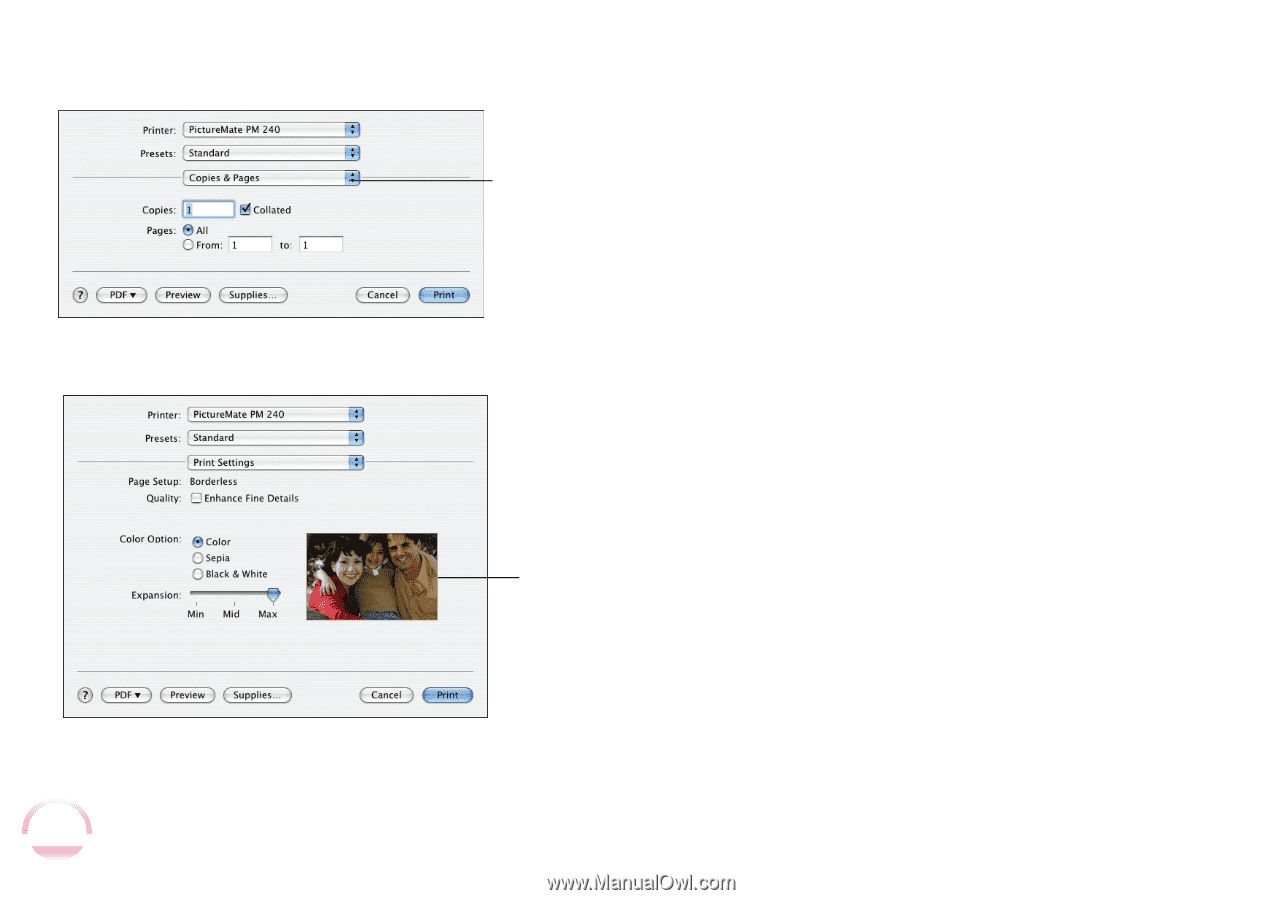
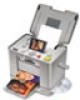
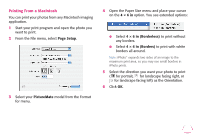
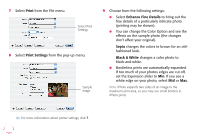
7 Select Print from the File menu. Select Print Settings 8 Select Print Settings from the pop-up menu. Sample image 9 Choose from the following settings: ● Select Enhance Fine Details to bring out the fine details of a particularly intricate photo (printing may be slower). ● You can change the Color Option and see the effects on the sample photo (the changes don't affect your original). Sepia changes the colors to brown for an oldfashioned look. Black & White changes a color photo to black-and-white. ● Borderless prints are automatically expanded. If too much of your photos edges are cut off, set the Expansion slider to Min. If you see a white edge on your photo, select Mid or Max. Note: iPhoto expands two sides of an image to the maximum print area, so you may see small borders in iPhoto prints. Tip: For more information about printer settings, click ?. 40
-
 1
1 -
2
-
3
-
4
-
5
-
6
-
7
-
8
-
9
-
10
-
11
-
12
-
13
-
14
-
15
-
16
-
17
-
18
-
19
-
20
-
21
-
22
-
23
-
24
-
25
-
26
-
27
-
28
-
29
-
30
-
31
-
32
-
33
-
34
-
35
-
 36
36 -
 37
37 -
 38
38 -
 39
39 -
 40
40 -
 41
41 -
 42
42 -
 43
43 -
 44
44 -
 45
45 -
 46
46 -
47
-
48
-
49
-
50
-
51
-
52
-
53
-
54
-
55
-
56
-
57
-
58
-
59
-
60
-
61
-
62
-
63
-
64
-
65
-
66
-
67
-
68
-
69
-
70
-
71
-
72
-
73
-
74
-
75
-
76
-
77
-
78
-
79
-
80
-
81
-
82
-
83
-
84
-
85
-
86
-
87
-
88
-
89
-
90
-
91
 |
 |