Epson WF-M1560 Users Guide - Page 176
Print Head Cleaning, Cleaning the Print Head Using the Product Control Panel, Parent topic
 |
View all Epson WF-M1560 manuals
Add to My Manuals
Save this manual to your list of manuals |
Page 176 highlights
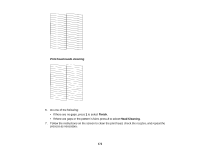
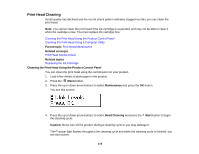
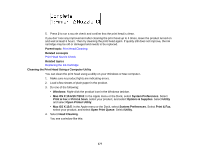
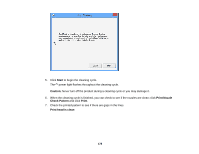
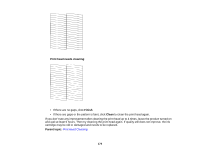
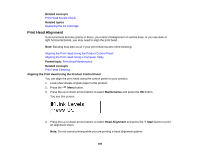
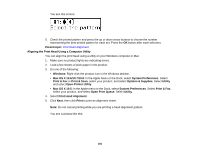
Print Head Cleaning If print quality has declined and the nozzle check pattern indicates clogged nozzles, you can clean the print head. Note: You cannot clean the print head if the ink cartridge is expended, and may not be able to clean it when the cartridge is low. You must replace the cartridge first. Cleaning the Print Head Using the Product Control Panel Cleaning the Print Head Using a Computer Utility Parent topic: Print Head Maintenance Related concepts Print Head Nozzle Check Related topics Replacing the Ink Cartridge Cleaning the Print Head Using the Product Control Panel You can clean the print head using the control panel on your product. 1. Load a few sheets of plain paper in the product. 2. Press the Menu button. 3. Press the up or down arrow buttons to select Maintenance and press the OK button. You see this screen: 4. Press the up or down arrow buttons to select Head Cleaning and press the Start button to begin the cleaning cycle. Caution: Never turn off the product during a cleaning cycle or you may damage it. The power light flashes throughout the cleaning cycle and when the cleaning cycle is finished, you see this screen: 176
-
 1
1 -
2
-
3
-
4
-
5
-
6
-
7
-
8
-
9
-
10
-
11
-
12
-
13
-
14
-
15
-
16
-
17
-
18
-
19
-
20
-
21
-
22
-
23
-
24
-
25
-
26
-
27
-
28
-
29
-
30
-
31
-
32
-
33
-
34
-
35
-
36
-
37
-
38
-
39
-
40
-
41
-
42
-
43
-
44
-
45
-
46
-
47
-
48
-
49
-
50
-
51
-
52
-
53
-
54
-
55
-
56
-
57
-
58
-
59
-
60
-
61
-
62
-
63
-
64
-
65
-
66
-
67
-
68
-
69
-
70
-
71
-
72
-
73
-
74
-
75
-
76
-
77
-
78
-
79
-
80
-
81
-
82
-
83
-
84
-
85
-
86
-
87
-
88
-
89
-
90
-
91
-
92
-
93
-
94
-
95
-
96
-
97
-
98
-
99
-
100
-
101
-
102
-
103
-
104
-
105
-
106
-
107
-
108
-
109
-
110
-
111
-
112
-
113
-
114
-
115
-
116
-
117
-
118
-
119
-
120
-
121
-
122
-
123
-
124
-
125
-
126
-
127
-
128
-
129
-
130
-
131
-
132
-
133
-
134
-
135
-
136
-
137
-
138
-
139
-
140
-
141
-
142
-
143
-
144
-
145
-
146
-
147
-
148
-
149
-
150
-
151
-
152
-
153
-
154
-
155
-
156
-
157
-
158
-
159
-
160
-
161
-
162
-
163
-
164
-
165
-
166
-
167
-
168
-
169
-
170
-
 171
171 -
 172
172 -
 173
173 -
 174
174 -
 175
175 -
 176
176 -
 177
177 -
 178
178 -
 179
179 -
 180
180 -
 181
181 -
182
-
183
-
184
-
185
-
186
-
187
-
188
-
189
-
190
-
191
-
192
-
193
-
194
-
195
-
196
-
197
-
198
-
199
-
200
-
201
-
202
-
203
-
204
-
205
-
206
-
207
-
208
-
209
-
210
-
211
-
212
-
213
-
214
-
215
-
216
-
217
-
218
-
219
-
220
-
221
-
222
-
223
-
224
-
225
-
226
-
227
-
228
-
229
-
230
-
231
-
232
-
233
-
234
-
235
-
236
-
237
-
238
-
239
-
240
-
241
-
242
-
243
-
244
-
245
-
246
-
247
 |
 |