HP CM3530 HP Color LaserJet CM3530 MFP Series - User Guide - Page 140
Set document effects, Set document finishing options, Effects, Finishing
 |
UPC - 884420196501
View all HP CM3530 manuals
Add to My Manuals
Save this manual to your list of manuals |
Page 140 highlights
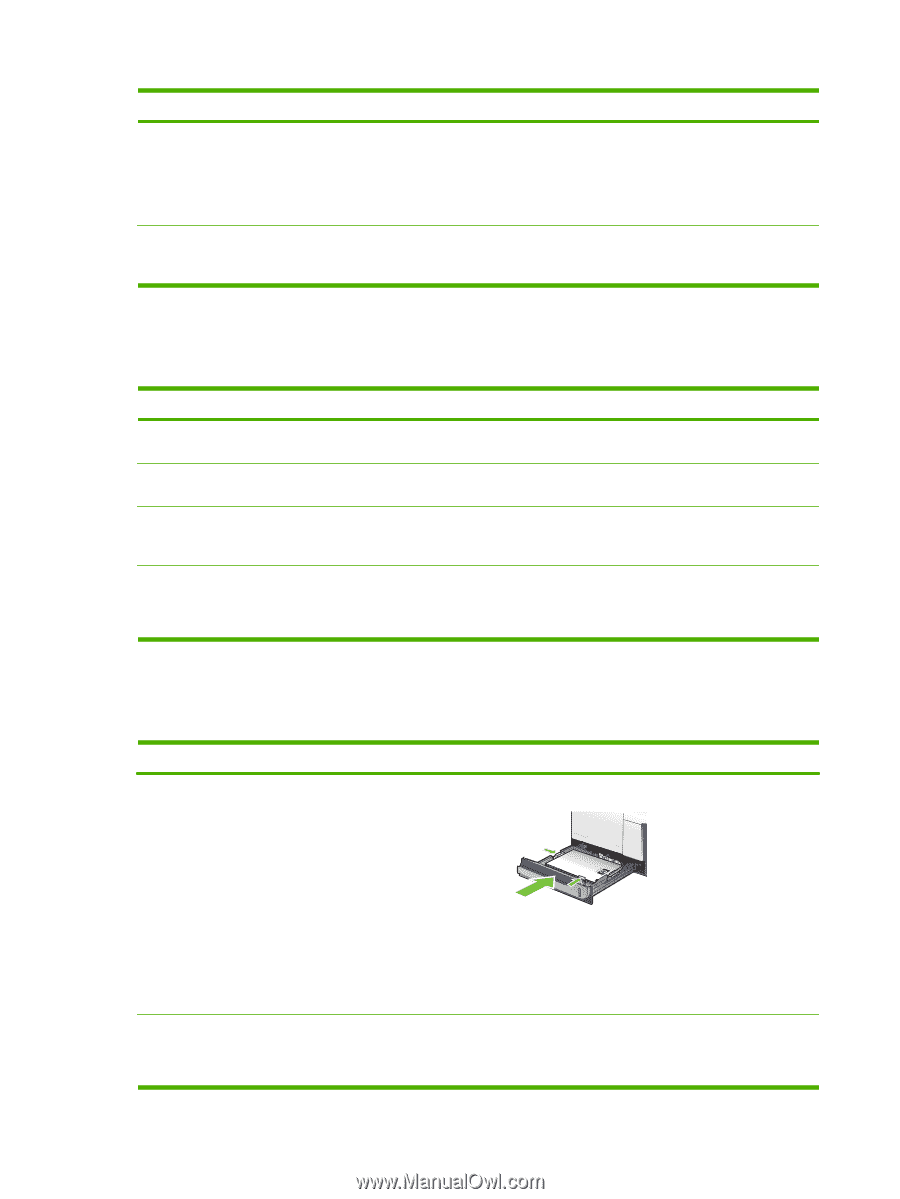
How do I Print covers on different paper Print the first or last page on different paper Adjust the resolution of printed images Steps to perform a) In the Special pages area, click Covers or Print pages on different paper, and then click Settings. b) Select an option to print a blank or preprinted front cover, back cover, or both. Or, select an option to print the first or last page on different paper. c) Select options from the Paper source and Paper type drop-down lists, and then click Add. d) Click OK. In the Print Quality area, select an option from the first dropdown list. See the printer-driver online Help for information about each of the available options. Set document effects To perform the following tasks, open the printer driver and click the Effects tab. How do I Steps to perform Scale a page to fit on a selected paper size Click Print document on, and then select a size from the dropdown list. Scale a page to be a percent of the actual size Click % of actual size, and then type the percent or adjust the slider bar. Print a watermark a) Select a watermark from the Watermarks drop-down list. b) To print the watermark on the first page only, click First page only. Otherwise, the watermark is printed on each page. Add or edit watermarks NOTE: The printer driver must be stored on your computer for this to work. a) In the Watermarks area, click Edit. The Watermark Details dialog box opens. b) Specify the settings for the watermark, and then click OK. Set document finishing options To perform the following tasks, open the printer driver and click the Finishing tab. How do I Automatically print on both sides (duplex) Steps to perform 1. Load paper face-up in Tray 2. Print a booklet 126 Chapter 8 Print tasks 2. In the printer driver, select the Print on both sides check box. If you will bind the document along the top edge, select the Flip pages up check box. 3. Click the OK button to print the job. a) Select the Print on both sides check box. b) In the Booklet layout drop-down list, click the Left binding or Right binding option. The Pages per sheet option automatically changes to 2 pages per sheet. ENWW
-
 1
1 -
2
-
3
-
4
-
5
-
6
-
7
-
8
-
9
-
10
-
11
-
12
-
13
-
14
-
15
-
16
-
17
-
18
-
19
-
20
-
21
-
22
-
23
-
24
-
25
-
26
-
27
-
28
-
29
-
30
-
31
-
32
-
33
-
34
-
35
-
36
-
37
-
38
-
39
-
40
-
41
-
42
-
43
-
44
-
45
-
46
-
47
-
48
-
49
-
50
-
51
-
52
-
53
-
54
-
55
-
56
-
57
-
58
-
59
-
60
-
61
-
62
-
63
-
64
-
65
-
66
-
67
-
68
-
69
-
70
-
71
-
72
-
73
-
74
-
75
-
76
-
77
-
78
-
79
-
80
-
81
-
82
-
83
-
84
-
85
-
86
-
87
-
88
-
89
-
90
-
91
-
92
-
93
-
94
-
95
-
96
-
97
-
98
-
99
-
100
-
101
-
102
-
103
-
104
-
105
-
106
-
107
-
108
-
109
-
110
-
111
-
112
-
113
-
114
-
115
-
116
-
117
-
118
-
119
-
120
-
121
-
122
-
123
-
124
-
125
-
126
-
127
-
128
-
129
-
130
-
131
-
132
-
133
-
134
-
 135
135 -
 136
136 -
 137
137 -
 138
138 -
 139
139 -
 140
140 -
 141
141 -
 142
142 -
 143
143 -
 144
144 -
 145
145 -
146
-
147
-
148
-
149
-
150
-
151
-
152
-
153
-
154
-
155
-
156
-
157
-
158
-
159
-
160
-
161
-
162
-
163
-
164
-
165
-
166
-
167
-
168
-
169
-
170
-
171
-
172
-
173
-
174
-
175
-
176
-
177
-
178
-
179
-
180
-
181
-
182
-
183
-
184
-
185
-
186
-
187
-
188
-
189
-
190
-
191
-
192
-
193
-
194
-
195
-
196
-
197
-
198
-
199
-
200
-
201
-
202
-
203
-
204
-
205
-
206
-
207
-
208
-
209
-
210
-
211
-
212
-
213
-
214
-
215
-
216
-
217
-
218
-
219
-
220
-
221
-
222
-
223
-
224
-
225
-
226
-
227
-
228
-
229
-
230
-
231
-
232
-
233
-
234
-
235
-
236
-
237
-
238
-
239
-
240
-
241
-
242
-
243
-
244
-
245
-
246
-
247
-
248
-
249
-
250
-
251
-
252
-
253
-
254
-
255
-
256
-
257
-
258
-
259
-
260
-
261
-
262
-
263
-
264
-
265
-
266
-
267
-
268
-
269
-
270
-
271
-
272
-
273
-
274
-
275
-
276
-
277
-
278
-
279
-
280
-
281
-
282
-
283
-
284
-
285
-
286
-
287
-
288
-
289
-
290
-
291
-
292
-
293
-
294
-
295
-
296
-
297
-
298
-
299
-
300
-
301
-
302
 |
 |