HP CM3530 HP Color LaserJet CM3530 MFP Series - User Guide - Page 189
Gain access to Secure Disk Erase, Additional Information, HP Encrypted High Performance Hard Disks - formatter board
 |
UPC - 884420196501
View all HP CM3530 manuals
Add to My Manuals
Save this manual to your list of manuals |
Page 189 highlights
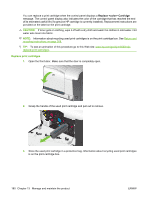
Gain access to Secure Disk Erase Use HP Web Jetadmin to gain access to and set the Secure Disk Erase feature. Additional Information For additional information about the HP Secure Disk Erase feature, see the HP support flyer or go to www.hp.com/go/webjetadmin/. HP Encrypted High Performance Hard Disks This product supports optional encrypted hard disks that you can install on the formatter board, in the EIO accessory slot, or in both locations. These hard disks provide hardware-based encryption so you can securely store sensitive print, copy, and scan data without impacting product performance. These hard disks use the latest Advanced Encryption Standard (AES) and have versatile time-saving features and robust functionality. For information about ordering these accessories see Part numbers on page 245. DSS authentication Optional Digital Sending Software (DSS) for the product is available for purchase separately. The software provides an advanced sending program that contains an authentication process. This process requires users to type a user identification and a password before they can use any of the DSS features that require authentication. Lock the control-panel menus To prevent someone from changing the product configuration, you can lock the control-panel menus. This prevents unauthorized users from changing the configuration settings such as the SMTP server. The following procedure describes how to restrict access to the control-panel menus by using the HP Web Jetadmin software. (See Use HP Web Jetadmin software on page 173.) 1. Open the HP Web Jetadmin program. 2. Open the DEVICE MANAGEMENT folder in the drop-down list in the Navigation panel. Navigate to the DEVICE LISTS folder. 3. Select the product. 4. In the Device Tools drop-down list, select Configure. 5. Select Security from the Configuration Categories list. 6. Type a Device Password. 7. In the Control Panel Access section, select Maximum Lock. This prevents unauthorized users from gaining access to configuration settings. ENWW Security features 175
-
 1
1 -
2
-
3
-
4
-
5
-
6
-
7
-
8
-
9
-
10
-
11
-
12
-
13
-
14
-
15
-
16
-
17
-
18
-
19
-
20
-
21
-
22
-
23
-
24
-
25
-
26
-
27
-
28
-
29
-
30
-
31
-
32
-
33
-
34
-
35
-
36
-
37
-
38
-
39
-
40
-
41
-
42
-
43
-
44
-
45
-
46
-
47
-
48
-
49
-
50
-
51
-
52
-
53
-
54
-
55
-
56
-
57
-
58
-
59
-
60
-
61
-
62
-
63
-
64
-
65
-
66
-
67
-
68
-
69
-
70
-
71
-
72
-
73
-
74
-
75
-
76
-
77
-
78
-
79
-
80
-
81
-
82
-
83
-
84
-
85
-
86
-
87
-
88
-
89
-
90
-
91
-
92
-
93
-
94
-
95
-
96
-
97
-
98
-
99
-
100
-
101
-
102
-
103
-
104
-
105
-
106
-
107
-
108
-
109
-
110
-
111
-
112
-
113
-
114
-
115
-
116
-
117
-
118
-
119
-
120
-
121
-
122
-
123
-
124
-
125
-
126
-
127
-
128
-
129
-
130
-
131
-
132
-
133
-
134
-
135
-
136
-
137
-
138
-
139
-
140
-
141
-
142
-
143
-
144
-
145
-
146
-
147
-
148
-
149
-
150
-
151
-
152
-
153
-
154
-
155
-
156
-
157
-
158
-
159
-
160
-
161
-
162
-
163
-
164
-
165
-
166
-
167
-
168
-
169
-
170
-
171
-
172
-
173
-
174
-
175
-
176
-
177
-
178
-
179
-
180
-
181
-
182
-
183
-
 184
184 -
 185
185 -
 186
186 -
 187
187 -
 188
188 -
 189
189 -
 190
190 -
 191
191 -
 192
192 -
 193
193 -
 194
194 -
195
-
196
-
197
-
198
-
199
-
200
-
201
-
202
-
203
-
204
-
205
-
206
-
207
-
208
-
209
-
210
-
211
-
212
-
213
-
214
-
215
-
216
-
217
-
218
-
219
-
220
-
221
-
222
-
223
-
224
-
225
-
226
-
227
-
228
-
229
-
230
-
231
-
232
-
233
-
234
-
235
-
236
-
237
-
238
-
239
-
240
-
241
-
242
-
243
-
244
-
245
-
246
-
247
-
248
-
249
-
250
-
251
-
252
-
253
-
254
-
255
-
256
-
257
-
258
-
259
-
260
-
261
-
262
-
263
-
264
-
265
-
266
-
267
-
268
-
269
-
270
-
271
-
272
-
273
-
274
-
275
-
276
-
277
-
278
-
279
-
280
-
281
-
282
-
283
-
284
-
285
-
286
-
287
-
288
-
289
-
290
-
291
-
292
-
293
-
294
-
295
-
296
-
297
-
298
-
299
-
300
-
301
-
302
 |
 |