HP Color LaserJet Pro M252 User Guide - Page 72
Update the firmware, Method one: Update the firmware using the control panel
 |
View all HP Color LaserJet Pro M252 manuals
Add to My Manuals
Save this manual to your list of manuals |
Page 72 highlights
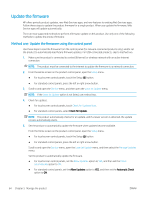
Update the firmware HP offers periodic product updates, new Web Services apps, and new features to existing Web Services apps. Follow these steps to update the product firmware for a single product. When you update the firmware, Web Service apps will update automatically. There are two supported methods to perform a firmware update on this product. Use only one of the following methods to update the product firmware. Method one: Update the firmware using the control panel Use these steps to load the firmware from the control panel (for network-connected products only), and/or set the product to automatically load future firmware updates. For USB-connected products, skip to method two. 1. Make sure the product is connected to a wired (Ethernet) or wireless network with an active Internet connection. NOTE: The product must be connected to the internet to update the firmware via a network connection. 2. From the Home screen on the product control panel, open the Setup menu. ● For touchscreen control panels, touch the Setup button. ● For standard control panels, press the left or right arrow button. 3. Scroll to and open the Service menu, and then open the LaserJet Update menu. NOTE: If the LaserJet Update option is not listed, use method two. 4. Check for updates. ● For touchscreen control panels, touch Check for Updates Now. ● For standard control panels, select Check for Update. NOTE: The product automatically checks for an update, and if a newer version is detected, the update process automatically starts. 5. Set the product to automatically update the firmware when updates become available. From the Home screen on the product control panel, open the Setup menu. ● For touchscreen control panels, touch the Setup button. ● For standard control panels, press the left or right arrow button. Scroll to and open the Service menu, open the LaserJet Update menu, and then select the Manage Updates menu. Set the product to automatically update the firmware. ● For touchscreen control panels, set the Allow Updates option to YES, and then set the Check automatically option to ON. ● For standard control panels, set the Allow Updates option to YES, and then set the Automatic Check option to ON. 64 Chapter 5 Manage the product ENWW
-
 1
1 -
2
-
3
-
4
-
5
-
6
-
7
-
8
-
9
-
10
-
11
-
12
-
13
-
14
-
15
-
16
-
17
-
18
-
19
-
20
-
21
-
22
-
23
-
24
-
25
-
26
-
27
-
28
-
29
-
30
-
31
-
32
-
33
-
34
-
35
-
36
-
37
-
38
-
39
-
40
-
41
-
42
-
43
-
44
-
45
-
46
-
47
-
48
-
49
-
50
-
51
-
52
-
53
-
54
-
55
-
56
-
57
-
58
-
59
-
60
-
61
-
62
-
63
-
64
-
65
-
66
-
 67
67 -
 68
68 -
 69
69 -
 70
70 -
 71
71 -
 72
72 -
 73
73 -
 74
74 -
 75
75 -
 76
76 -
 77
77 -
78
-
79
-
80
-
81
-
82
-
83
-
84
-
85
-
86
-
87
-
88
-
89
-
90
-
91
-
92
-
93
-
94
-
95
-
96
-
97
-
98
-
99
-
100
-
101
-
102
-
103
-
104
-
105
-
106
-
107
-
108
-
109
-
110
-
111
-
112
 |
 |