HP Color LaserJet Pro M252 User Guide - Page 83
Paper jam locations, Setup, Reports, Configuration Report
 |
View all HP Color LaserJet Pro M252 manuals
Add to My Manuals
Save this manual to your list of manuals |
Page 83 highlights
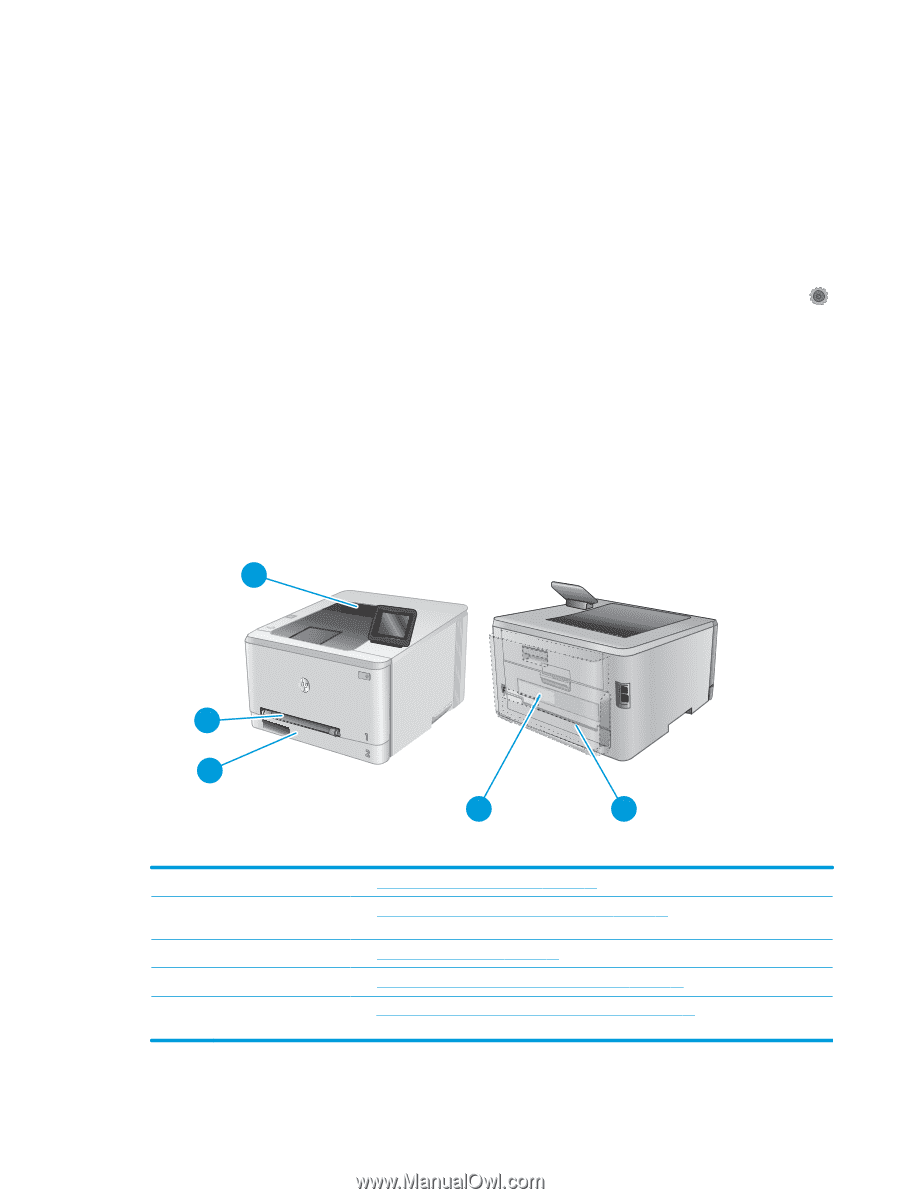
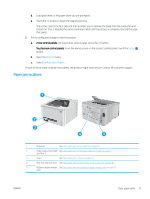
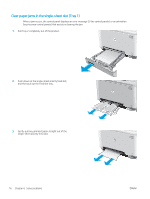
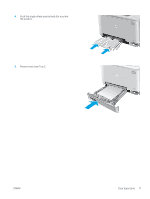
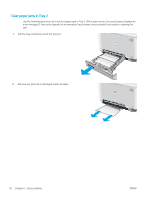
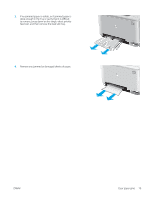
d. Load plain letter or A4 paper when you are prompted. e. Touch the OK button to begin the cleaning process. The product prints the first side and then prompts you to remove the page from the output bin and reload it in Tray 1, keeping the same orientation. Wait until the process is complete. Discard the page that prints. 5. Print a configuration page to test the product. a. 2-line control panels: On the product control panel, press the OK button. Touchscreen control panels: From the Home screen on the product control panel, touch the Setup button. b. Open the Reports menu. c. Select Configuration Report. If none of these steps resolves the problem, the product might need service. Contact HP customer support. Paper jam locations 1 2 3 4 5 1 Output bin See Clear paper jams in the output bin on page 83. 2 Single-sheet priority feed See Clear paper jams in the single-sheet slot (Tray 1) on page 76. slot (Tray 1) 3 Tray 2 See Clear paper jams in Tray 2 on page 78. 4 Rear door and fuser area See Clear paper jams in the rear door and the fuser area on page 81. 5 Duplexer (duplex models See Clear paper jams in the duplexer (duplex models only) on page 84. only) ENWW Clear paper jams 75
-
 1
1 -
2
-
3
-
4
-
5
-
6
-
7
-
8
-
9
-
10
-
11
-
12
-
13
-
14
-
15
-
16
-
17
-
18
-
19
-
20
-
21
-
22
-
23
-
24
-
25
-
26
-
27
-
28
-
29
-
30
-
31
-
32
-
33
-
34
-
35
-
36
-
37
-
38
-
39
-
40
-
41
-
42
-
43
-
44
-
45
-
46
-
47
-
48
-
49
-
50
-
51
-
52
-
53
-
54
-
55
-
56
-
57
-
58
-
59
-
60
-
61
-
62
-
63
-
64
-
65
-
66
-
67
-
68
-
69
-
70
-
71
-
72
-
73
-
74
-
75
-
76
-
77
-
 78
78 -
 79
79 -
 80
80 -
 81
81 -
 82
82 -
 83
83 -
 84
84 -
 85
85 -
 86
86 -
 87
87 -
 88
88 -
89
-
90
-
91
-
92
-
93
-
94
-
95
-
96
-
97
-
98
-
99
-
100
-
101
-
102
-
103
-
104
-
105
-
106
-
107
-
108
-
109
-
110
-
111
-
112
 |
 |